Revisions
April 25, 2026: Updated Nvidia global settings to use new option.
March 31, 2026: Minor grammatical corrections.
August 26, 2025: Updated the Nvidia App instructions for setting a global DLSS override.
So you just built a new computer and have a fresh install of Windows 11. Follow these steps to get everything set up optimally. These are in no particular order and you don’t have to follow them step-by-step.
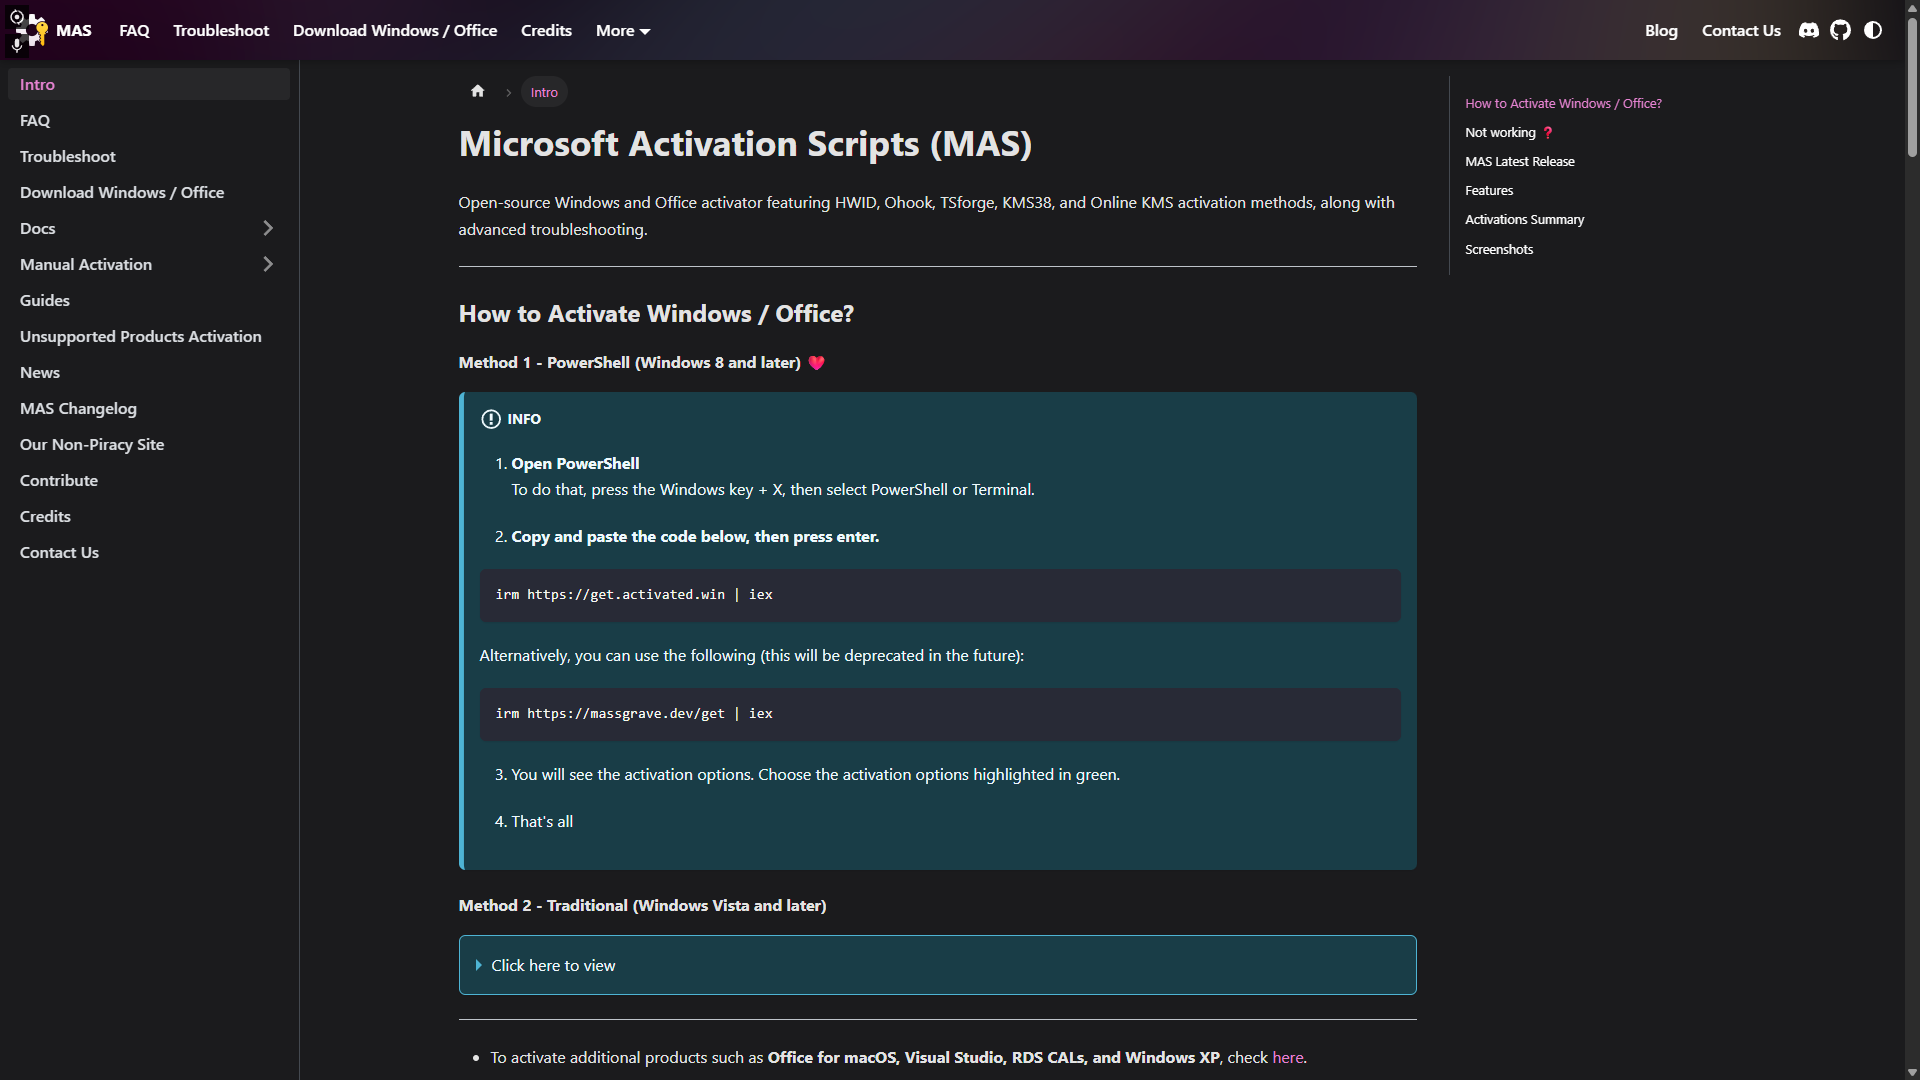
Windows activation.
Visit Massgrave and follow the instructions in Method #1 to get your copy of Windows activated. When you run the script in PowerShell, there will be an option to also change your version of Windows to the Pro edition, which is recommended if you’re not already on Pro.
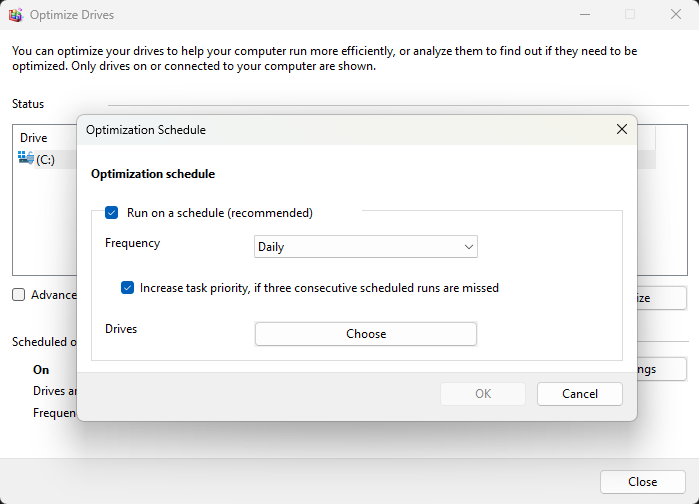
Drive optimization.
Search for “Defragment and Optimize Drives” in your Start menu and click on the first result. In the scheduled optimization settings, change the frequency to Daily.
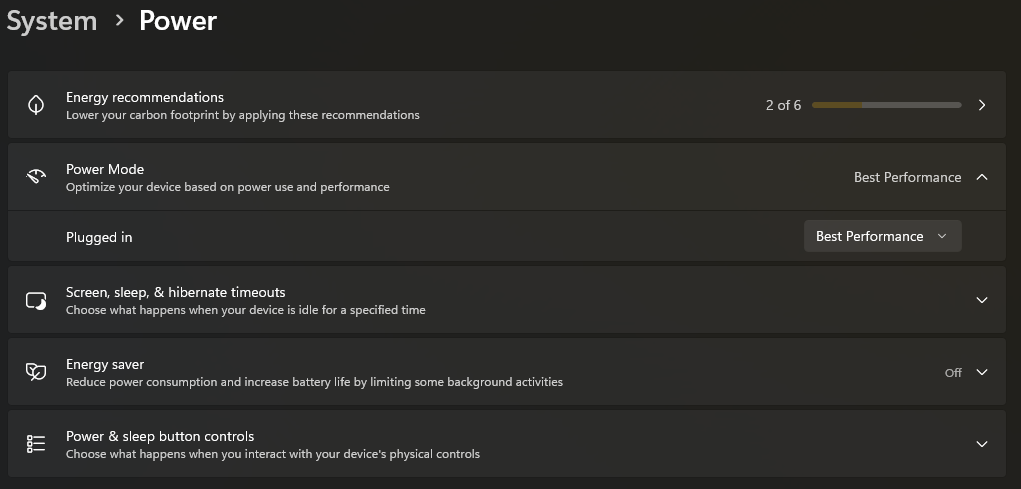
Windows power settings.
Search for “Power, sleep, and battery settings” in the Start menu and click the first result. Make sure your power mode is set to Best Performance. If you’re on a laptop, it may show different power options for plugged in and battery. I would typically suggest Best Performance when plugged in and Best Battery Efficiency on battery mode.
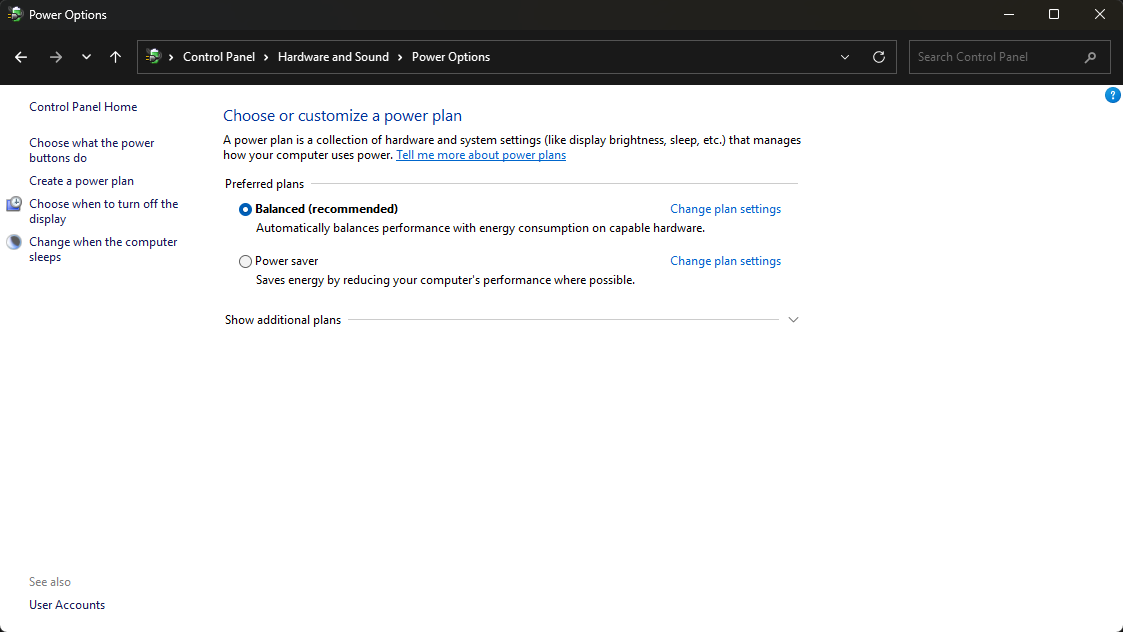
Keep in mind that this is NOT the same as power plans. It is recommended that you do NOT touch the power plans, especially on newer systems. One of the most important reasons not to touch this setting is because modern CPUs can have different types of cores (like X3D processors from AMD). Changing this setting would prevent slower cores from going to sleep or powering into a lower state during gaming, potentially pegging all cores to a static frequency and not assigning the game to the cores with V-Cache. Leave the setting on Balanced.
Display refresh rate.
Search for “Display settings” in the Start menu and click on the first result. Scroll to the bottom of the new window and click on “Advanced display.” Make sure all your monitors are set to the highest refresh rate available. If there are any refresh rates listed with an asterisk, they should be avoided. Those refresh rates are technically overclocks and do not usually support the monitor’s native resolution.
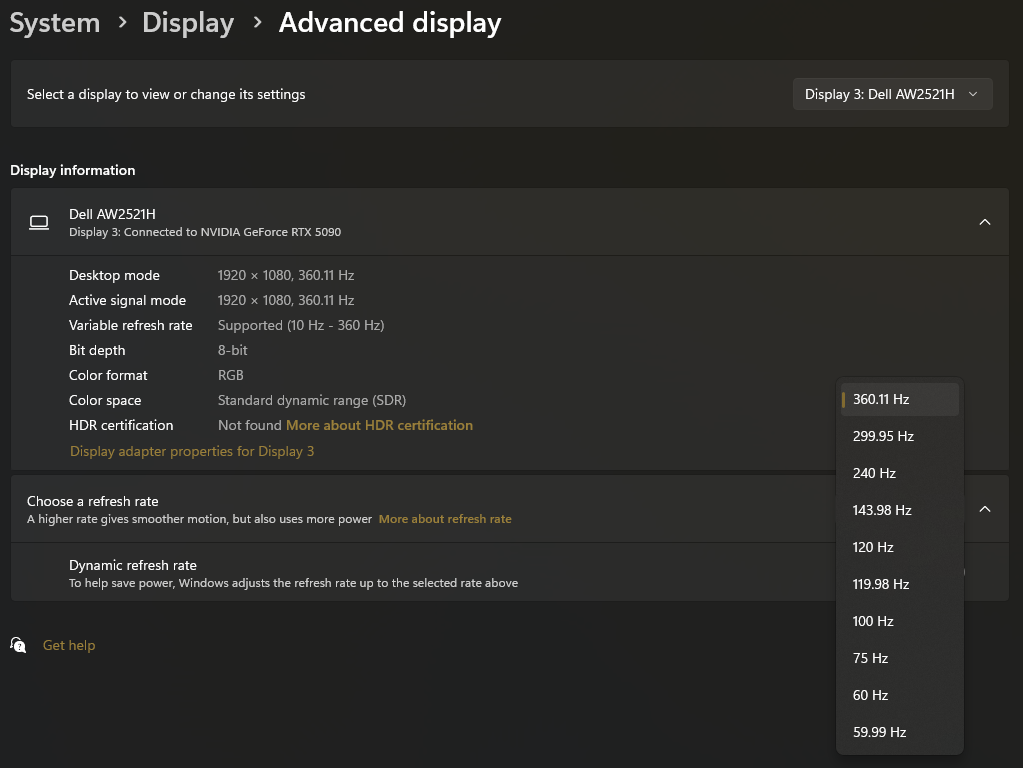
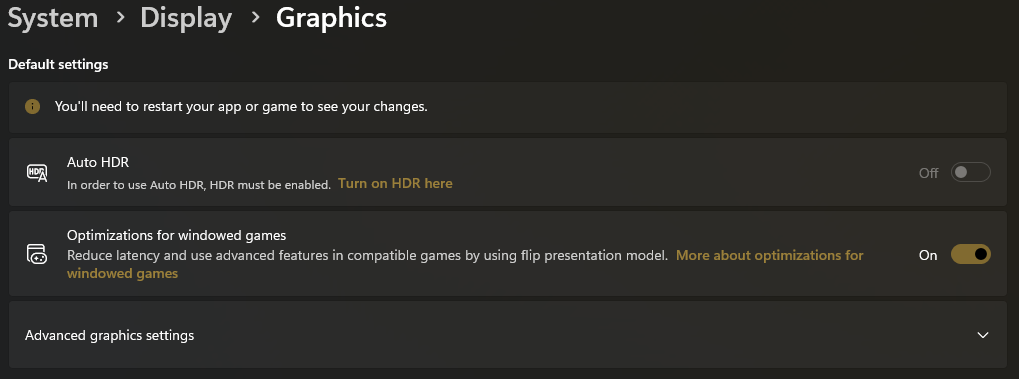
You can go back to the previous page, scroll all the way down, and click on the “Graphics” setting. Make sure “Optimizations for windowed games” is enabled.
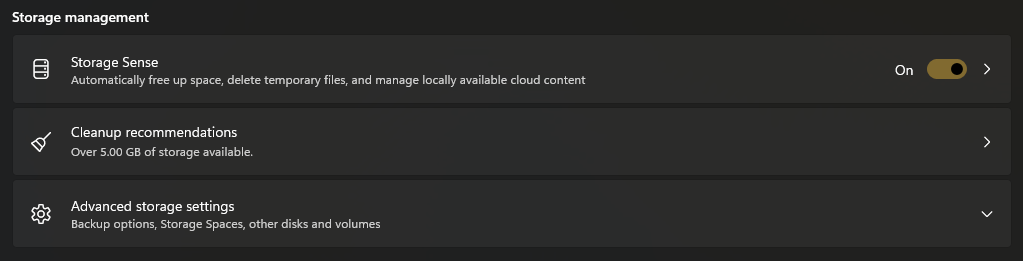
Windows storage space optimization.
Search for “Storage settings” in the Start menu and click on the first result. Toggle on the Storage Sense option.
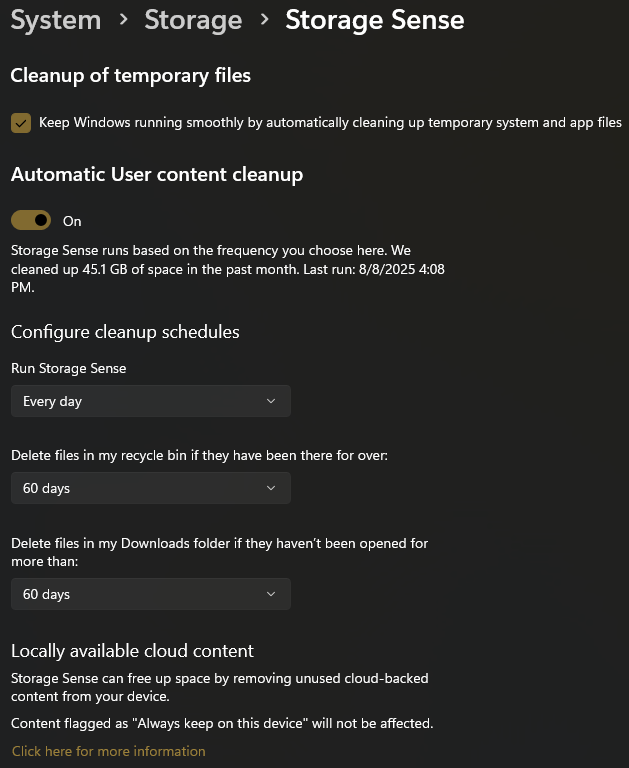
Click into Storage Sense. Enable the cleanup of temporary files and automatic user content cleanup. Set Storage Sense to run every day. Set the Recycle Bin and Downloads folder cleanup to sixty days. If you have cloud services enabled, you will see an additional setting at the bottom where you can choose how many days of inactivity need to pass before files are offloaded to be stored online only.
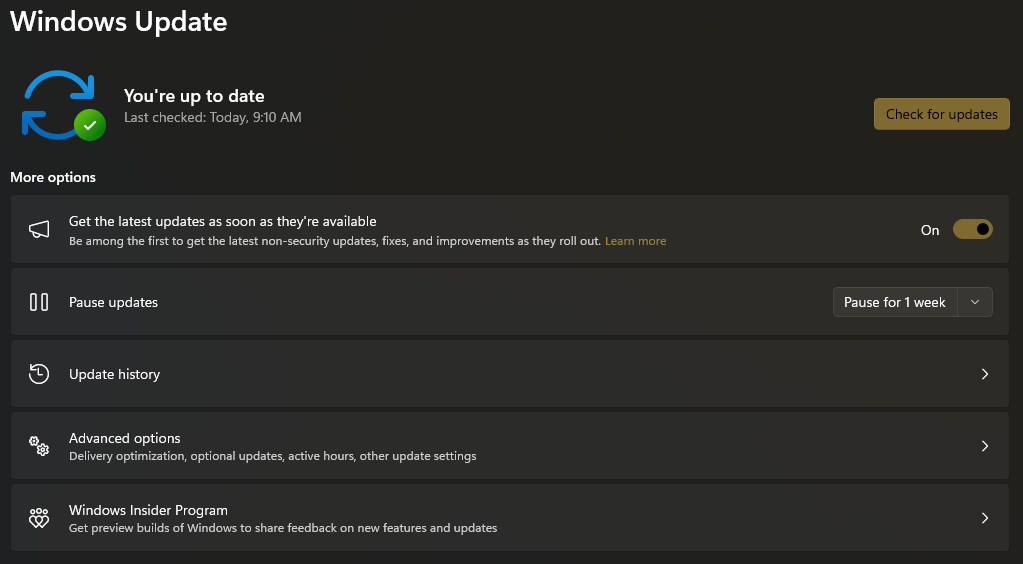
Windows updates.
Search for “Windows update settings” in the Start menu and click on the first result. Toggle on the option to get the latest updates as soon as they are available.
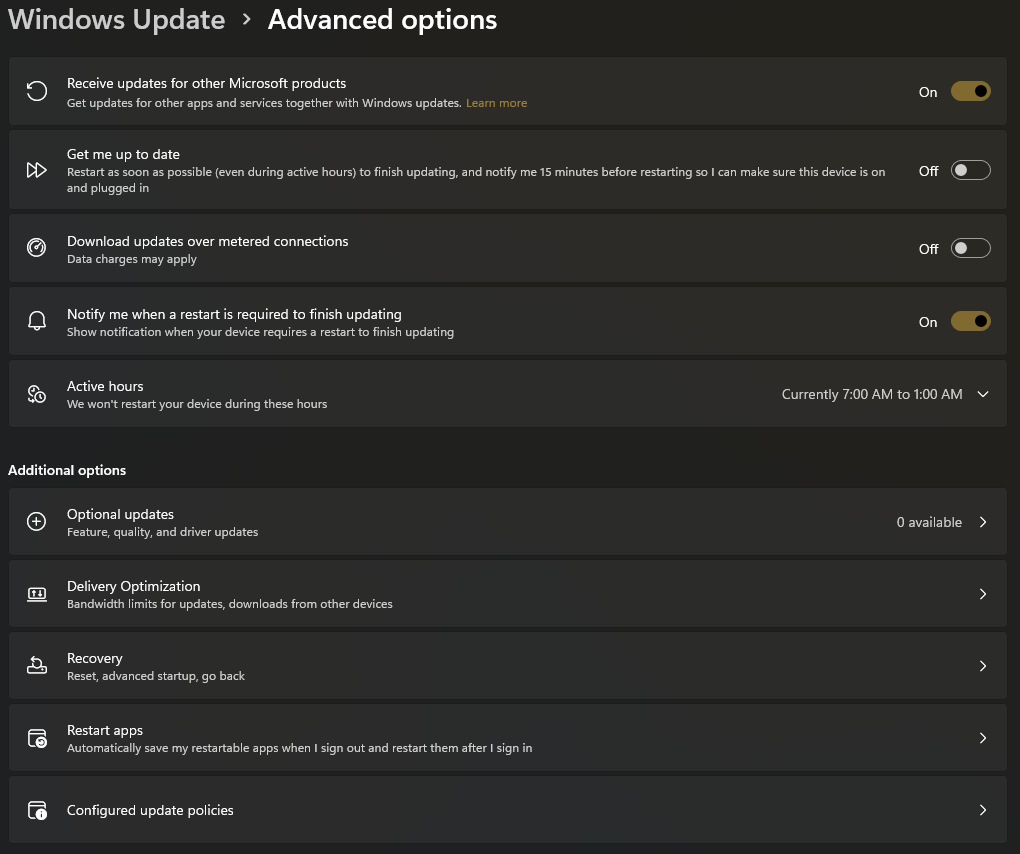
Click into the “Advanced options” menu. Toggle on the options to receive updates for other Microsoft products and to notify you when a restart is required to finish updating. It’s also a good idea to check what’s available in the “Optional updates” section near the bottom and install them.
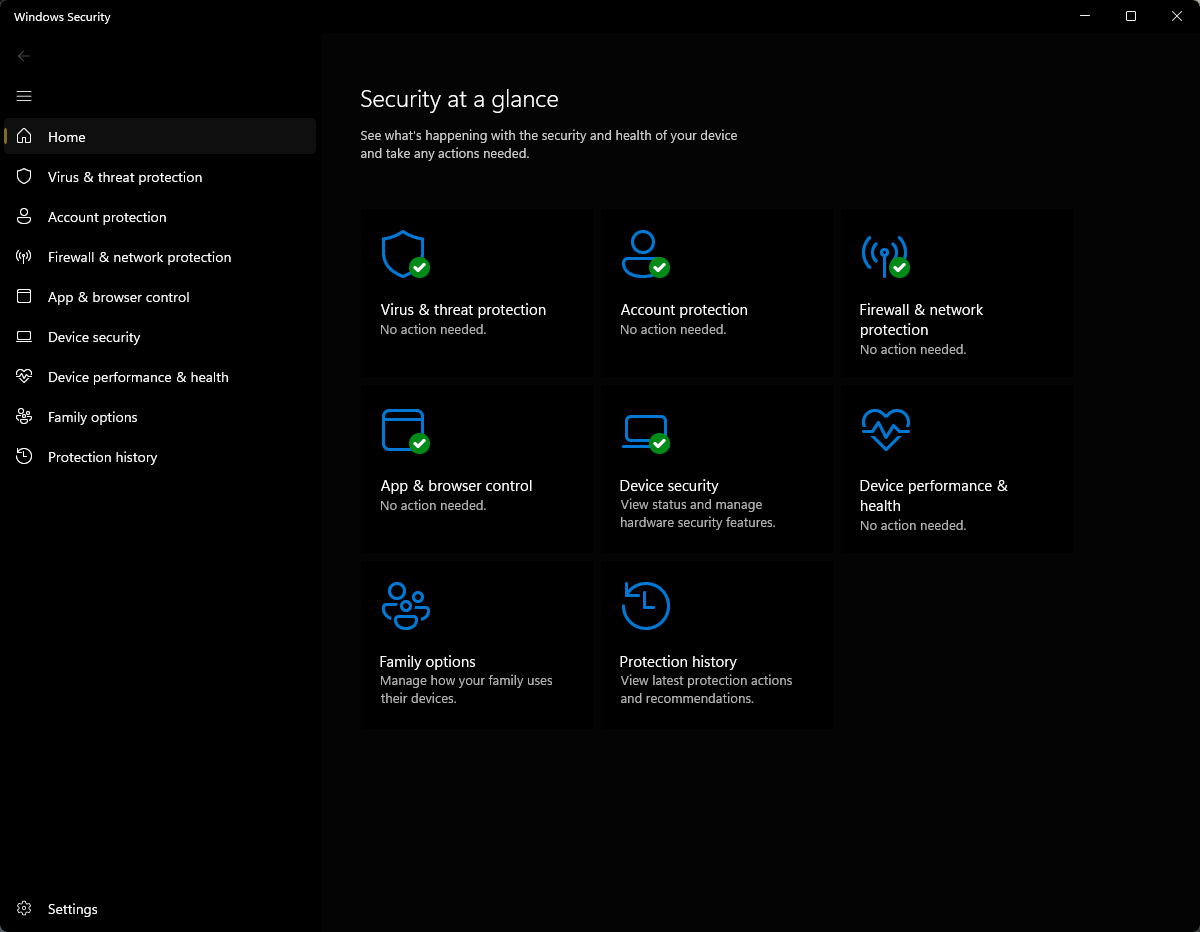
Windows security.
Search for “Windows Security” in the Start menu and click on the first result. Go through each option and make sure all the categories are enabled, except for Smart App Control in the “App & browser control” section.
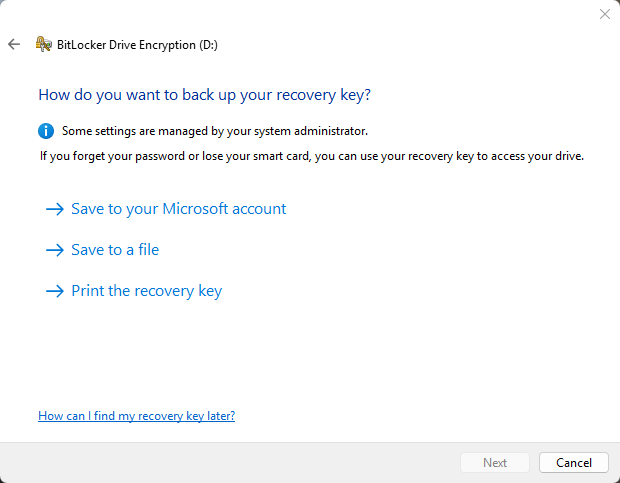
Device encryption.
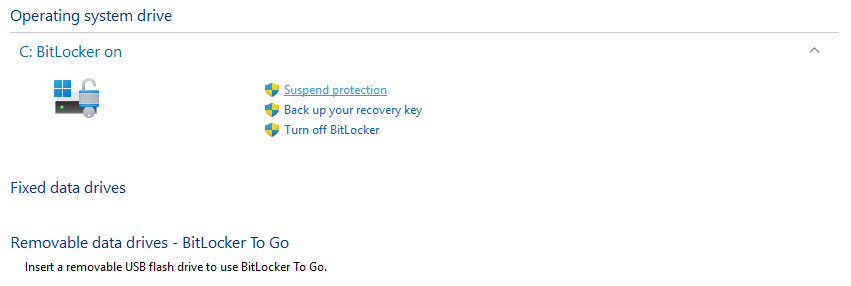
Search for “Manage BitLocker” in the Start menu and click on the first result. You can start the drive encryption process if your device is not already encrypted by default. One very important step during the setup process is to make sure you select “Save to your Microsoft account.” Too many people save their key to a file or print the recovery key and end up losing it. Only select those options at your own risk if you are an advanced user.
Keep in mind that you will most likely need to enter the key whenever you make major changes to your hardware, like flashing your motherboard BIOS or upgrading to a different graphics card. It is recommended that you return to the Manage BitLocker options and click “Suspend protection” right before making such changes so it doesn’t ask for your recovery key on the next boot.
Chipset drivers.
If desired, you can grab the latest chipset drivers for your motherboard directly from Intel or AMD, depending on what processor you’re on. I would not recommend downloading them from the motherboard support page, as those aren’t always up to date. Most of the time, this step can be skipped since Windows Updates will handle it.
Graphics drivers.
If you have a discrete graphics card, you can download the corresponding software for your system (Nvidia, AMD, or Intel), which will also give you options to update drivers once installed.
Graphics performance tuning.
In the NVIDIA App, click on Graphics in the sidebar and go to the Global Settings tab. Set the DLSS Override – Model Presets to Recommended, and set Low Latency Mode to Ultra.

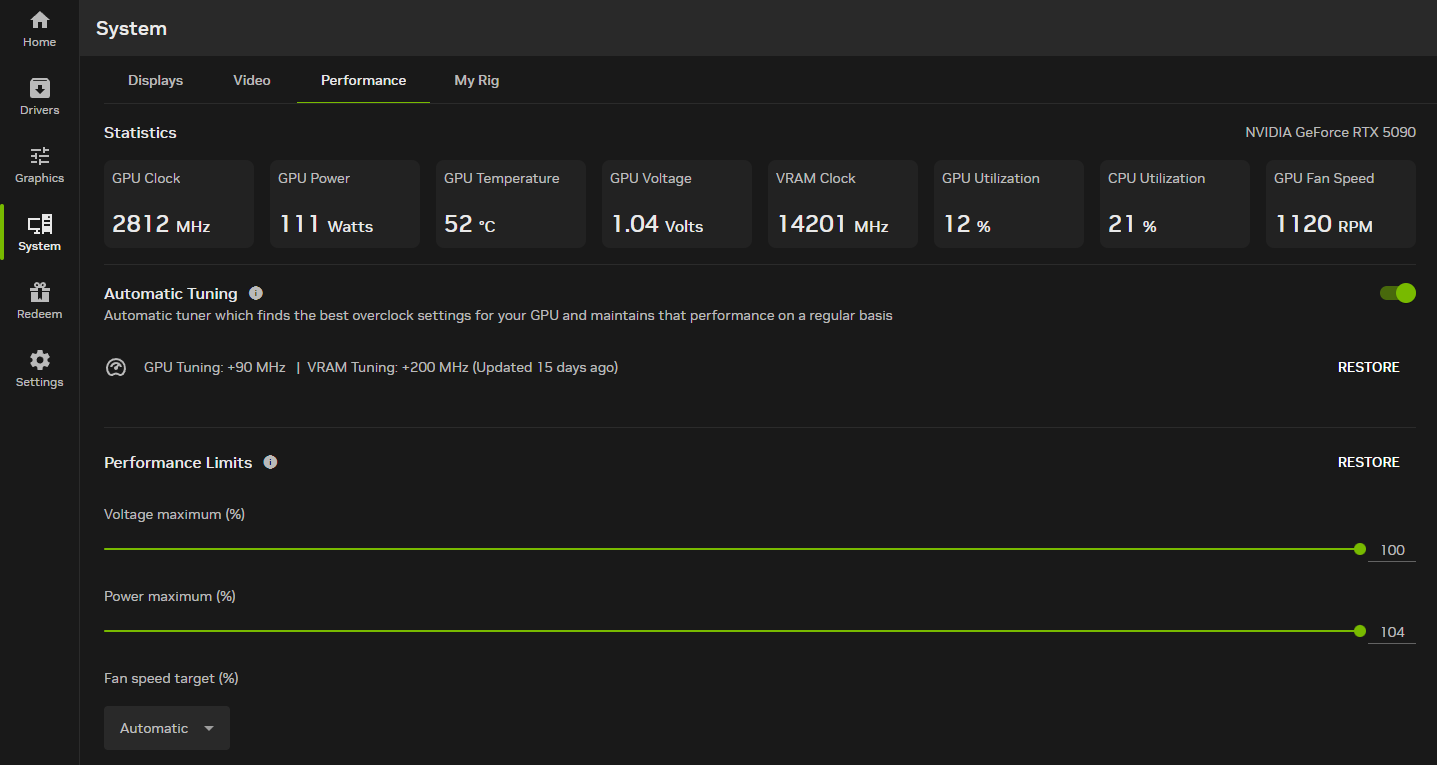
Click on System in the sidebar and go to the Performance tab. Toggle on Automatic Tuning. Max out all the available sliders (voltage maximum, power maximum, temperature target).
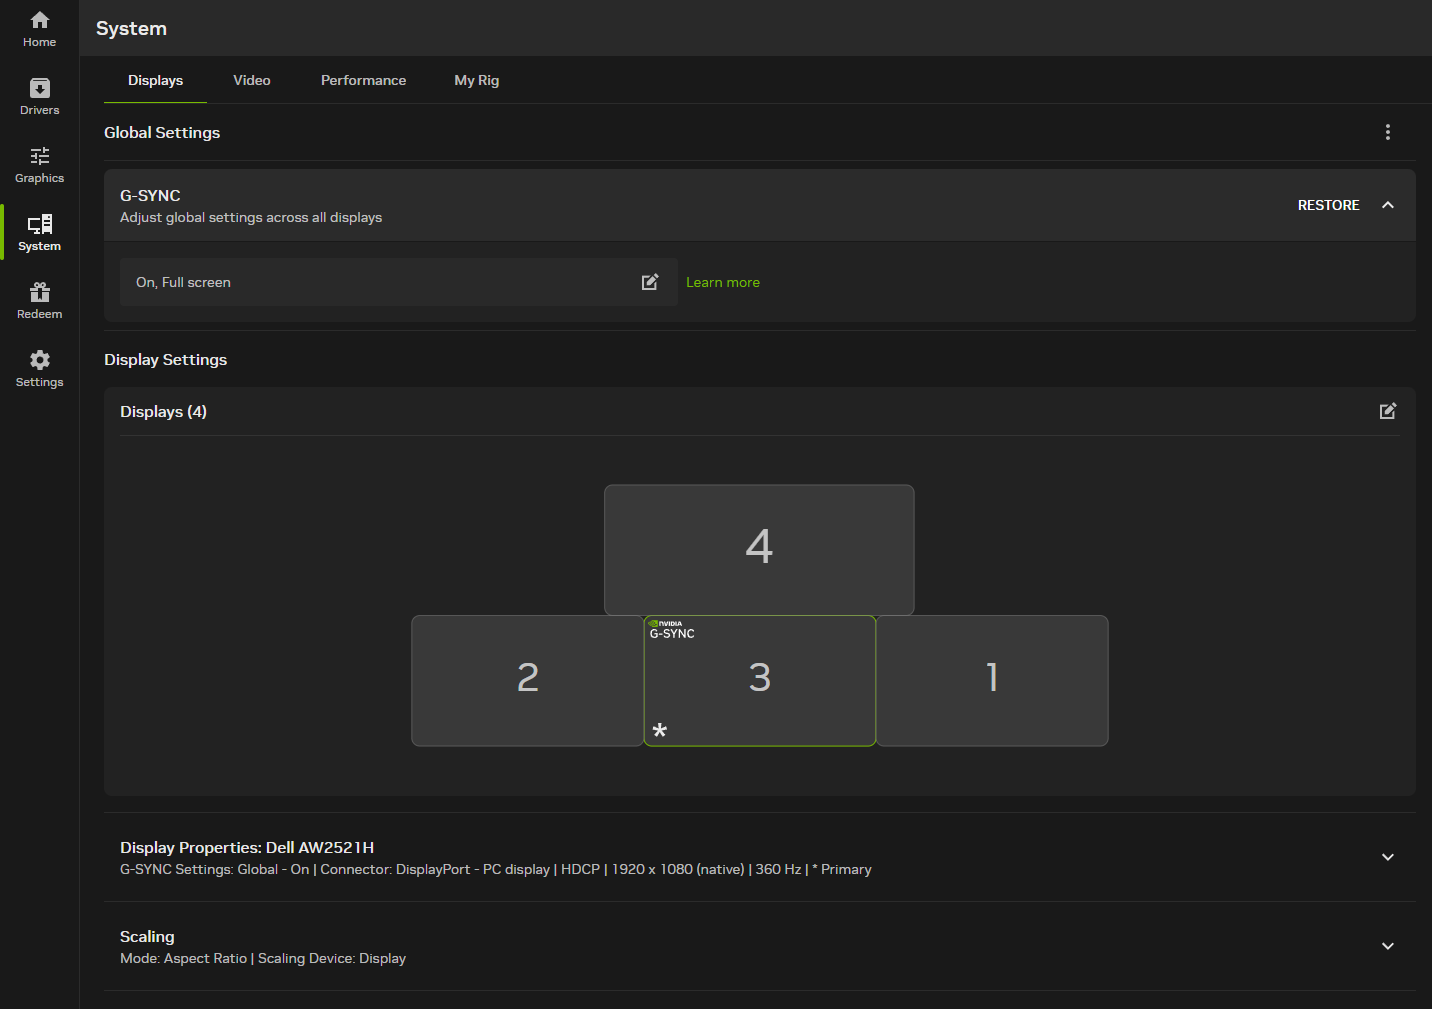
If you have a G-Sync compatible or G-Sync capable display, you can click on the System button in the sidebar and navigate to the Displays tab. Ensure that G-Sync is set to “On, Full screen” at the top.
Nvidia overlay settings.
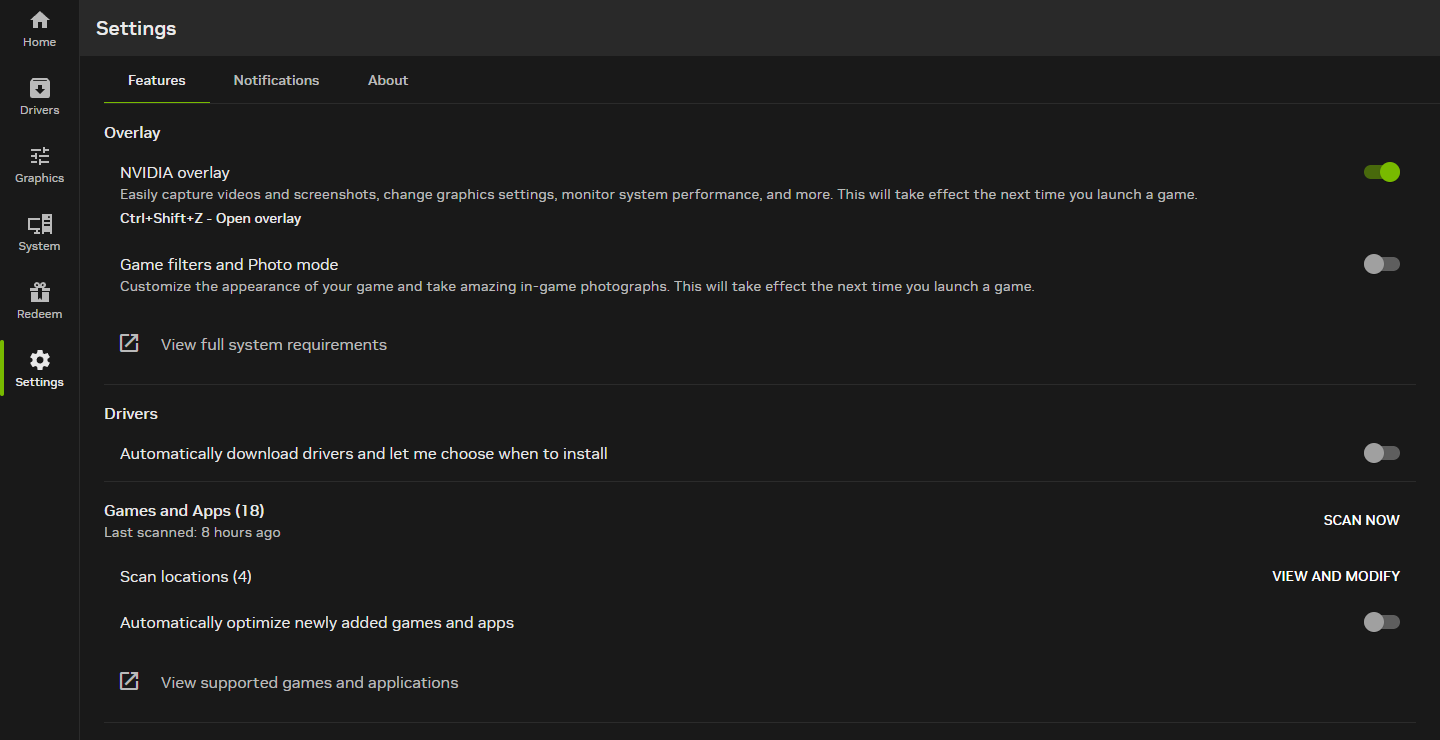
In the NVIDIA App, click Settings in the sidebar. Toggle on NVIDIA overlay. You can hit the assigned hotkey (defaulted to Alt+Z) to open up the overlay and customize your options.
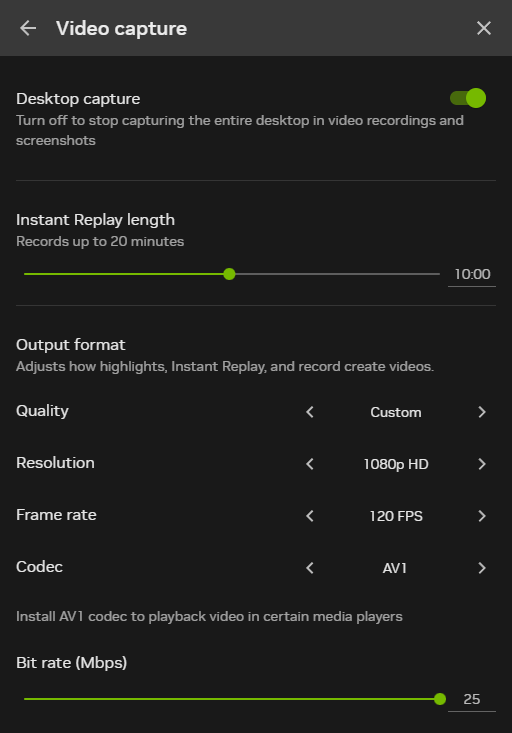
If you plan to enable Instant Replay (automatically clipping the last few minutes of your gameplay), the screenshot below shows my recommended settings for anyone on a 1080p screen. If you are on a higher resolution, simply set the resolution to match your screen and set the quality preset to High. You can leave the frame rate and codec to the ones in the screenshot below.
Audio setup.
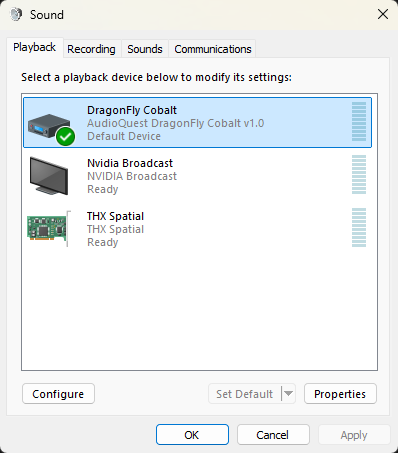
Search for “Sound settings” in the Start menu and click on the first result. Scroll down and click on “More sound settings.” Right-click and disable any playback devices that are not going to be used, like audio outputs from your graphics card. This prevents software from accidentally selecting them as an output device. To properly set a default playback device, highlight the device and click on the “Set Default” button. If you right-click and click on “Set as default device,” you will have a separate device selected as the communication device, which isn’t what we typically want.
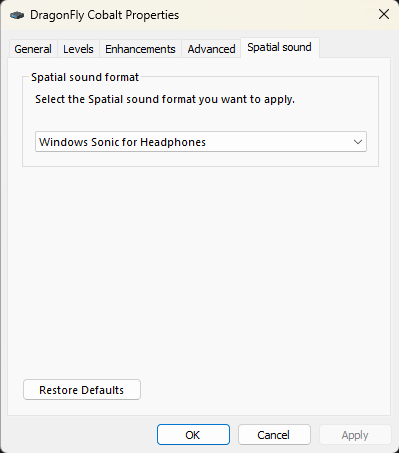
Right-click your playback device and click Properties. Go to the Spatial sound tab and enable “Windows Sonic for Headphones” if the output will be used with headphones.
Network tuning.
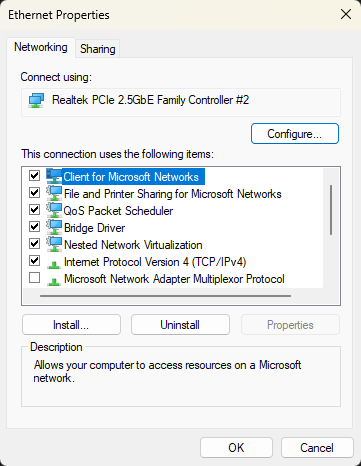
Search for “Manage Network Adapter settings” in the Start menu and click on the first result. Click on your Ethernet or Wi-Fi adapter (depending on what you use) to expand the options. Click on the “Edit” button next to “More adapter options.”
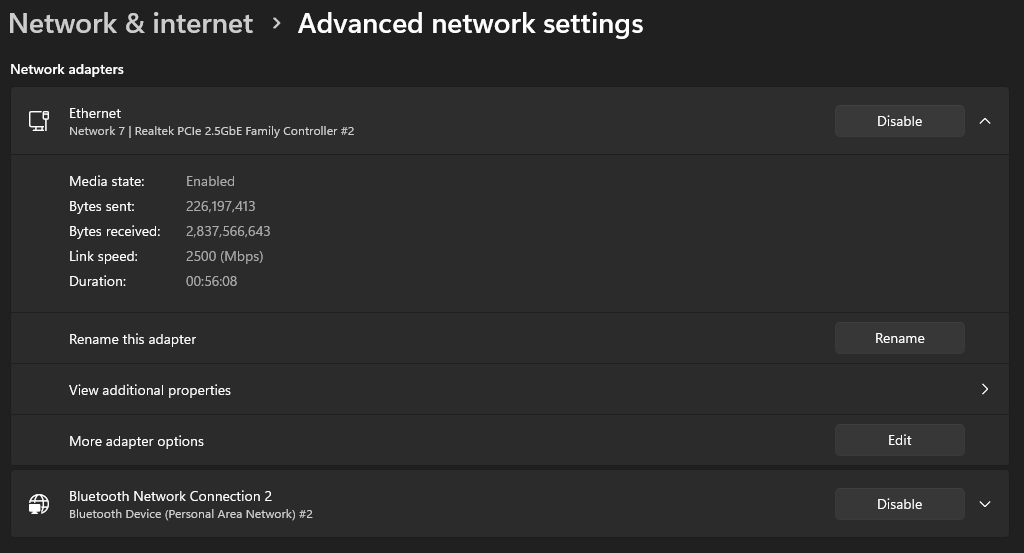
Click on the Configure button in the new window.
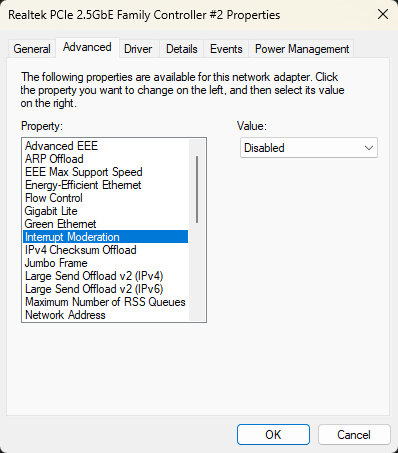
Go to the Advanced tab. Disable all energy efficiency options like Gigabit Lite and Green Ethernet. Disable any option that has the word “Offload” in its name. Turn off Interrupt Moderation and Flow Control. Disabling Interrupt Moderation may be the most important setting out of all of these, since it has the highest impact on latency from queuing up packets before sending them out in batches.
Drive firmware.
It’s a good idea to temporarily download software for your drive to make sure there are no firmware updates available for it. For example, there is Crucial Storage Executive for Crucial drives and Samsung Magician for Samsung drives. You can either uninstall it after checking for updates or remove it from startup.
Time sync.
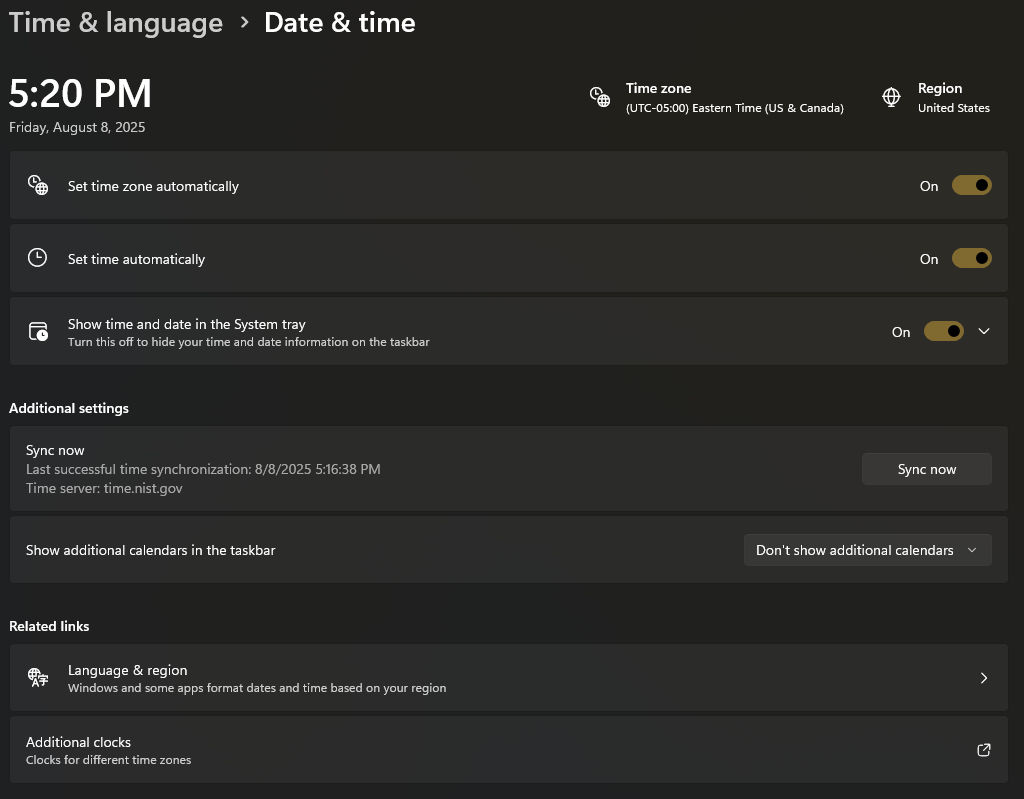
Search for “Date & time settings” in the Start menu and click on the first result. Click on “Additional clocks” near the bottom.
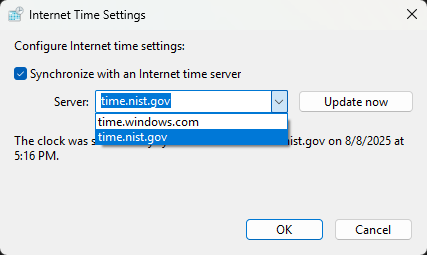
Click on the Internet Time tab in the new window. Then click on the “Change settings” button.
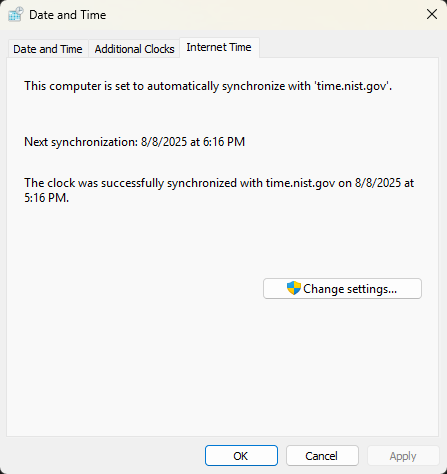
Set your time server to the NIST version and click OK. This is the official source of time from the United States government.
Clipboard history.
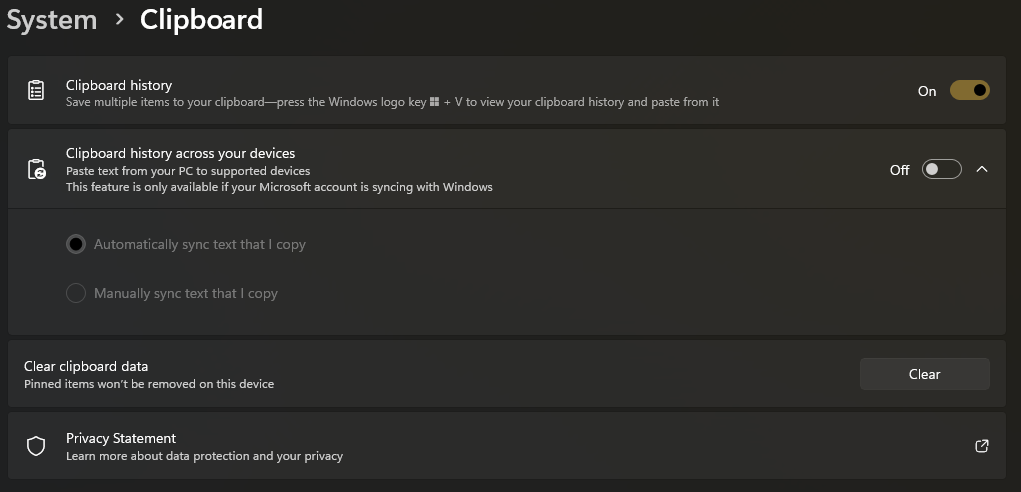
Search for “Clipboard settings” in the Start menu and click on the first result. Toggle on the “Clipboard history” setting. This will allow you to press Windows+V and paste from your clipboard history. You will still be able to use Ctrl+V to paste the most recently copied item.
Miscellaneous.
Of course, make sure you uninstall any unnecessary programs that were automatically installed with Windows. Make sure you also look at your startup apps and disable anything that you don’t want running when you boot up your device.
Leave a Reply