Writing on computer hardware, software, gadgets, and everyday technology from Egregious, including build guides, configuration tips, and product picks.
May 27, 2026: Removed mentions of outdated libraries.
April 1, 2026: Polished for clarity.
So you’ve gained access to a Plex library and you want to make the most of the experience. Follow this guide to configure your Plex settings correctly so you can start watching content without any issues.
Download the Plex app.
The best experience begins with downloading the Plex software. Visit the official Plex website and hover over the Download button in the menu. Click on the “For Desktop” option, not Plex Media Server. You can choose to download and install the software directly from the Plex website or from the Microsoft Store. Plex is also available on mobile and tablet devices, such as through the App Store on your iPhone. You may also use the web version of Plex if preferred, such as when you’re on a work laptop that prohibits unauthorized software installation.
Plex on Windows.
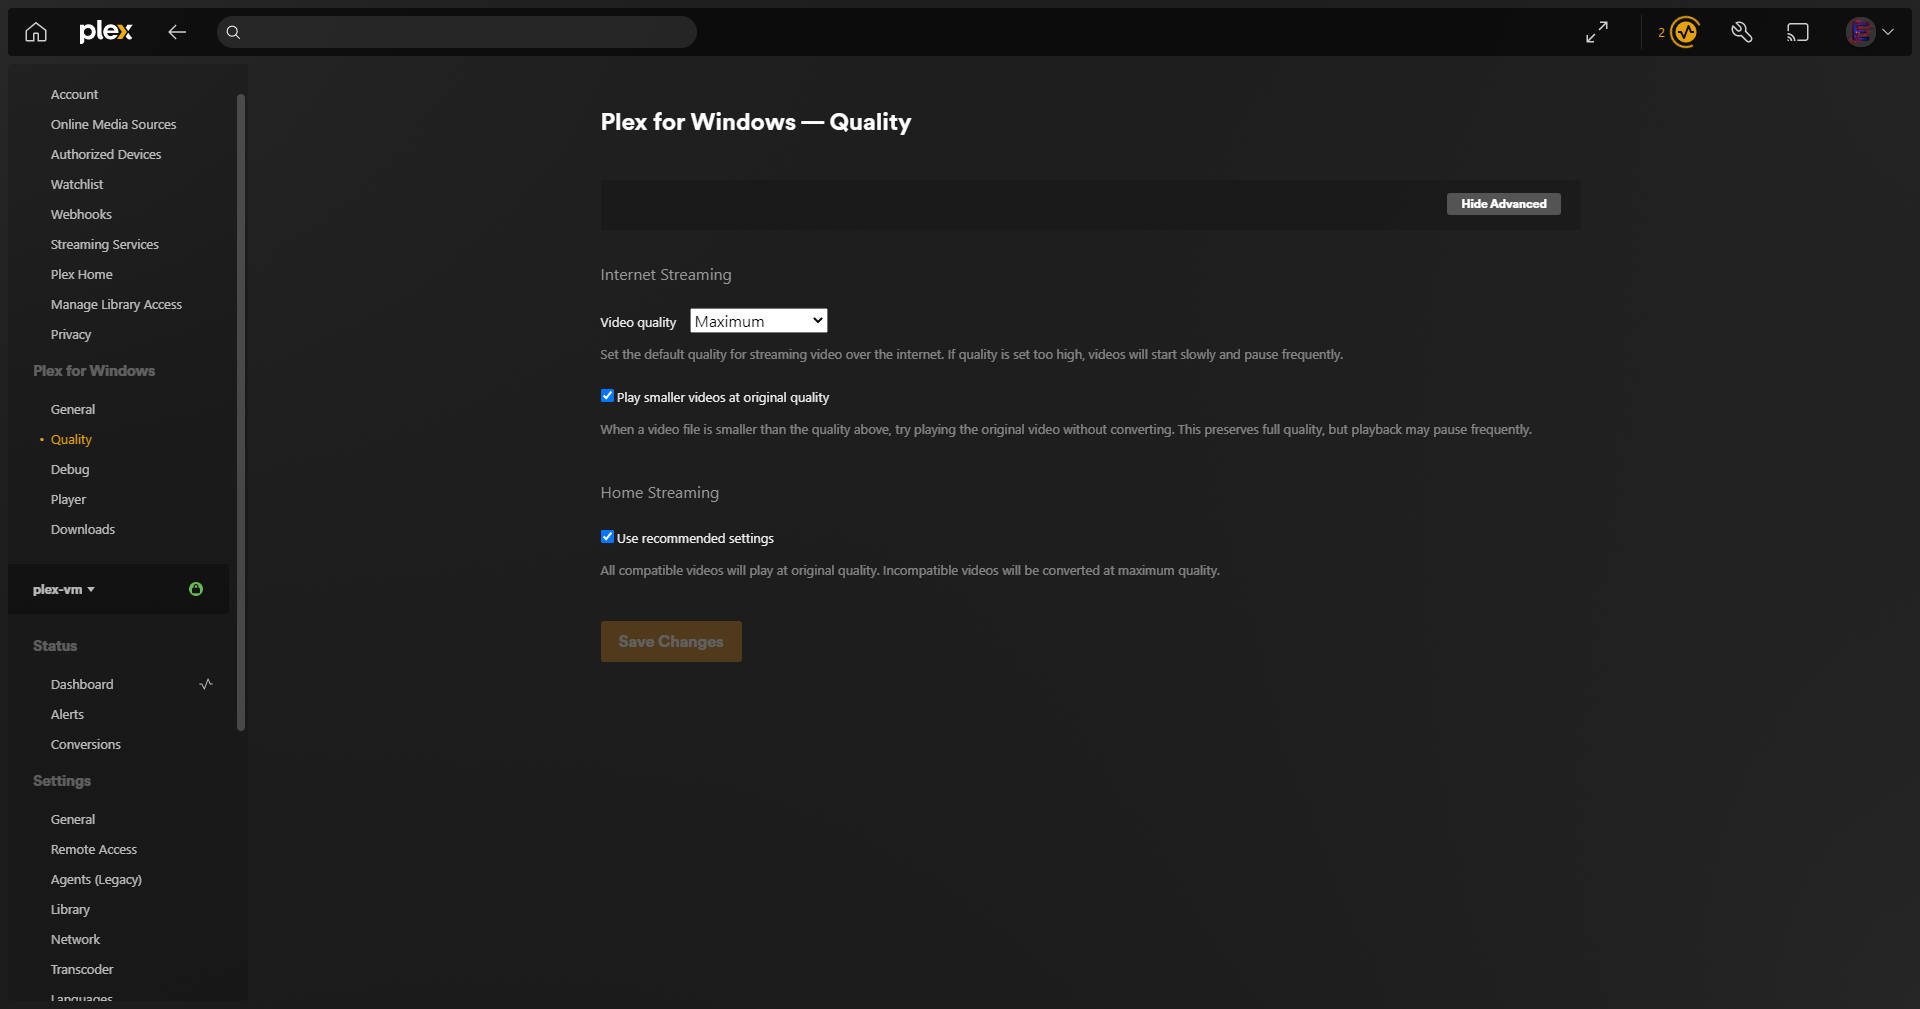
After installing Plex and logging into your account, click on the wrench icon in the top right corner. In the left sidebar, click on Quality. Set the video quality to maximum. Ensure the other two options (Play Smaller Videos at Original Quality and Use Recommended Settings) are enabled. The same options will be available if you’re using the web version of Plex.
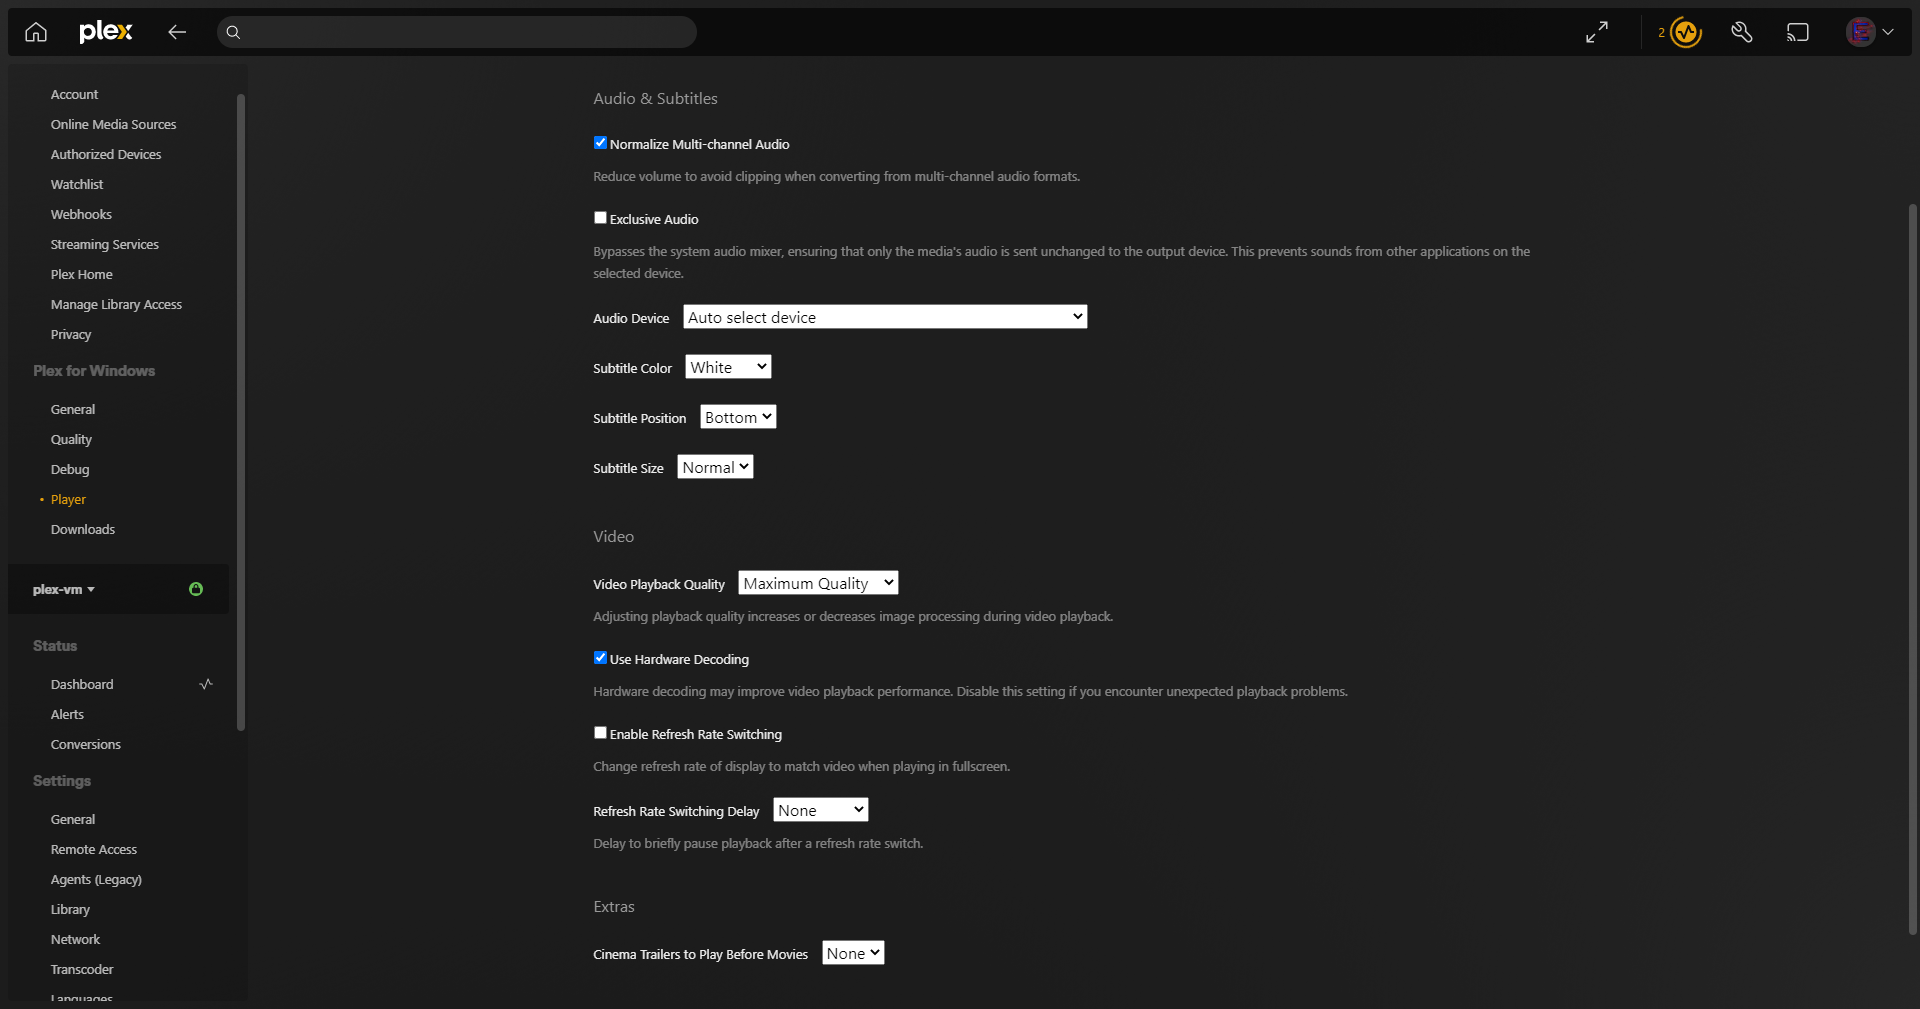
Next, navigate to the Player settings (from the same sidebar) and scroll down to Video Playback Quality. Set this to maximum quality as well. This setting may not appear in the web version of Plex.
Next, navigate to the Download settings (also from the same sidebar) and set both Music Quality and Video Quality to original.
Plex on iOS.
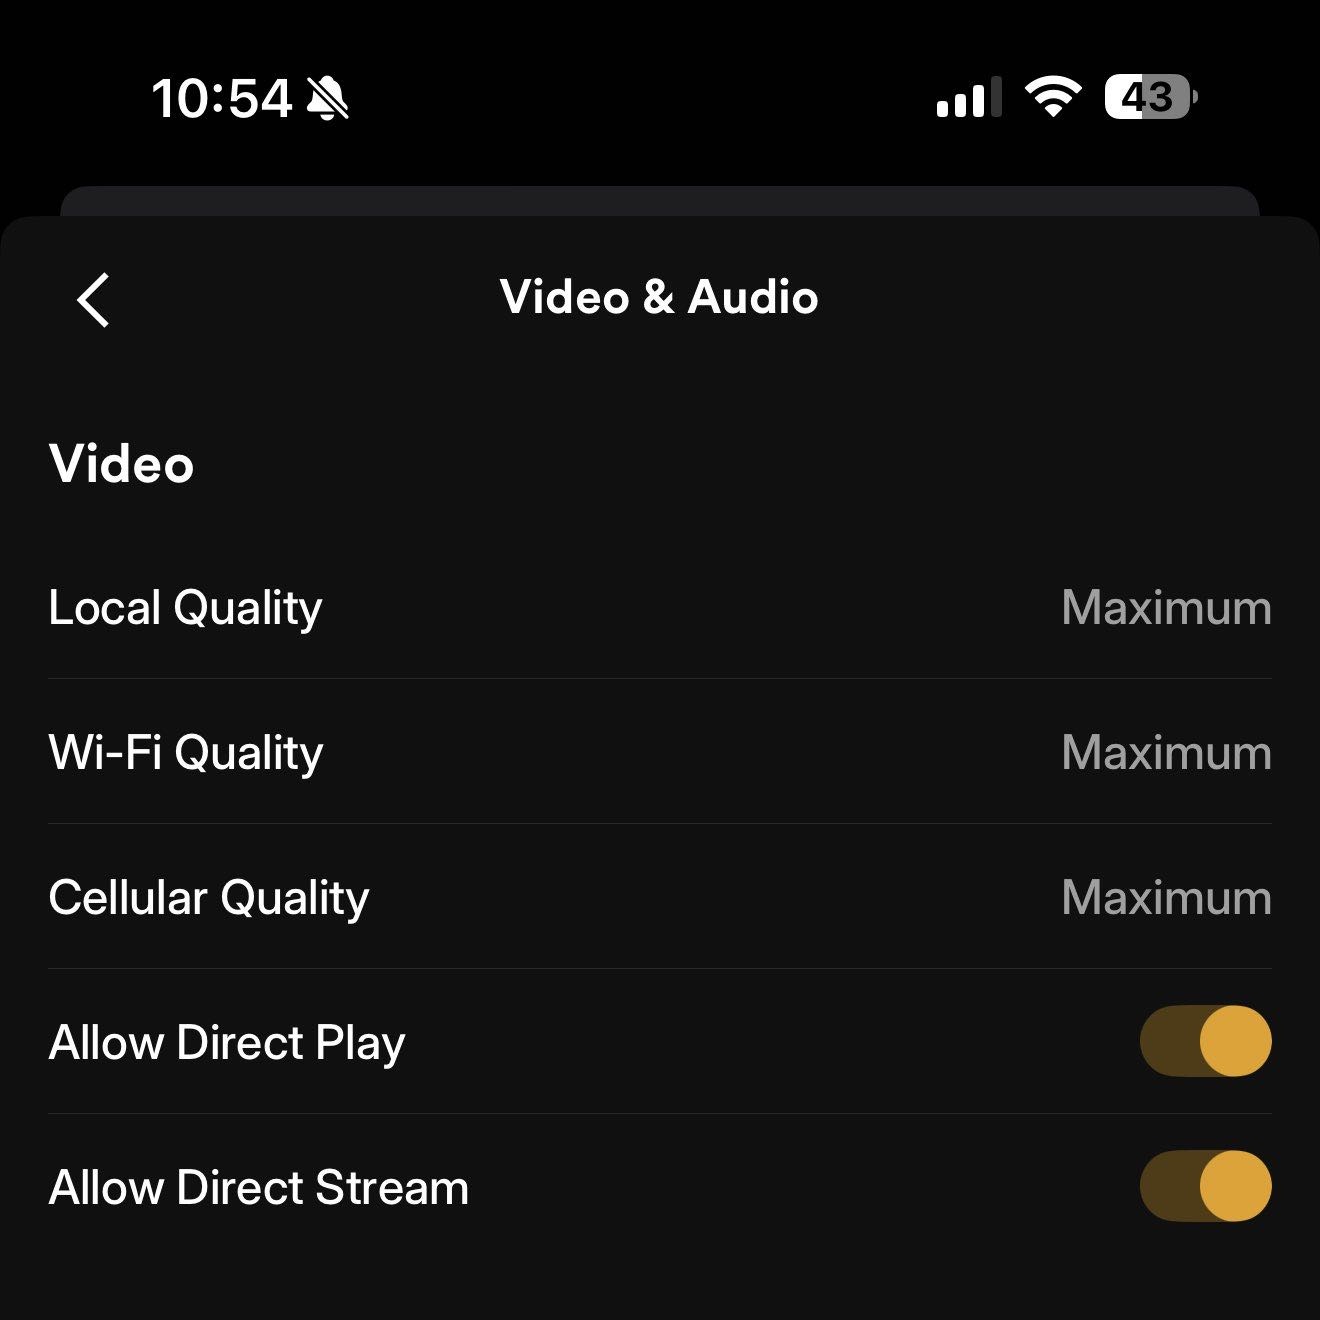
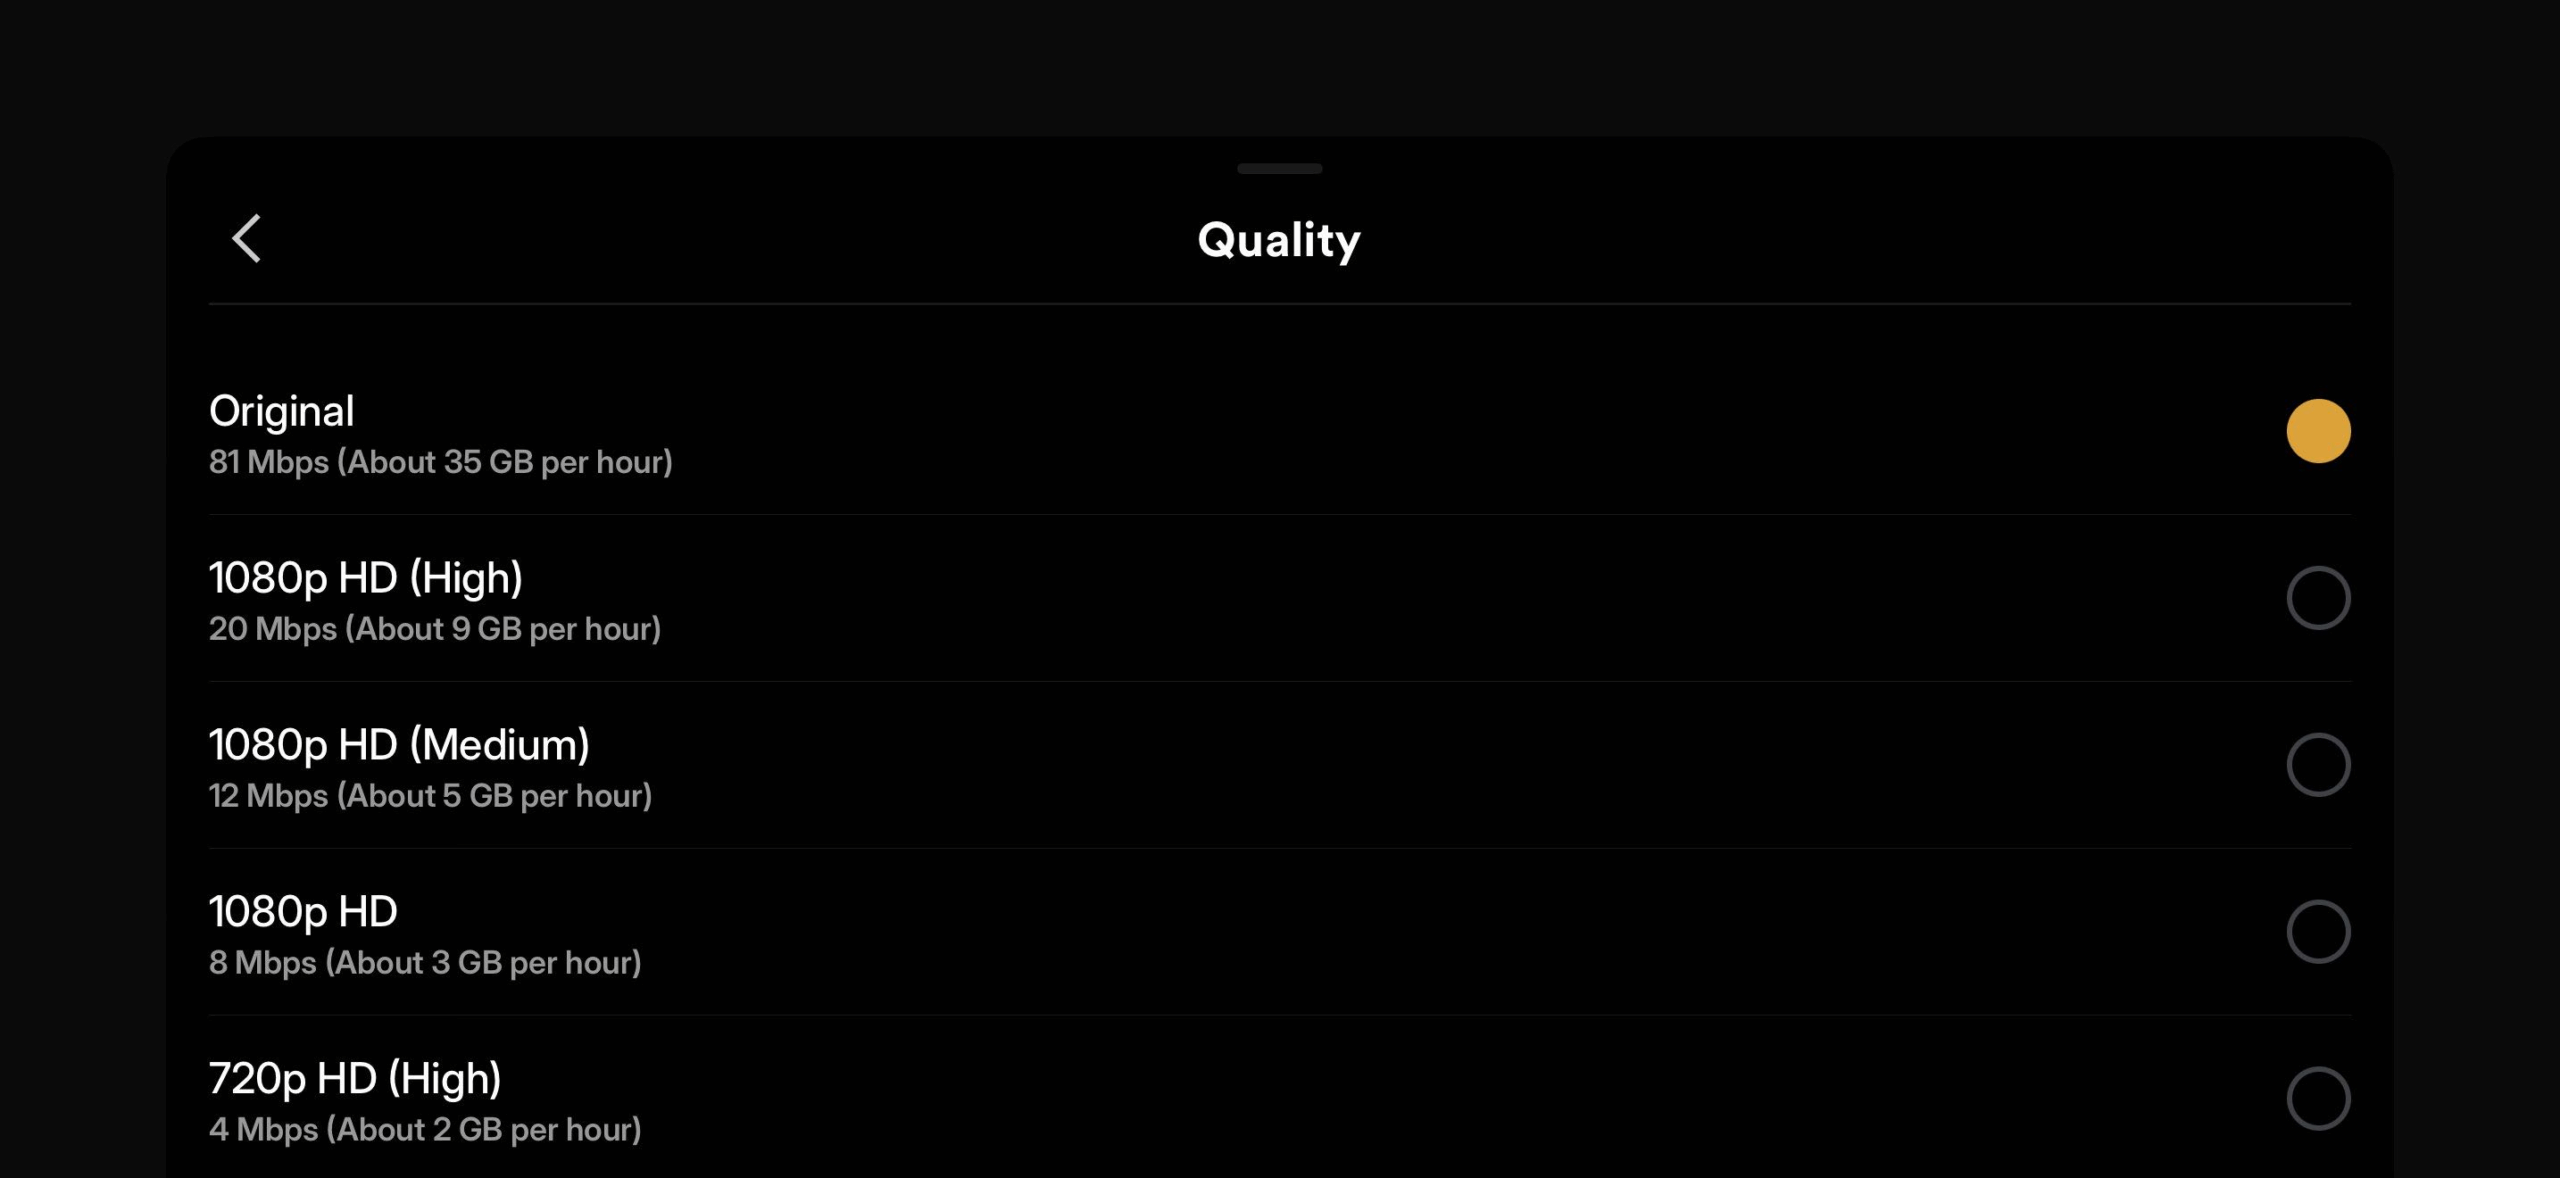
After installing Plex and logging into your account, tap on your user icon in the top right corner. A sidebar will appear. Tap on Settings. Go into Video & Audio and set all the options to maximum. Additionally, ensure that the other two available toggles are turned on (Allow Direct Play and Allow Direct Stream).
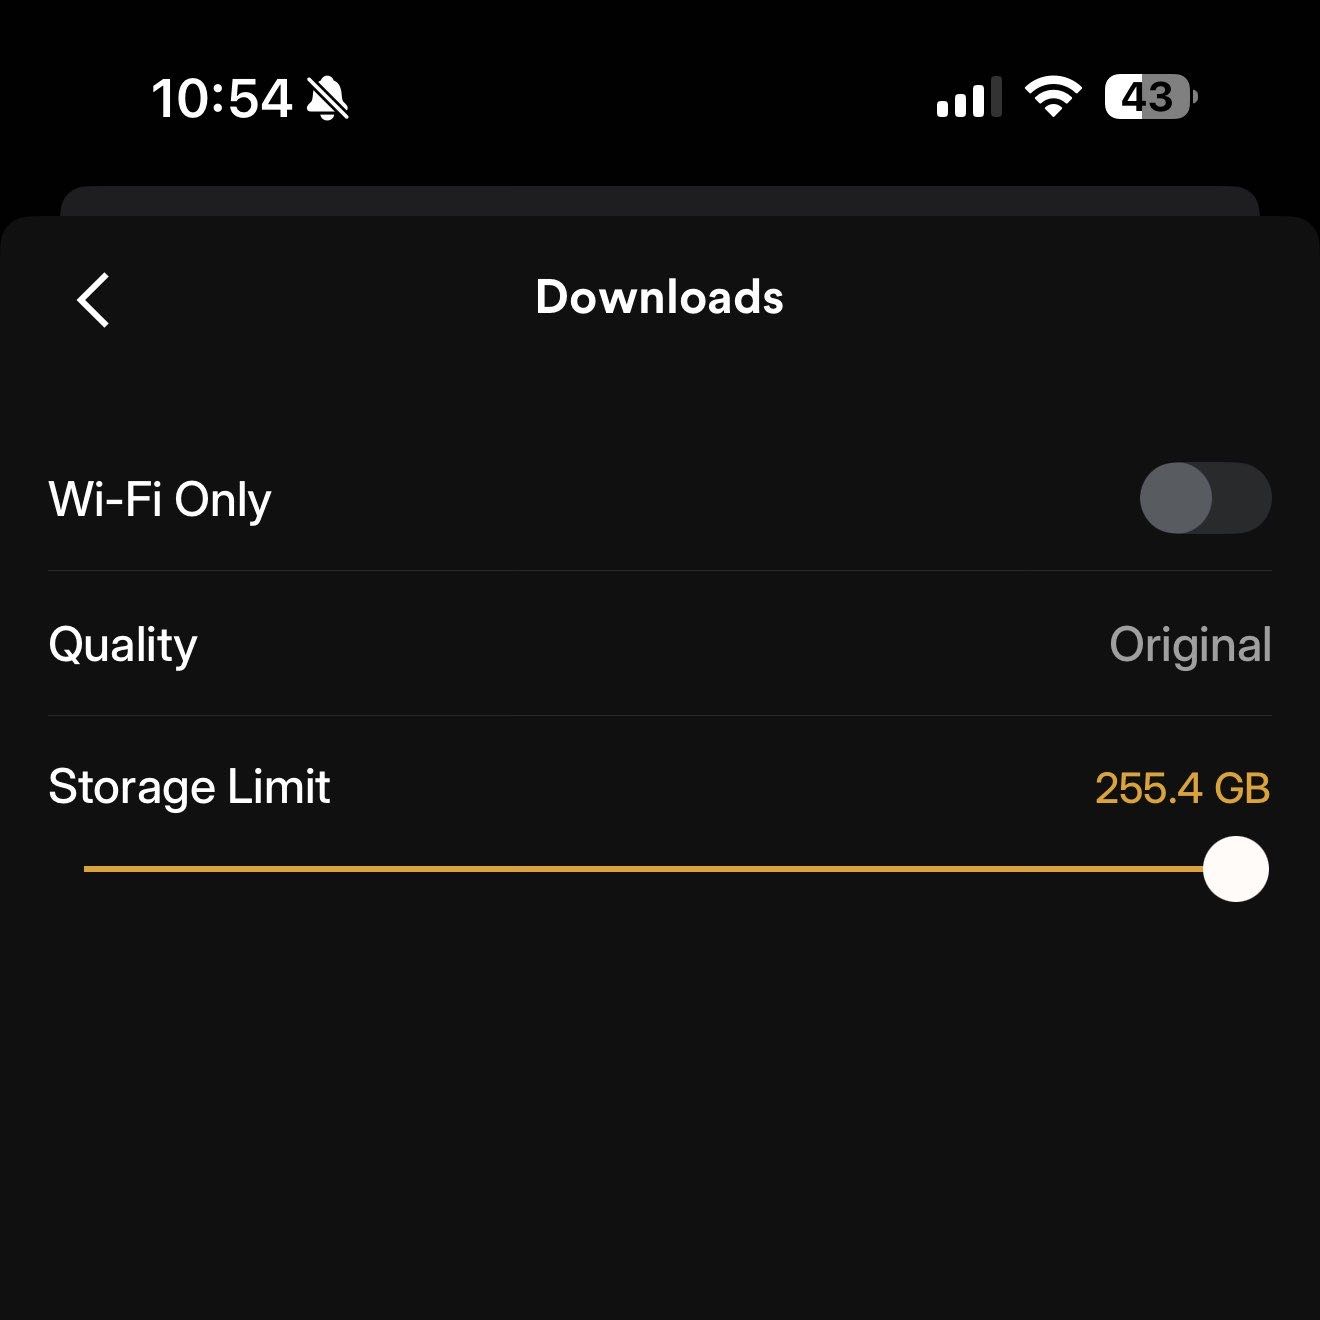
Navigate back to the main Settings screen and go into Downloads. Turn off the Wi-Fi Only option and change the quality to original.
Media playback.
The settings mentioned in the sections above will result in streams starting at the highest possible quality. A single movie on Plex could be a full Blu-Ray rip with a file size close to 100GB or even higher. Not everyone has that kind of bandwidth, especially when you’re traveling and using mobile data. This would result in constant buffering.
If your stream doesn’t buffer, that means your connection has sufficient bandwidth to handle the file. In that case, you can continue watching in original quality. If your stream is buffering, simply click the three-dot button to open the player settings (usually near the bottom right corner) and go into the Quality sub-menu. Gradually lower the quality until your video stream no longer stutters. In most cases, setting it to one step below original (20Mbps) is sufficient.
Requesting media.
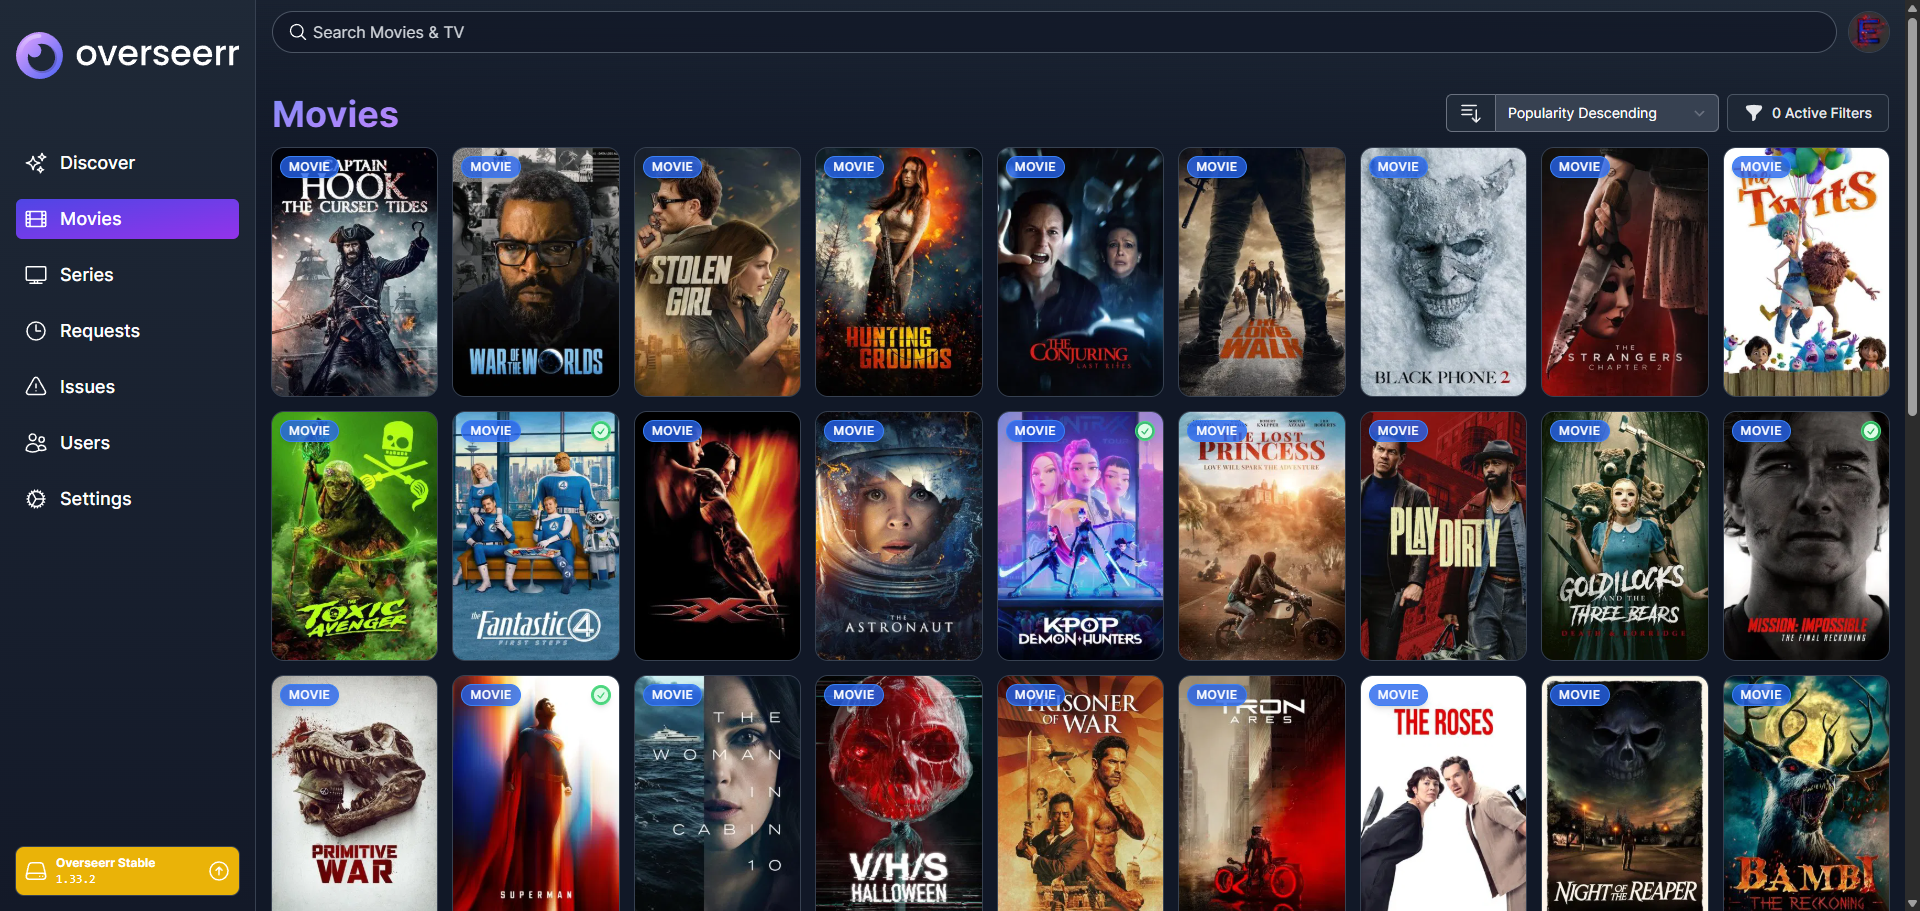
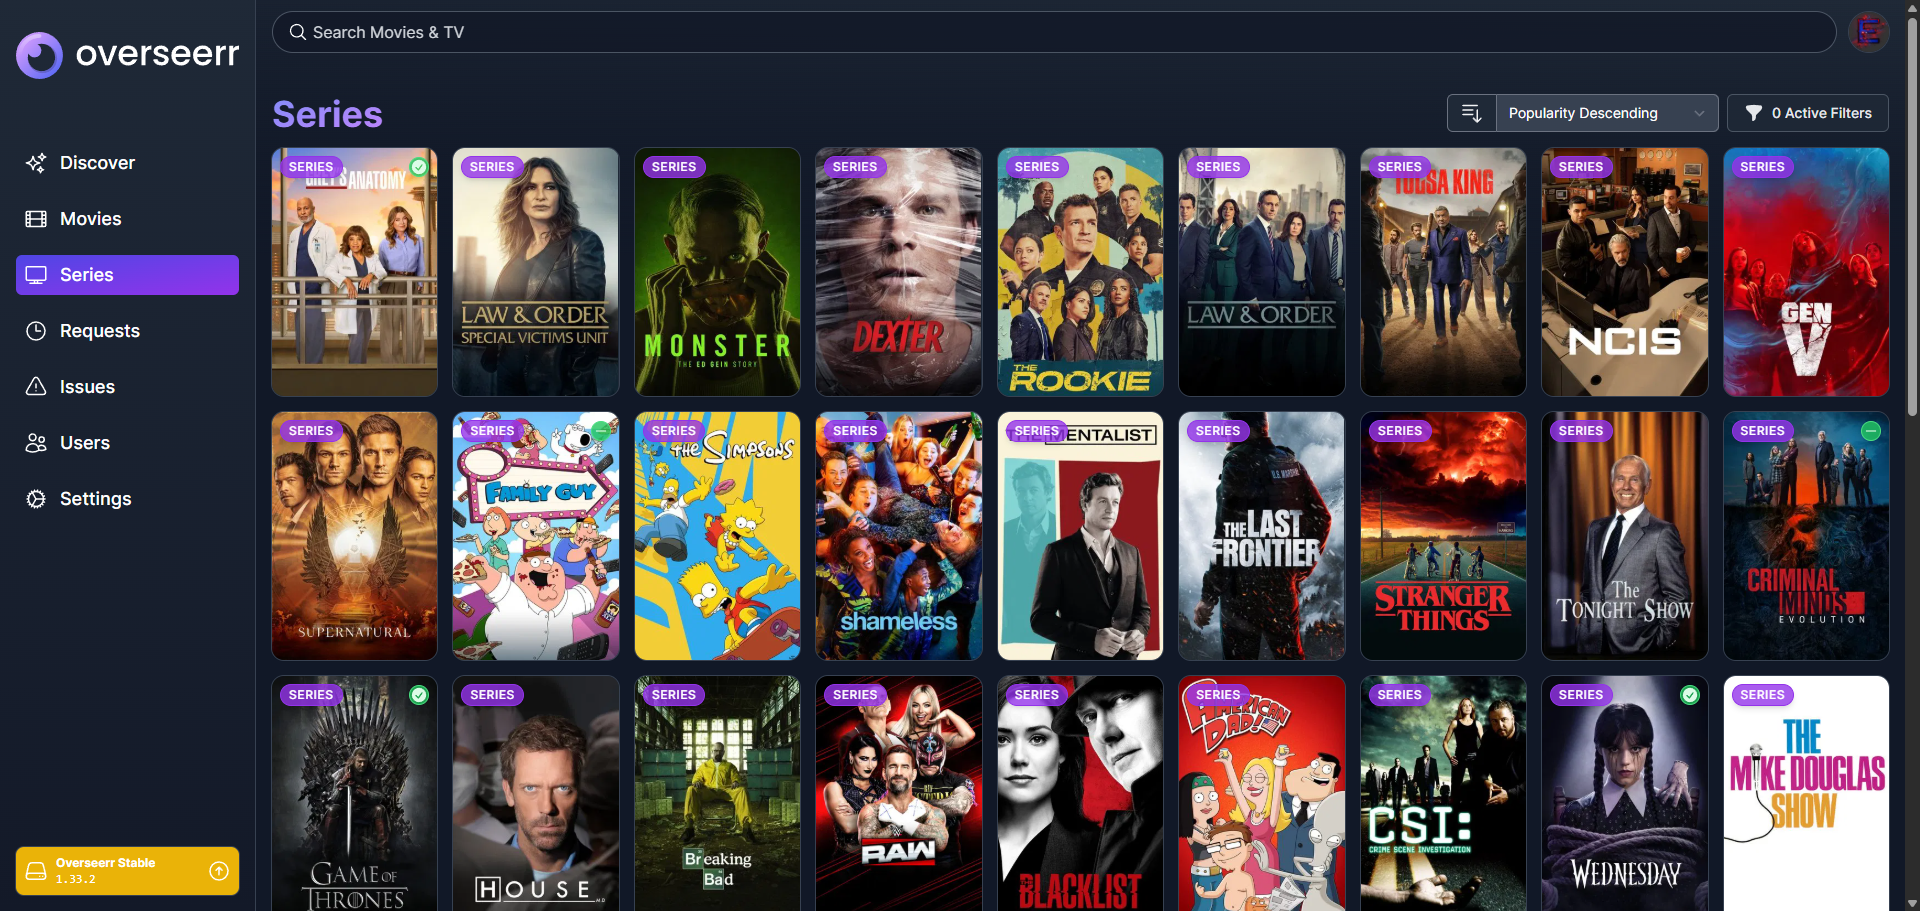
This section only applies if you’re accessing my Plex server. You can request any movie or TV show through the Overseerr platform. For a link to the site, please reach out to me directly. You can log into Overseerr using your Plex account. Once logged in, you can search for any movie or TV show that interests you. When you submit a request, the server will automatically search for, download, and load the media into Plex. You will receive an email notification once the process is complete (email notifications may fail to send in certain scenarios, such as when a TV show is currently airing and episodes are still being released).
The one rule I ask you to follow is to not request any anime on Overseerr. Requesting anime on Overseerr will result in the media being incorrectly added to the TV Shows library instead of the Anime library. When in doubt, if it exists on MyAnimeList, please refrain from requesting it. Instead, ask me directly.
You’re set on the parts you’re going to use for your new rig. But that’s only half of it. Don’t forget about the mouse, keyboard, monitor, and everything else you’ll need for your PC. Choose the right accessories to pair with your computer.
Mouse.
I’ll get straight to the point. There are two end-game mice on the market that I usually recommend. The first is Razer Viper series. If you’re not a fan of Razer, then I recommend the Logitech G PRO series. The newest Razer Viper variant at the time of this post is the Razer Viper V3 Pro. Coming in at 54g, it has an ambidextrous design for maximum flexibility no matter how you hold your mouse. It’s a rechargeable (USB-C), wireless mouse equipped with a 35K optical sensor. If you’re on a budget, the Razer Viper V3 HyperSpeed is a much cheaper option from the same lineup. On the other hand, its direct competitor is the Logitech G PRO X Superlight 2. It’s 60g, ambidextrous, rechargeable (USB-C), and is equipped with a 44K optical sensor. Both mice are capable of 8000Hz polling rate.
If you’re looking to spice things up with aftermarket grip tape, then Pulsar’s Supergrip Grip Tape is a great choice. They are extremely grippy and can be easily removed without leaving behind any unwanted residue. They offer a wide range of pre-cut options for mouse models across various brands, including the ones I mentioned above.
Keyboard.
Keyboards can be anything from off-the-shelf products to custom-built creations. You have the option of building one with the components you choose, just like building a PC. If you’re just trying to choose a prebuilt keyboard, Razer offers their Razer Huntsman V3 Pro. The TKL (tenkeyless) variant is helpful if you don’t require a numpad and want to reclaim some mousepad space. On the other hand, the Logitech PRO X TKL RAPID is available. The folks over at Wooting are the ones who originally pioneered technologies like adjustable actuation and rapid trigger that companies like Razer and Logitech now use. They continue to raise the bar with newer models and iterations that push the boundaries.
If you’re down to build your own keyboard, there are a variety of options available, but it all comes down to personal preference. I currently use a keyboard built using a Glorious GMMK PRO Barebones 75% base kit, ZealPC Crystal (tactile) switches, TX Switch Films (0.125mm, clear), and Krytox GPL205 G0 lube. The components you choose are entirely up to you, from the layout to the feel of the switches. Keep in mind that building a custom keyboard means that you’re giving up some of the features that other gaming keyboards offer, like super high polling rates or custom trigger points. Check out the r/MechanicalKeyboards subreddit for inspiration.
Headphones.
I’m here to dissuade you from buying a headset. You do not need a headphone and mic combo. By buying a headset, you’re sacrificing quality in both audio playback and the microphone. Optimally, you would have a very nice pair of headphones and a standalone mic.
You’re probably thinking, what about all the “features” that I’ll be missing from a gaming headset? The features on headsets are just unnecessary. For example, if you want surround sound, you can enable Windows Sonic for Headphones. It’s a free Windows feature you can find in your audio settings. Many modern games like Counter Strike, Valorant, and Battlefield already support HRTF (head-related transfer function), which is built-in surround sound without requiring external software. As a matter of fact, enabling third-party “surround sound” features on top of HRTF will distort the sound and make positional audio less accurate. The same applies when adding a fake 3D effect to music.
Purchasing a mid-range or high-end pair of neutral, reference-grade headphones will be far more beneficial to you than any other marketing gimmick. Not only will everything sound exactly as intended, but you’ll be able to pinpoint every single detail that you won’t hear with a normal headset. You’re also not forced into buying a whole new headset if one part starts to fail.
For headphones, you have the choice between open-back and closed-back options. Open-back headphones are “open” and allow outside noise to flow through your earcups, similar to Transparency Mode on AirPods Pro. The directional audio will have extreme accuracy because of the insanely wide soundstage. It’s as if the sound is coming from around you instead of from the headphones. The downside is that these will not work if you’re not in a silent environment, as outside noise can interfere with your audio. Closed-back headphones are “closed” and passively block outside noise so they cannot pass through the earcups. You will have a tighter soundstage, but will benefit from not having external noise distract you. The bass response will also be more prominent than the former.
The open-back headphones I personally use are the Shure SRH1840. There is a great closed-back counterpart, the Shure SRH1540. If you’re not fond of wearing headphones, consider a nice pair of IEMs. I personally use the first-gen variant of the Shure SE846. I know these are higher-end options, and I’m not recommending that the average person just drop that kind of money on a whim. But there are cheaper options available as well, including ones from Shure.
Microphone.
A standalone mic is better than any mic you’ll find on a headset. Mics like the Shure MV7+ or the Shure MV6 are well known and proven to provide excellent performance. They are USB mics that can plug directly into your PC, no need for a separate XLR interface. If you’re on a budget, cheaper options like Razer’s Seiren lineup and Logitech’s (previously Blue) Yeti series are still great, reliable choices. A decent, budget-friendly microphone will still get your voice across clearly and isn’t as important as selecting a high-quality pair of headphones. If you’re in a noisy environment and must have the mic right next to your mouth at all times, Antlion Audio offers mics that attach directly to your headphones or IEMs. There are still software-based solutions like Nvidia Broadcast that uses GPU processing power to filter out background noise.
DAC.
A DAC, or digital-to-analog converter, does exactly what the name suggests. Your computer receives a digital audio signal and the DAC is responsible for accurately translating that into an analog output that your headphones can play back. It must be precise across the entire spectrum and amplify the signal without introducing any distortion or noise.
The reason discrete DACs still exist today is because the chips included in most motherboards are cheap, low-performers. When building a product, companies will focus their costs on the areas that can benefit most from a performance uplift. Most consumers will barely notice a mediocre DAC, if at all, so it would be a waste of money to invest in better audio integrity. If you have a really good pair of headphones, IEMs, or audio system that can take advantage of a nicer DAC, you can unleash the full capability of your hardware.
I personally own two AudioQuest DragonFly Cobalt DACs, one for my headphones, and one for my IEMs. It’s a great product that has a high-end ESS chip with clean power filtering and bit-perfect playback.
Webcam.
A webcam is a straightforward purchase for most people. You choose the resolution that you require, and that’s it. If you want a basic 720p or 1080p webcam, go for it. If you want a 4K webcam, there are options available for that too. I recommend Logitech webcams since they have always been reliable. I currently use the Logitech Brio 4K, which is a webcam that offers Windows Hello sign-on, something I use daily instead of manually typing in my password. If you’re a content creator or streamer, you may want something even higher quality, or specific features like an integrated ring light (but we know it’s best to separate products into their own specific functions).
Ethernet.
An ethernet cable is always the optimal choice when it comes to home network connectivity. Hardwiring your computer directly to the router will give you the highest speeds, the lowest latency, and the best reliability. Don’t fall into the marketing gimmicks of buying a Cat8 (Category 8) cable. You’re not running a datacenter and you don’t require 40Gbps speeds. There is no latency difference between Cat8 and lower categories. Those ethernet cables are extremely stiff and hard to route. At those speeds, datacenters would be running fiber anyway. What you need is a reliable Cat6A cable. These are rated for a minimum of 10Gbps at long distances and would be more than you would need at home.
I personally use Monoprice Cat6A SlimRun (S/FTP, 30AWG) ethernet cables. They are slimmer than standard ethernet cables (as the name suggests) and offer electromagnetic shielding. It features a pure copper core, unlike the CCA (copper-clad aluminum) ones that you’ll find with cheap ethernet cables. They’re offered in a small selection of colors, and range from 1 foot to 25 feet in length. The cable is available to purchase on Amazon as well. Just don’t get confused with the inferior 36AWG SlimRun variant.
Monitor.
Purchase a monitor by looking at the specifications. Look at the resolution. Do you want a 1080p or 1440p monitor? Maybe you want a 4K monitor, but make sure your graphics card can drive that many pixels. Most people nowadays will get a 1440p screen as the sweet spot. Look at the monitor size. If you’re purchasing a 1080p monitor, 24-inch or 25-inch screens are considered the sweet spot between image clarity and size. Don’t go larger than that. If you’re purchasing a 1440p monitor, a 27-inch monitor is considered the sweet spot.
Look at the refresh rate. Aim for something with a minimum of 144Hz. Many monitors nowadays can push 240Hz, 360Hz, 480Hz, or even higher, especially on lower resolutions. Take a look at the response time as well. You should be aiming for a 1ms response time or less.
Lastly, note the panel type. You should completely avoid TN panels. They will always produce washed-out, inaccurate colors. VA panels should also be avoided. Yes, they will have nice contrast, but will not perform well when it comes to motion. Most VA panels on the market will suffer from ghosting and smearing. Ideally, you should purchase a monitor with an IPS panel. It will provide nice, accurate colors without the downsides of the previous tech mentioned. OLED monitors could be another potential upgrade, but only if you know what you’re getting yourself into. OLED panels will have the best contrast since they are powered by individual LEDs that can be turned off instead of using a global backlight. This provides crisp colors with true blacks. You’ll have to watch out for burn-in, though. If a static image remains on the same area of your screen for too long, it can burn into the monitor. Common examples are the taskbar or desktop icons.
Colorimeter.
What’s the point of a nice monitor if what you’re seeing isn’t accurate? Most monitors are not color-calibrated from the factory unless you’re buying one made for professional use. Images can be oversaturated, washed out, tinted blue, or just look off.
A colorimeter solves all these problems by using hardware to calibrate your monitor. It consists of a sensor that you place up to your screen, and the included software plays a slideshow of various colors. The sensor determines how “off” the displayed image is from the intended reference, and builds a custom-calibrated display profile. The profile is automatically loaded into Windows and allows your monitor to display everything as accurately as possible. With photos, videos, movies, or games, you’ll be seeing everything as the creators intended. I personally recommend a Datacolor Spyder.
Mousepad.
A mousepad is entirely personal preference, so I’ll only write about what I personally use. I custom-ordered a mousepad that spans across my desk from X-Raypad. I specifically started with the Aqua Control+ base since it’s the perfect balance between a soft and hard surface, and a perfect balance between control and speed. You can contact their support team to customize different aspects of the mousepad. I specified my exact dimensions, uploaded my own graphic, opted for 4mm thickness, and went with black-stitched edges. They now also offer an updated “V2” version with an upgraded rubber bottom. If you want a high-end alternative, mousepads from Artisan are stellar performers.
UPS.
Power your equipment correctly. Protect your computer and peripherals from unexpected brownouts, blackouts, or power surges. A UPS (uninterruptible power supply) has built-in circuitry to automatically cut over to battery power if there is an issue with the power coming from the wall. “Online” UPS systems are even better double-conversion systems that have virtually no cutover time since they are constantly using the battery. It’s the highest level of power protection, but they are overkill for home use.
The other two types of UPS systems are “line-interactive” and “offline.” Line-interactive units are a middle ground between online and offline systems. They have circuitry to condition the incoming power, like boosting the voltage when it’s too low or bucking the voltage when it’s too high. It will only cut over to battery mode when the power is outside of the correctable range, protecting the battery against excessive cutovers. An offline UPS doesn’t have any built-in transformer or special circuitry to correct incoming power. It provides entry-level power protection and will just transfer over to the battery when there is an electrical issue.
Choose a line-interactive UPS that offers pure sine wave output. For my main rig, I personally use the Eaton 5SC1500 UPS. Since my UPS has little to no surge protection, I have it plugged into a heavy-duty Tripp Lite Isobar 8-Outlet Surge Protector. If you’re on a budget, it’s fine to choose a line-interactive one that doesn’t have pure sine wave output.
Chair.
Choose an office chair from Herman Miller or Steelcase. Herman Miller’s flagship chair is the Embody, also available in a Logitech G (gaming) variant. Steelcase’s flagship chair is the Gesture, available with an optional headrest. If your body runs hot while gaming, you may want to choose Herman Miller’s Aeron chair instead, maximizing airflow with mesh. The Aeron was remastered in 2016, so make sure not to purchase an older version. If you’re on a budget and you want a brand-new chair, the Steelcase Series 2 is a good choice. If you’re on a budget and you don’t mind a pre-owned chair, Crandall Office Furniture sells Steelcase Authorized Factory Returns at a lower price.
Why consider an office chair instead of a typical “gaming” chair? It doesn’t matter if you’re looking at brands like Secretlab or Razer or Corsair. Regardless of how they advertise their chairs as “ergonomic,” they are far from it. Genuine, high-end office chairs are designed and rated for all-day use. They are meant for people to sit in the chair for a full eight-hour workday (or more), and feel little to no fatigue by the end of the day. They are not built to be soft or comfortable like a sofa. They are meant to support you throughout the day in all the right areas, and prevent pain from long-term sitting. If you’re in a corporate environment and your chair is uncomfortable, you’re going to be taking more standing breaks, visiting the pantry more often, or dreading coming to work. Companies invest in chairs that allow employees to remain at their desks where they are the most productive.
Unlike these gaming companies, Herman Miller and Steelcase have conducted decades of extensive research and real-world studies of sitting behavior. They partner with ergonomists, scientists, medical professionals, and engineers to perfect every aspect across decades of analysis and development. Herman Miller and Steelcase both provide a full twelve-year warranty on their chairs, even down to the fabric. The warranty even covers continuous use, like in a 24/7 call center with rotating shifts. You’ll be sitting in the chair for over a decade, so the investment is worth it.
Honorable mentions.
There may be other things you want that weren’t covered above. Maybe your motherboard doesn’t have built-in Bluetooth and you need a Bluetooth dongle. Get one that supports Bluetooth 5.0 at the minimum. Perhaps you’re strict about security and require a hardware security key. Go for any YubiKey that suits your needs. Are you a streamer or just want a control panel to easily adjust volume, mute your mic, clip gameplay, or run macros? Look no further than any of Elgato’s Stream Deck products. In the market for a desk? Consider a sit-to-stand desk from a reputable company like UPLIFT, or a desk from IKEA if you’re on a budget.
August 19, 2025: Added details about insecure browser extensions.
Everyone hates memorizing passwords. We want logins to be easy and seamless. Nobody wants to go through the hassle of setting a complex password just to forget it next time, wasting time with yet another password reset. It doesn’t have to be difficult.
You’ve been taught the wrong advice.
In the past, it was widely accepted advice that a very short password can be highly secure if you just add special characters. A password like “J0hn4th4n” would supposedly be more secure than a simple, longer password like “AppleEnglishGrandmaStatue.” Now we know that’s not the case anymore. The first password could be cracked in less than one second, and the latter would take multiple years. A short, complex password is less secure than a much longer, simpler password that uses known dictionary words and is still easy to remember. Even better if you throw in numbers and special characters just like the short one. But the crux of this post isn’t to convince you to just use longer and more complicated passwords.
A quick lesson on data breaches.
If you’ve been online for a while, chances are that you’ve seen news about a multitude of data breaches across the years. Maybe you’ve even been a victim of one. It doesn’t matter if it’s a small site or a multi-billion-dollar company. Any organization can be at risk of getting hacked at any second. Once the perpetrators make their way into those systems, they dump and extract all the sensitive data they can get their hands on. Hackers often end up with personal information like names, addresses, and login credentials (email, username, and password). Depending on the site, other data can be stolen too. For retailers, your payment data can be at risk. For healthcare sites, your medical data can be as well.
Here’s the scary part. If you’ve used the same password on any other sites, consider those accounts also compromised. What’s even worse? Imagine you used a breached password for your email. Hackers will be able to request a password reset on any site where you have an account. They’ll get the password reset emails right there in your inbox. They could easily gain access to your bank, brokerage, credit cards, or other financial data. Or they can use your information to log into sites like Amazon to go on a shopping spree. Sometimes they’ll sell access to stolen accounts to others, like gaming accounts that have lots of games or money in the virtual wallet.
Excuses.
“But I’m not a target.” I’ve heard this line so many times that I’ve lost count. And so many of the same people end up coming to me for advice after they’ve become a victim. Hackers are not out there targeting specific people for the most part. You do not need to be special or high-net-worth to be at risk of getting hacked. They will often have bots run through combo lists in an attempt to crack as many accounts as possible.
“I have nothing of value to steal.” Same with this. It’s the second most common line I’ve heard when I advocate for people to improve their security practices. These people think that they won’t face any repercussions if they are hacked since there is nothing of value to take. They ignore it when others actually break into their accounts. It’s only a matter of time until one of the accounts they care about ends up getting changed, banned, or deleted. Hackers sometimes sit on stolen accounts without your knowledge until something interesting comes up, too. Victims end up wasting a huge amount of time recovering accounts (sometimes unsuccessfully) or even facing ransom demands to get their accounts back.
“I already have two-factor authentication on my important stuff.” Two-factor authentication is exactly that. It’s just the second factor. You cannot rely on a weak password or a breached password to secure your important accounts just because you have 2FA enabled. There are many cases where two-factor authentication has been bypassed. The first and primary defense is always the most important.
The art of cracking passwords.
User-created passwords are usually not random. A typical user will use something memorable or significant to them, like a pet’s name or a birthday. For example, “charlie2012” would be something a normal person would set as a password. Let’s say a site requires you to use both lowercase and uppercase characters. Most people would just capitalize the “C” to make the password “Charlie2012” instead. And let’s say a site also requires you to use at least one special character. Psychologically, most people tend to just add an exclamation point at the end, like “Charlie2012!” or replace one of the characters with a special character that looks visually similar, like “Ch@rlie2012.”
Password cracking has evolved throughout the years. It’s not just plain brute-forcing anymore. Hackers know that users typically start their alphabetical characters at the beginning of a password, followed by numbers. They know that many people add their special character(s) at the end of a password, whether it’s an exclamation point or dollar sign or anything else. They know people also tend to simply replace regular alphabetical characters with a special character, like using an exclamation point in place of an “i.”
They know all the common tricks and can tune cracking scripts to try all the possible variations. Or they have the option of speeding things up by skipping unlikely passwords that don’t match a known pattern. You’re not slick by changing your password from “mypassword1” to “Mypassword1@” just because the former was in a breach. As computers continue getting more powerful and cracking algorithms continue advancing, average human behavior remains remarkably predictable.
Using a password manager.
Use a password manager. You’ve heard this advice all across the web, over and over. I think most people are put off by the idea of a password manager since they think that it’ll be something difficult to use. A password manager syncs all your data online so you have it anywhere, whether you’re on your computer or on your phone. Browser extensions, mobile apps, and desktop software are widely available for most well-known password managers. And they virtually all have autofill functionality, so you won’t have to manually copy and paste your credentials each time you hit a login page. Password manager apps on your phone even integrate right into your keyboard.
The other common pushback against a password manager is the hassle of adding passwords across every site that you use. Starting to use a password manager doesn’t mean you need to instantly set it up for every single site. It can be a gradual thing, starting with the most important accounts first. Add sites like your email and bank, and slowly add other sites as you use them. For example, the next time you visit Facebook, make sure to add your account into the password manager if it’s not already there.
A password manager is useless if you don’t change your old passwords. When adding an existing account to your password manager, make sure you change the password to a secure one. You can use the password generator feature built right into your password manager. It will create a long string of random characters, including uppercase letters, lowercase letters, numbers, and special characters. There is no specific pattern or sequence that would make it easily guessable based on common human behavior. I would recommend that you generate a password with at least sixteen characters to increase the cracking difficulty.
I personally recommend BitWarden as my password manager of choice. It’s completely free, with an optional $10/year paid subscription if you need additional features like hardware security key support or access to the built-in 2FA authenticator. That’s effectively less than $1/month for a premium password manager. It’s open source as well, which means all the code is public. Anyone, including security professionals and researchers, can freely audit the software for bugs or vulnerabilities.
Common questions.
“Wouldn’t a password manager be the same as placing all my eggs in one basket?” Well, yes and no. It’s true that you’re relying on a password manager to store all your passwords in one centralized location. If someone is able to figure out your master password, they’ll essentially have access to all the passwords you’ve stored. But if it’s locked behind a very strong master password, then your underlying passwords are secure. It’s critical to use a master password that you’ve never, ever previously used anywhere else. Don’t even consider reusing a password from another site, even one that hasn’t been breached yet. It’s important that you also enable 2FA on your password manager to further strengthen its security.
“What if the password manager gets hacked?” If you’re using a good password manager, this is a non-issue. Good password managers utilize very strong, modern encryption standards. If there is a breach and hackers steal all the data, everything remains securely encrypted. Your data remains a jumbled mess that cannot be deciphered without your master password. Your master password is essentially like the private key that protects your information. Not even the password manager company can access the contents. This doesn’t mean you should keep using the same passwords. You have a long window of time available to change your master password and all your underlying passwords.
“What if the web vault goes offline?” Password managers usually store a cached copy of your most recent passwords directly on your device. For example, if you’re using the browser extension or mobile app, you’ll have access to all your most recently synced data available for offline use. This is convenient when the primary password manager site is down for maintenance or you’re in an area with spotty cellular data service.
Additional considerations.
A password manager is not an excuse for you to lapse in other areas of internet security. Although a password manager is an extremely useful tool to generate long, unique passwords for every single site, it is not secure if you aren’t. Password manager companies are resistant to attacks, but it doesn’t mean you also are. If you often browse shady sites or download questionable files, you may find your device infected with malware. Malware can record all your keystrokes to steal your master password or even directly read all the contents of your vault. When is the last time you checked which browser extensions you have installed? Do you fully trust the developers? Most extensions can read and edit all your browser data, and many have turned malicious after securing a large enough user base. Make sure you take security seriously to avoid becoming a victim.
Some sites use multiple different URLs. For example, Hulu, Disney Plus, and ESPN Plus all use the same account credentials regardless of which site you choose to log into. If you first logged into Hulu and added that account to your password manager, you may not see an account available to autofill when visiting Disney Plus or ESPN Plus. That’s because you need to manually add the domains that the account covers, so it can correctly match all the sites it applies to. The same applies to websites that lead you to an interstitial page on a different domain to log in, before redirecting you back to the main site.
Other takeover tactics.
There are other account takeover tactics aside from the ones I’ve mentioned. One example is using security question answers from sites that have been breached. How often do you choose the same exact security questions when creating an account on different websites? Your mother’s maiden name doesn’t change. Neither does your first pet’s name. Or your place of birth. Or your high school mascot. When sites get breached, security questions and answers are also part of that. Hackers can use the same security questions and answers to fraudulently “recover” accounts on sites where you also used the same info. This can completely bypass sending an account recovery or password reset email. It’s a good idea to use fake security question answers and record them in your password manager.
“SIM swapping” has been in the news over the past decade. This is a tactic in which hackers gain access to insiders or pose as you to obtain a copy of your SIM card. They may have a partner working as a customer support agent at a cell carrier who can process a duplicate SIM. Or they have partners who go into physical stores with a fake ID to impersonate you and obtain the replacement SIM. This means they’ll silently gain access to all your incoming SMS messages, like 2FA codes. Those codes can then be used to break into your accounts. All the major carriers have optional features available to significantly reduce the possibility of a SIM swap. AT&T has Wireless Account Lock, Verizon has SIM Protection, and T-Mobile’s is also called SIM Protection.
Of course, there are other kinds of attacks that are in use. It can even be as simple as social engineering a customer support rep. You can never be too careful as threats are ever-evolving. Stay safe.
April 1, 2026: Polished for better readability and fixed grammatical mistakes.
October 22, 2025: Included a code snippet that automatically boots the PC into BIOS.
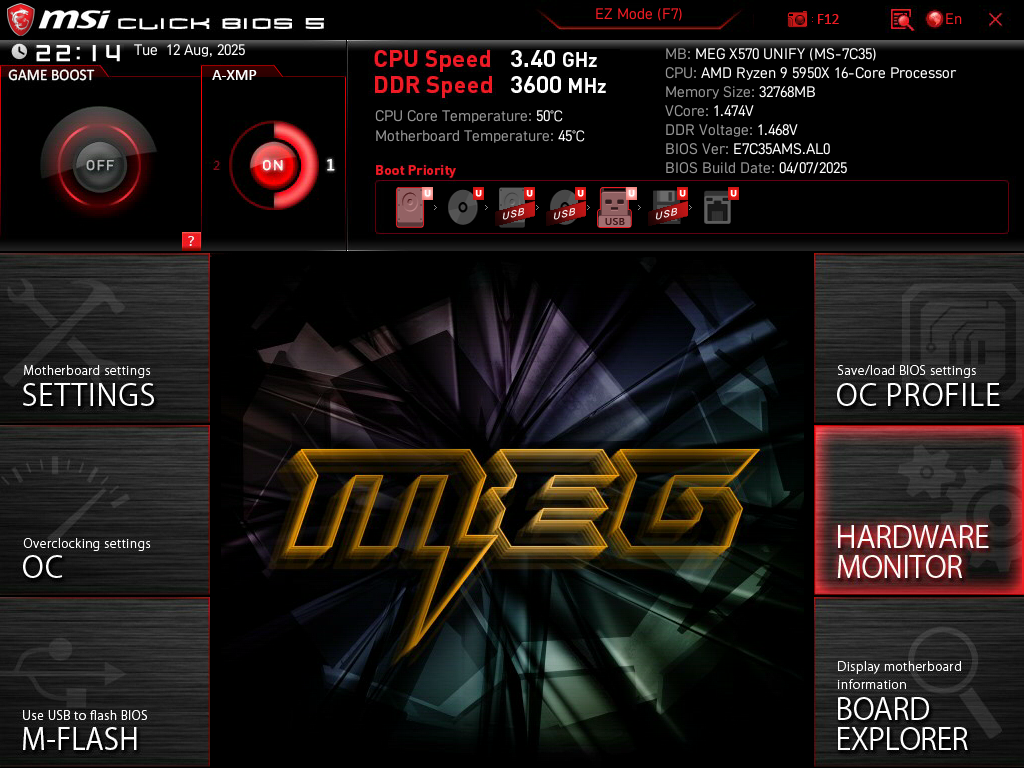
Whether you’ve just built a new computer or want to double-check your existing settings, this guide is for you. Find out how to get the most out of your AMD system by correctly configuring your motherboard BIOS. Don’t just leave everything running at factory defaults.
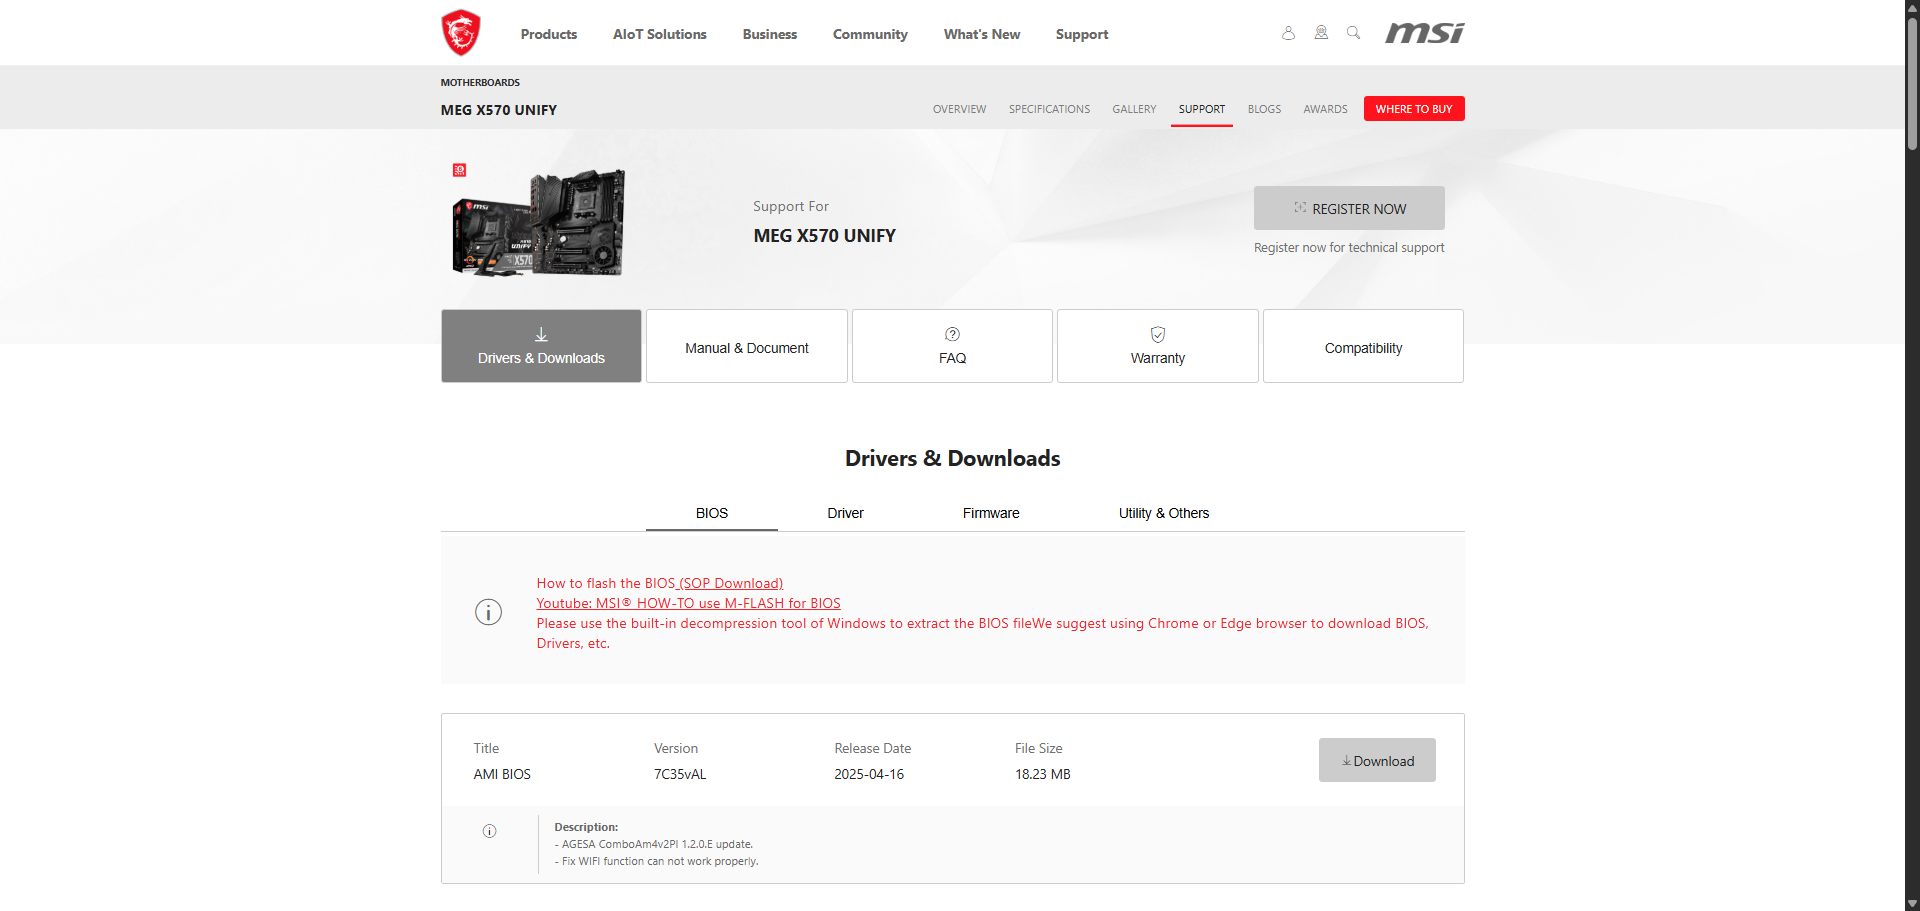
BIOS firmware update.
Always start by ensuring that your BIOS firmware is up to date. Visit the Support section of your motherboard product page. For MSI, it should be under Support > Drivers & Downloads > BIOS.
Download the latest version and extract the contents onto a USB flash drive. Your flash drive will most likely need to be formatted with FAT32, otherwise your motherboard may not be able to detect the flash drive or read the contents. If you have BitLocker enabled on your computer, now is a good time to use the “suspend protection” option, or else it will prompt you to enter your recovery key after the BIOS update. This option temporarily suspends BitLocker protection during the next boot and automatically re-enables it right afterwards.
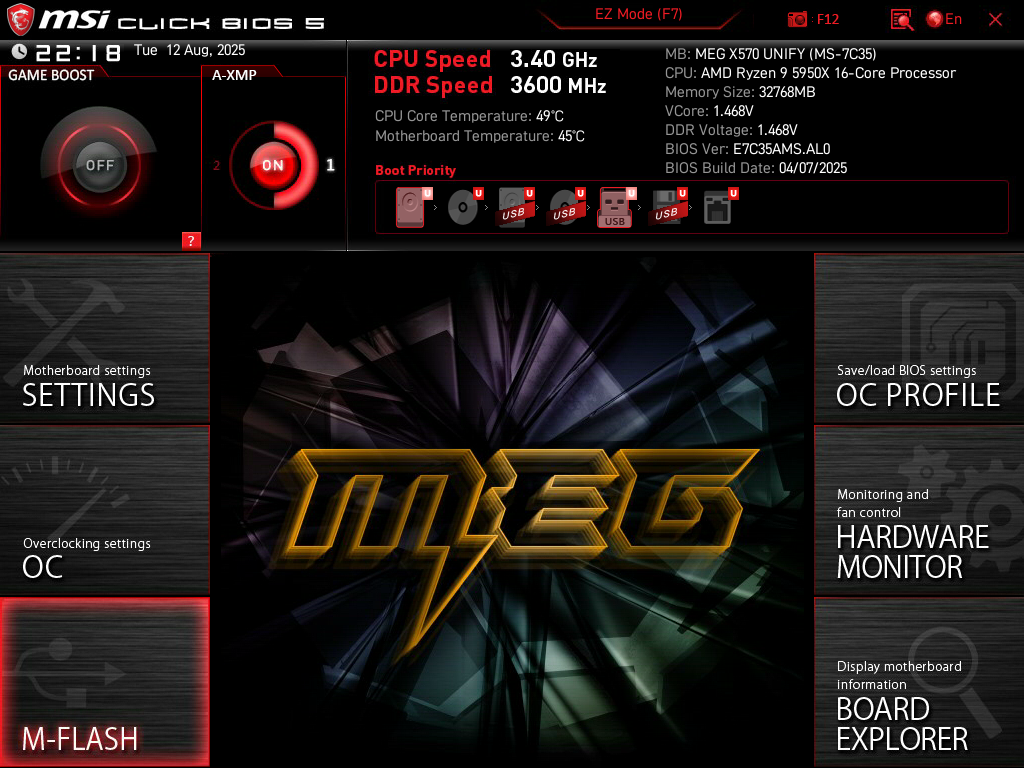
Reboot your computer with the flash drive still plugged in. As your computer powers back on, keep pressing the DEL key on your keyboard to enter the BIOS. Most motherboards use DEL as the BIOS key, but yours may be different. You can navigate through the BIOS by using your keyboard and sometimes also your mouse, depending on the motherboard. Choose the option to flash your BIOS firmware (for MSI, this is called M-Flash).
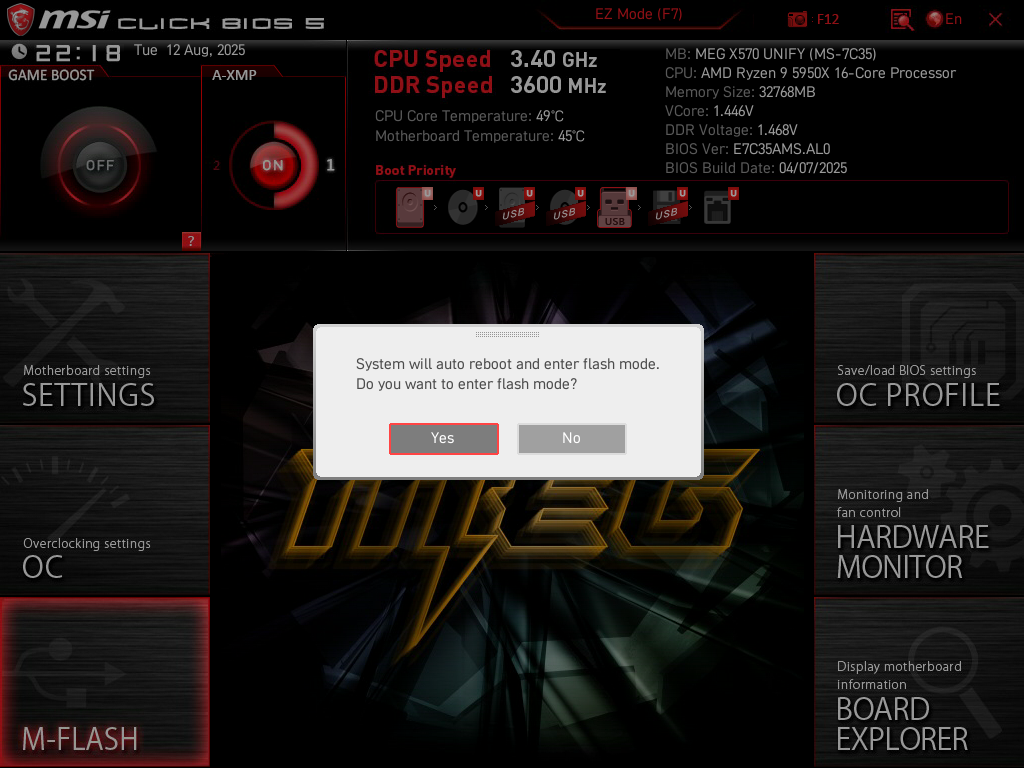
You may receive a prompt asking if you want to automatically reboot your PC into flash mode. Select “Yes” and proceed. On the following screens, you’ll be able to select the new BIOS file from your flash drive and complete the flashing process.
When the BIOS update is finished, your PC will automatically reboot again. As it starts up, keep pressing the DEL key to enter the BIOS again. You can verify that the correct BIOS firmware was loaded by checking the BIOS version or BIOS Build Date information at the top of your screen. The build date may not always exactly match what’s listed on the website, but it should be roughly the same date.
If you’re having trouble getting into the BIOS, open a Command Prompt window with administrator privileges (“Run as administrator”) and use the command below. It will automatically restart your PC and boot directly into the BIOS.
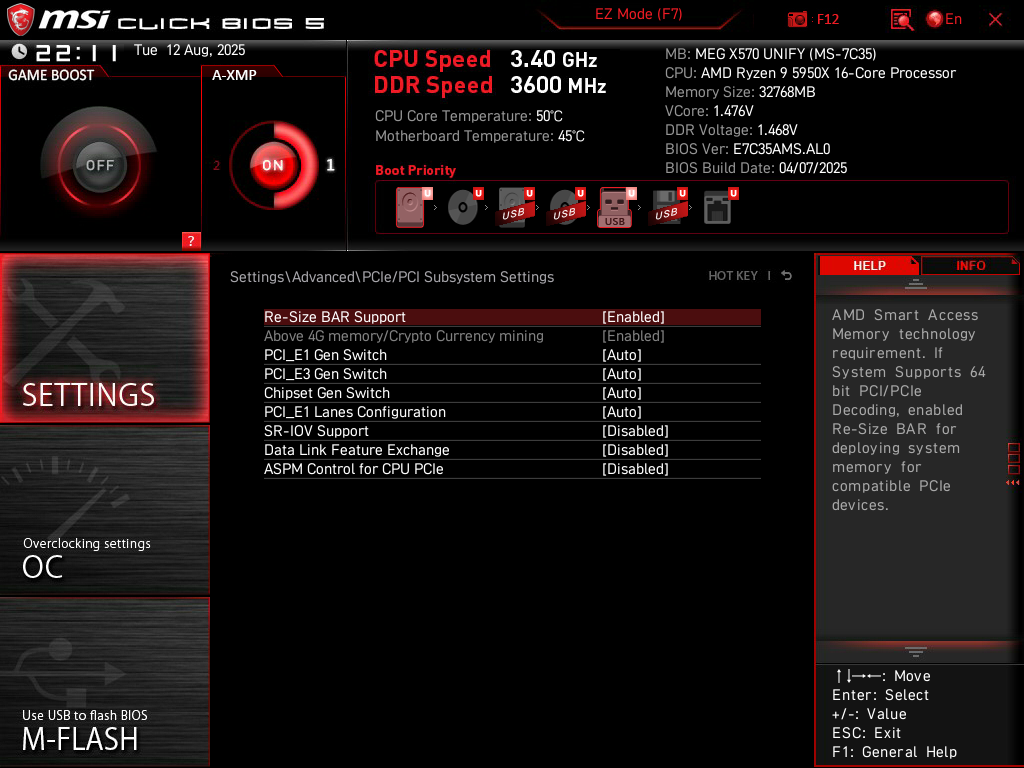
Turn on Re-Size BAR Support. This should automatically enable Above 4G Memory as well. Resizable BAR is a feature that allows your CPU to directly access the VRAM on your graphics card, resulting in improved performance.
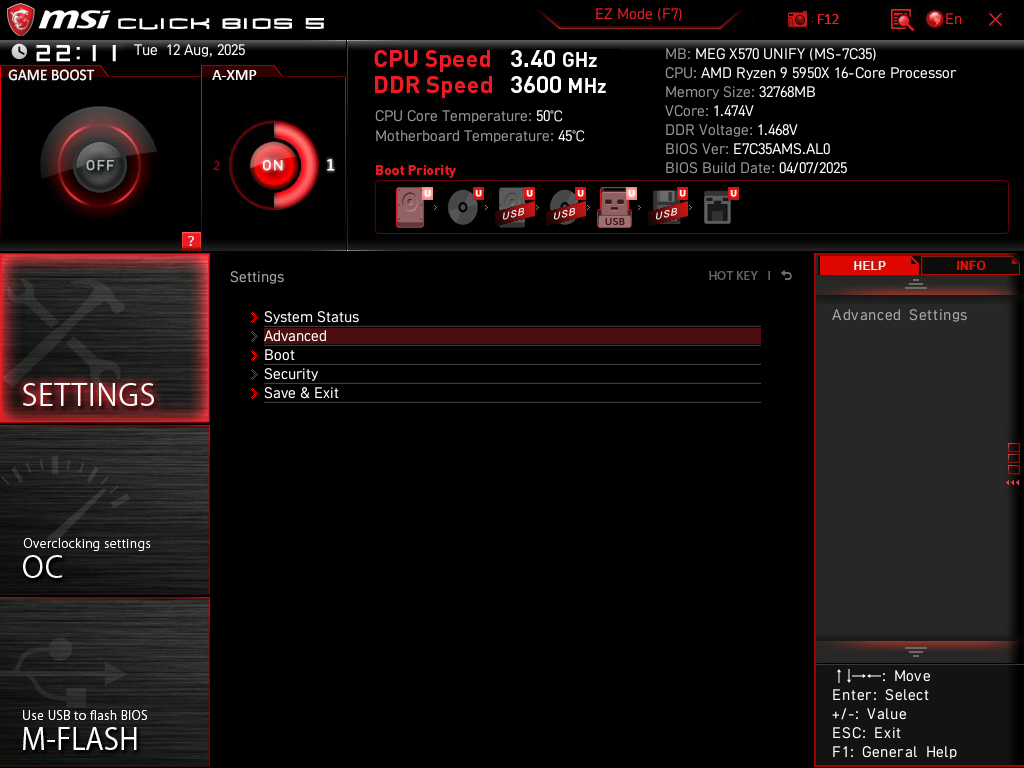
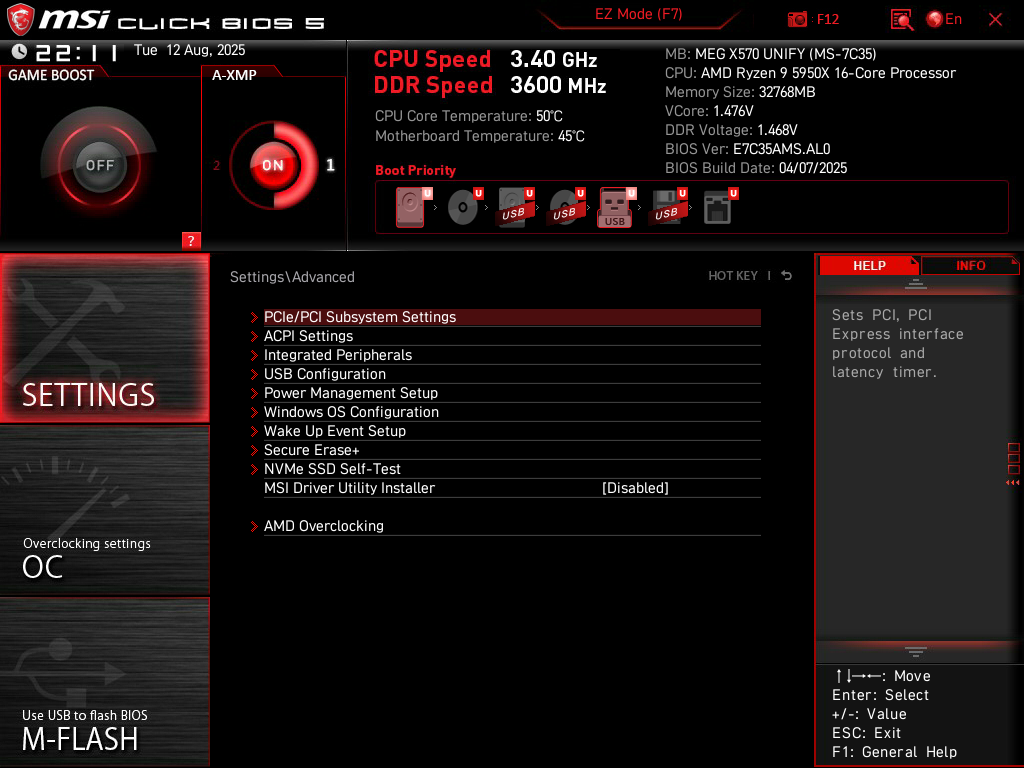
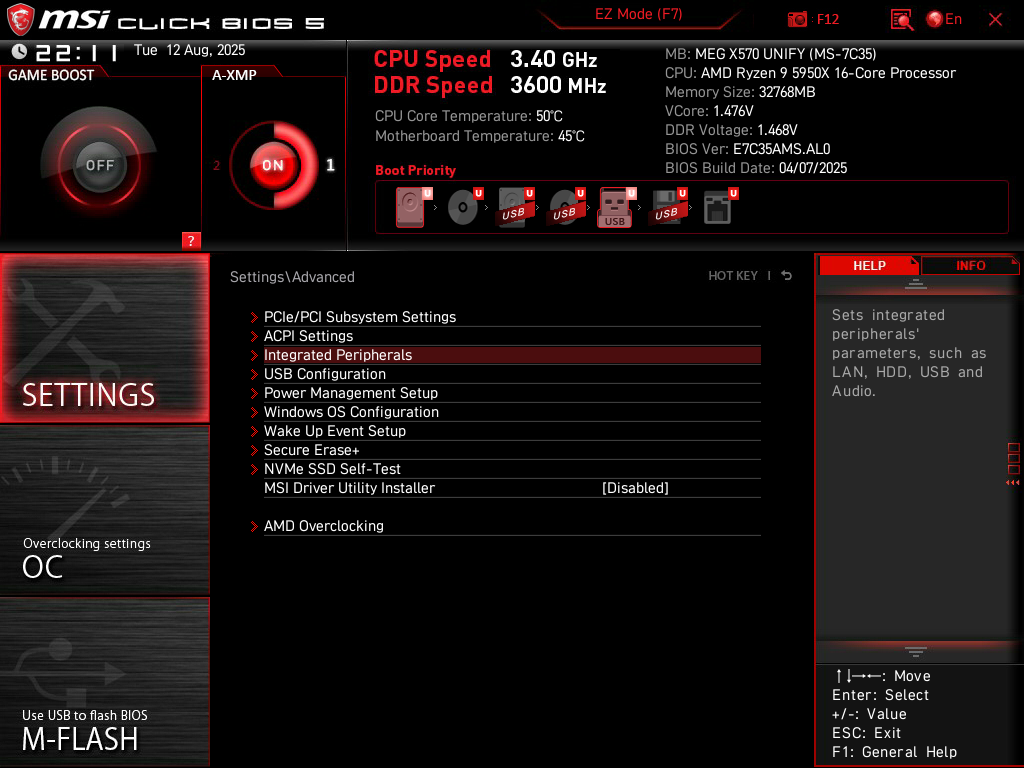
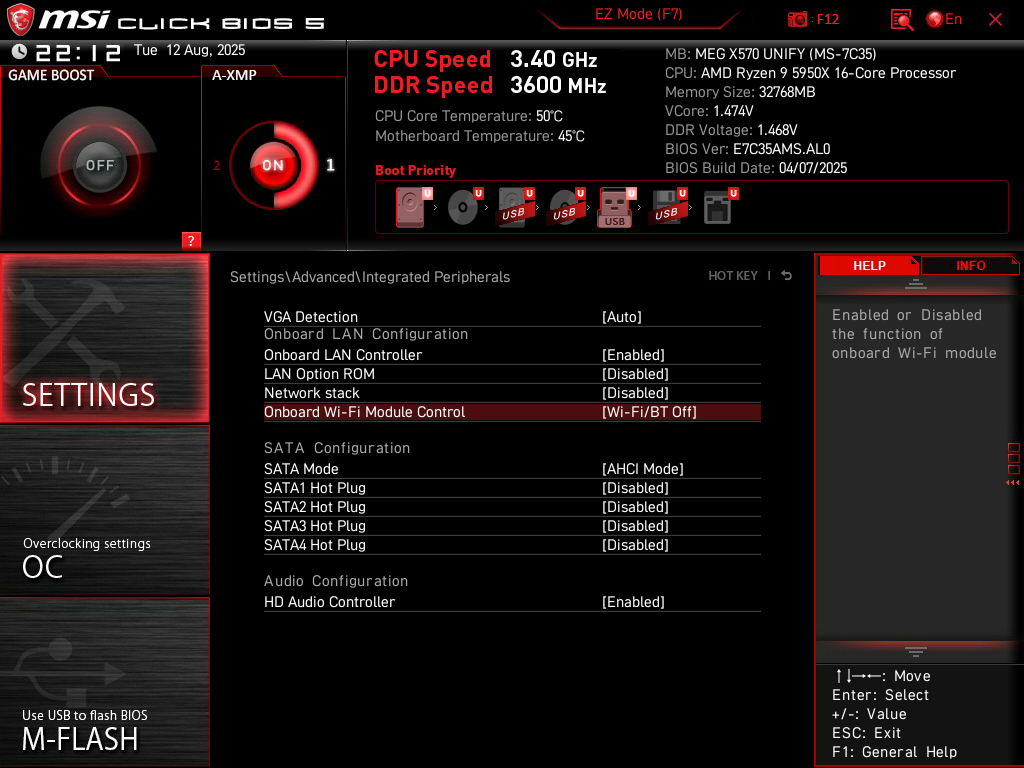
Settings > Advanced > Integrated Peripherals.
The Onboard Wi-Fi Module Control should be configured based on your usage. For example, if you only use Ethernet, you can turn off the Wi-Fi functionality on your motherboard. Disabling Bluetooth is also an option here, if desired.
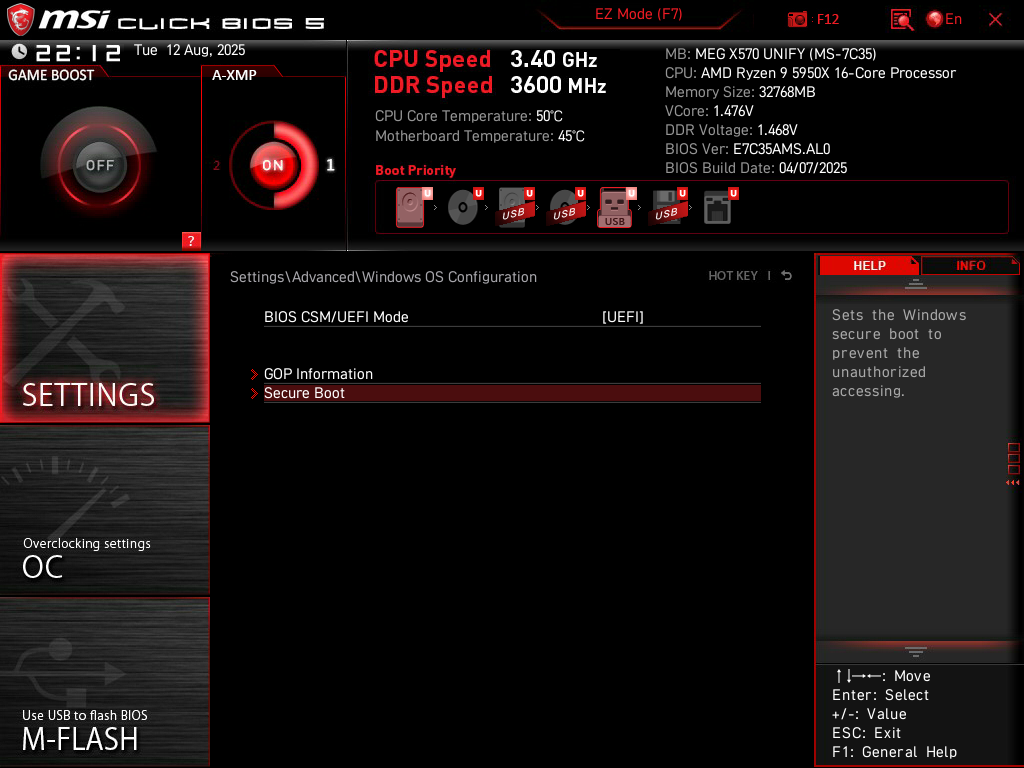
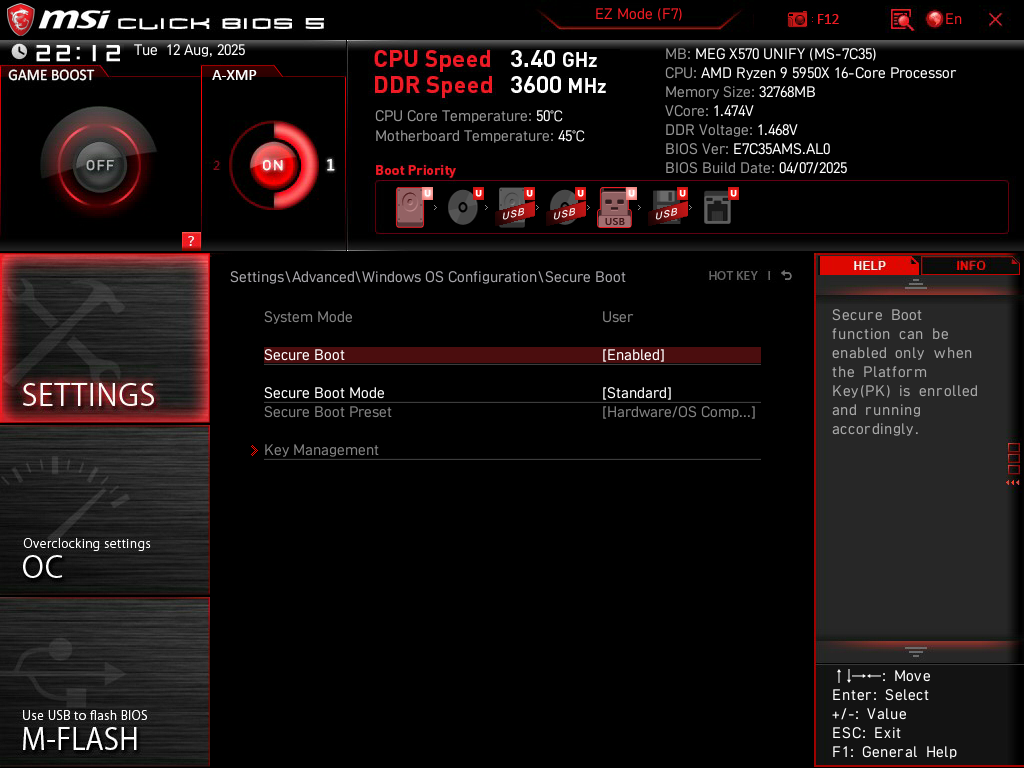
Settings > Advanced > Windows OS Configuration > Secure Boot.
Enable the Secure Boot setting. This ensures that only trusted software is run when your PC boots up. Games such as Valorant and Battlefield 6 also require Secure Boot to be enabled.
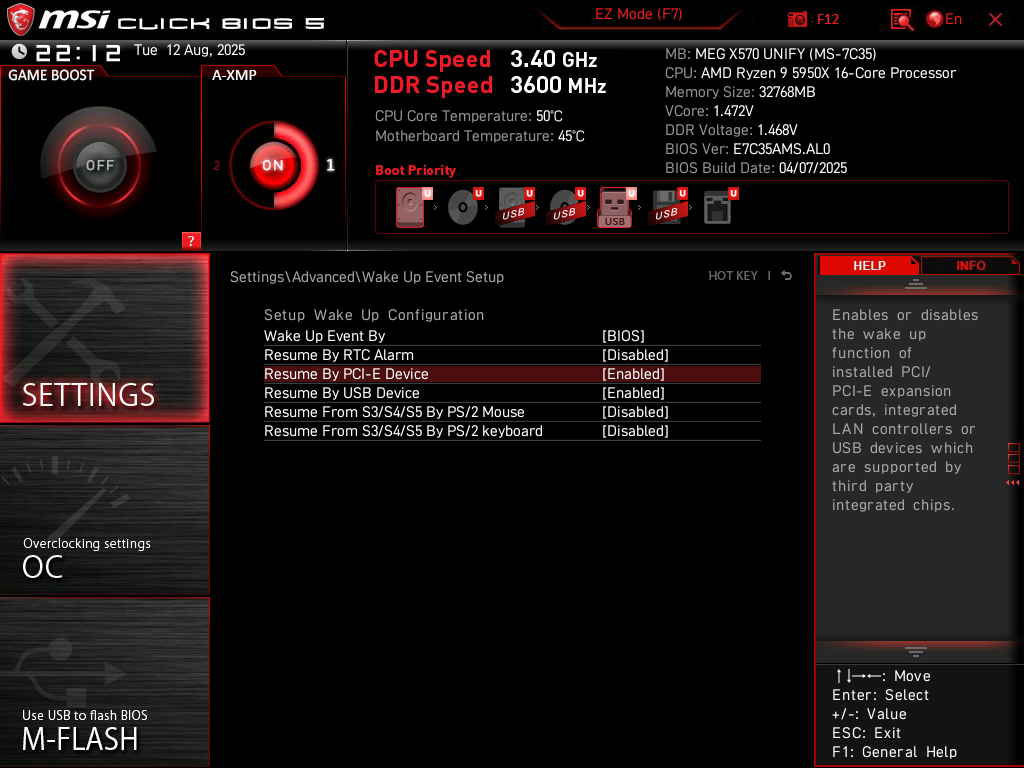
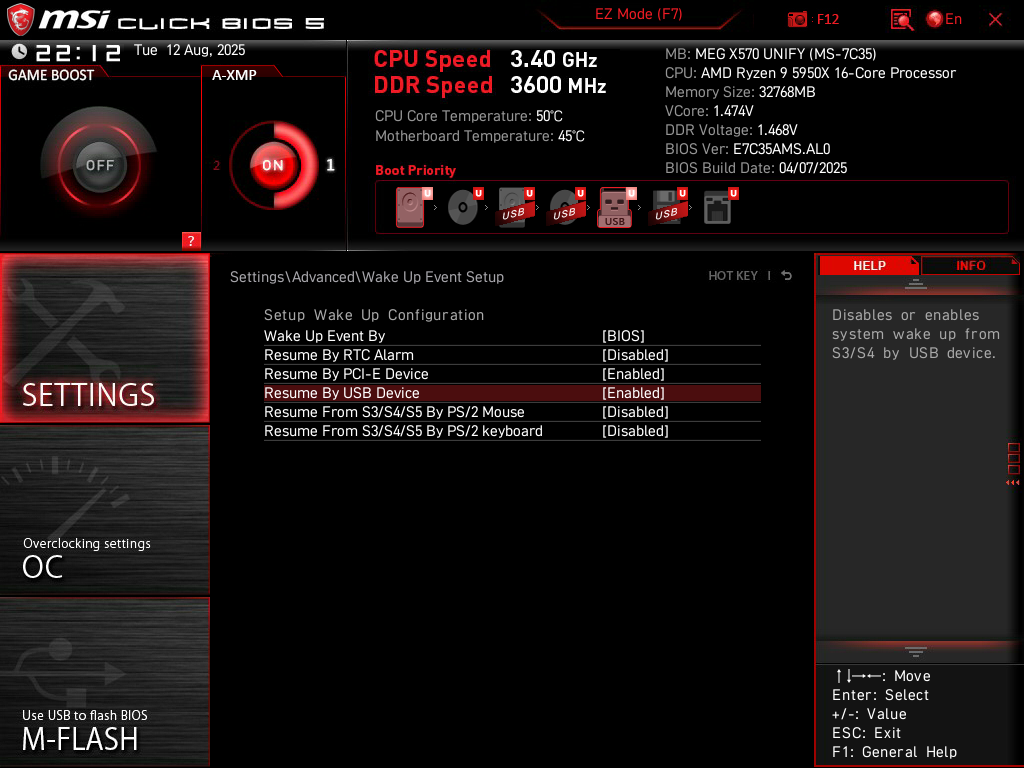
Settings > Advanced > Wake Up Event Setup.
Enable the Resume By PCI-E Device setting if you use WoL (Wake-on-LAN) functionality. Enable the Resume By USB Device setting if you want to charge peripherals such as your wireless mouse while the PC is shut down.
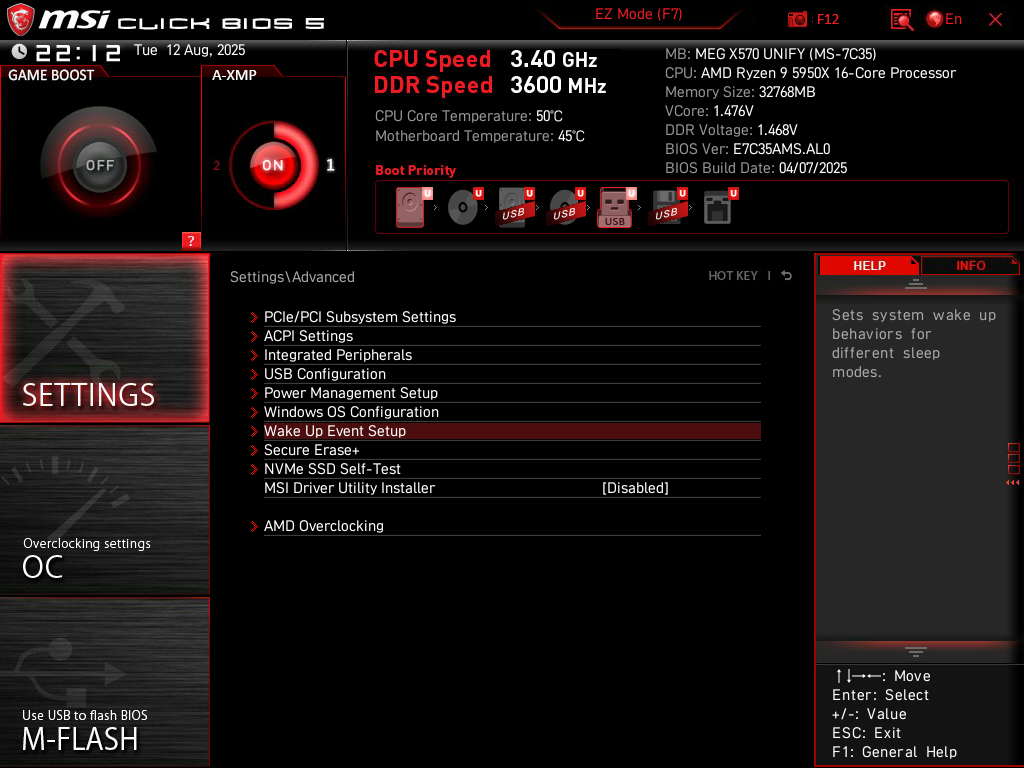
Settings > Advanced.
Disable the MSI Driver Utility Installer. If you leave this enabled, your motherboard may install unnecessary software on your PC. You do not need their automatic driver updater, which may also install additional bloatware on your computer.
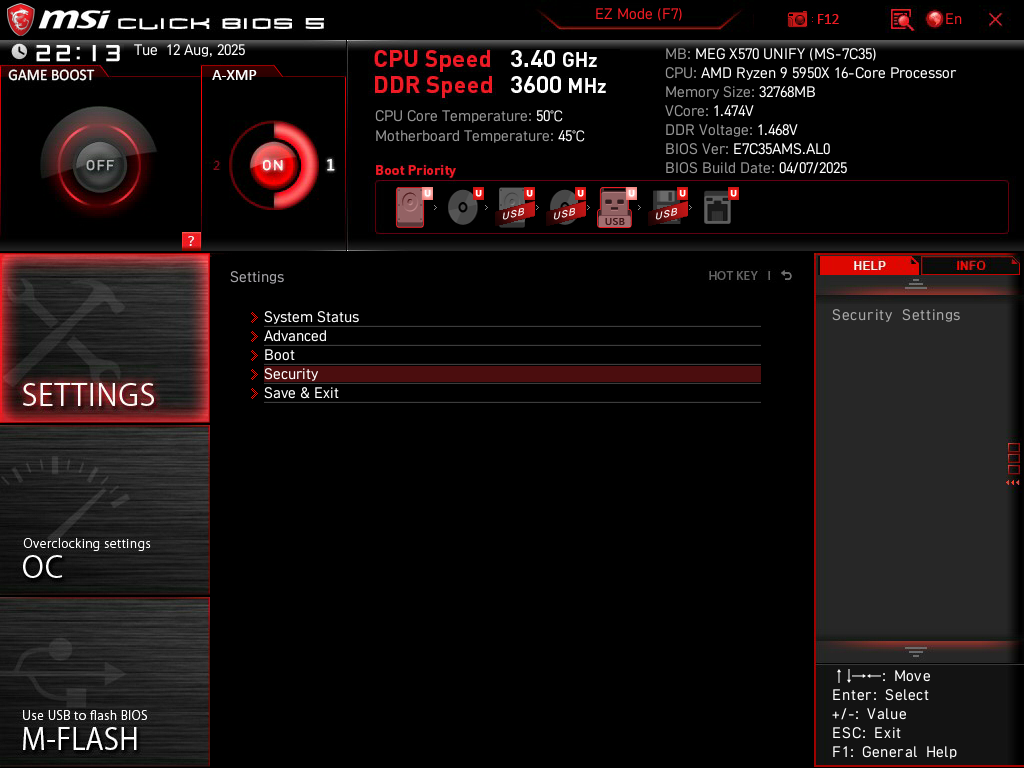
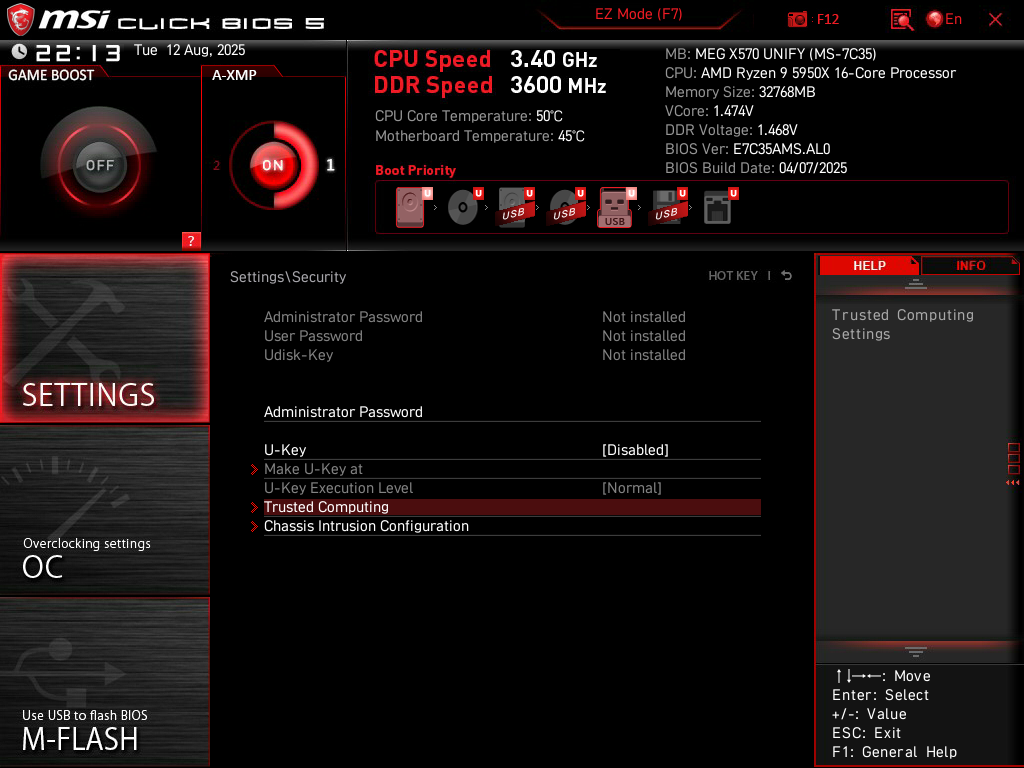
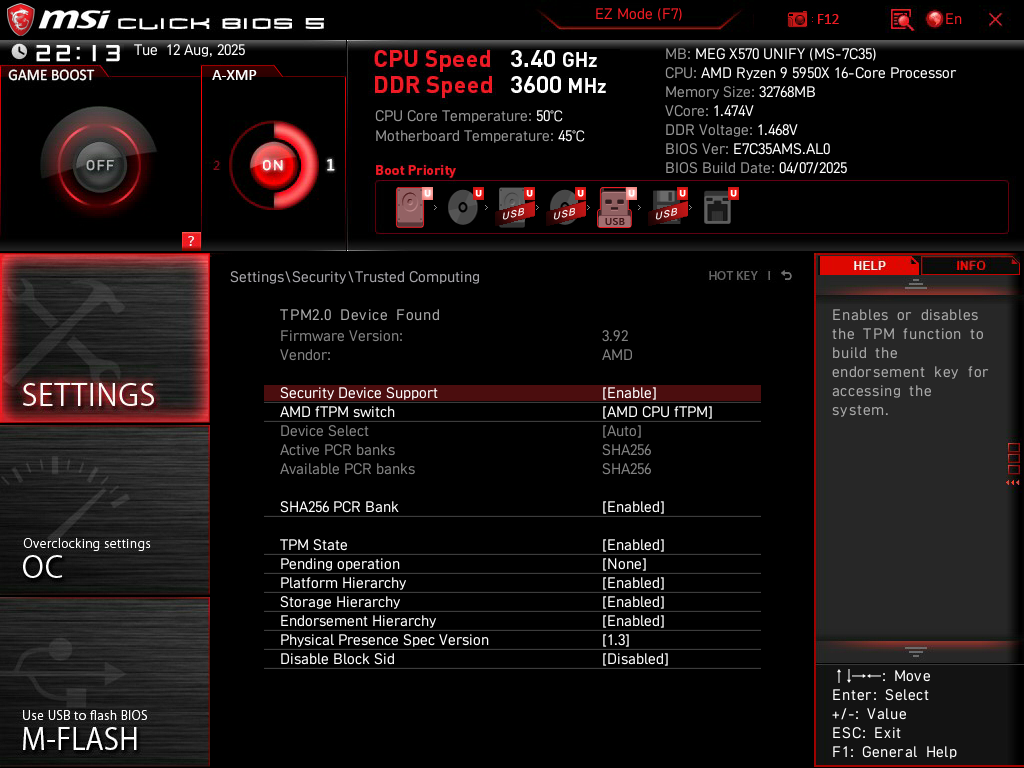
Settings > Security > Trusted Computing.
Enable the Security Device Support setting. This should automatically turn on the AMD CPU fTPM as your TPM (Trusted Platform Module). The TPM is a secure location where cryptographic keys are stored, helping maintain platform integrity. Having a TPM is also a requirement to run Windows 11.
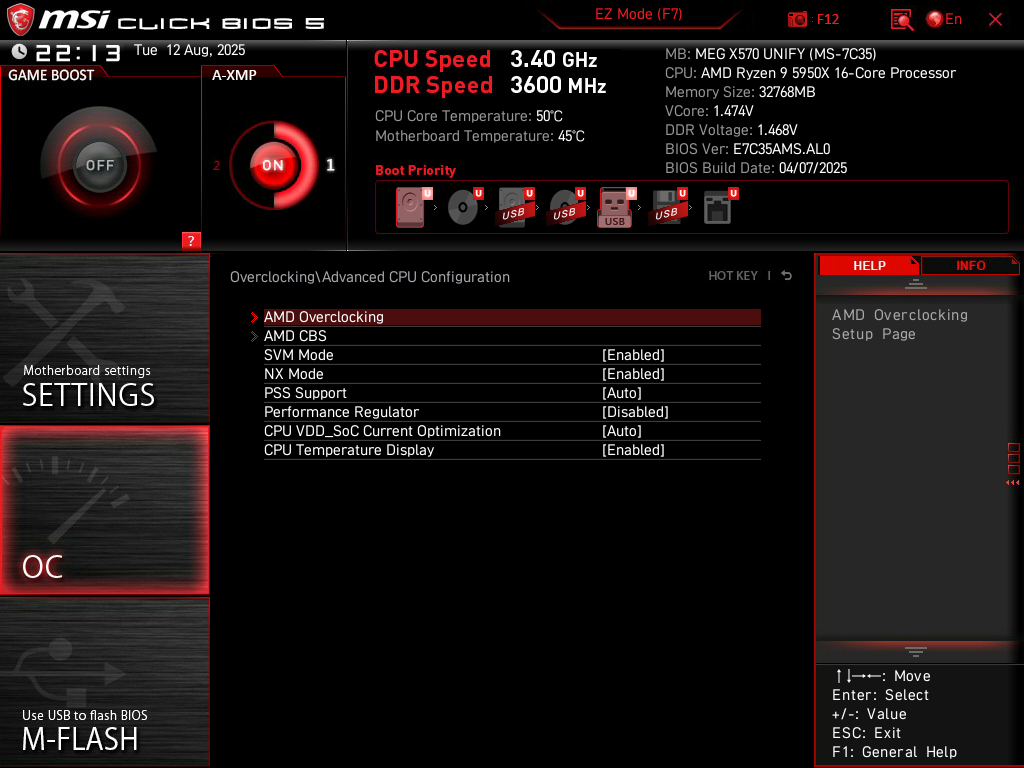
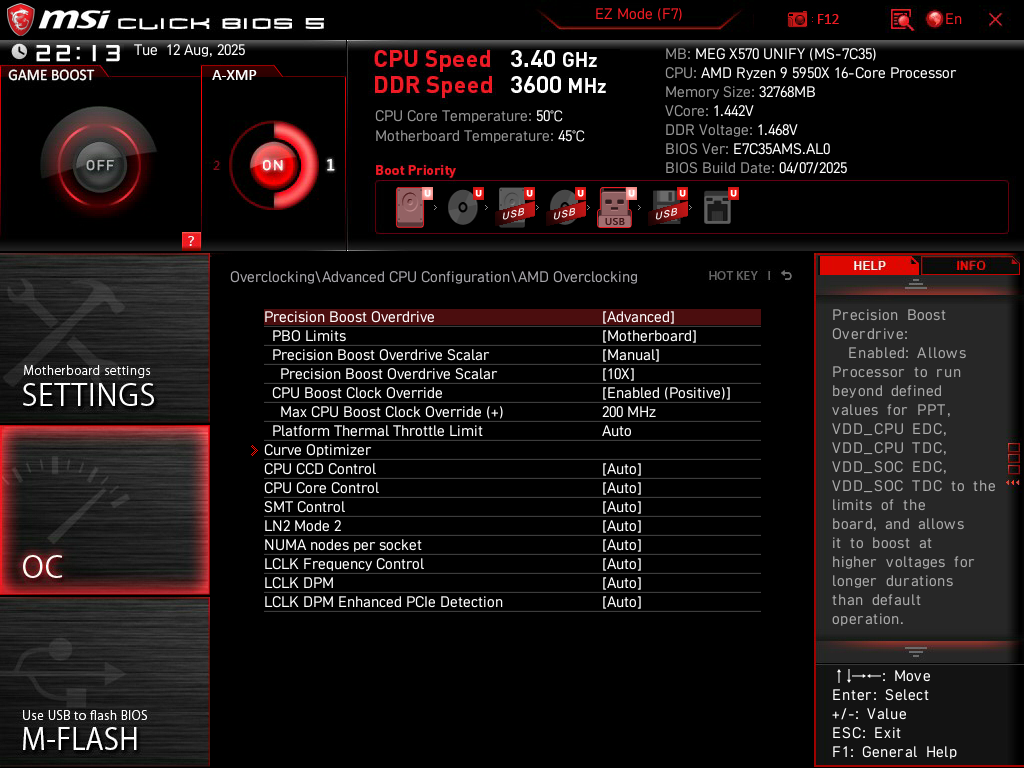
OC > Advanced CPU Configuration > AMD Overclocking.
Set Precision Boost Overdrive to Advanced. Set PBO Limits to Motherboard. Set Precision Boost Overdrive Scalar to Manual, and its sub-setting to 10X. Set CPU Boost Clock Override to Enabled (Positive), and its sub-setting to 200MHz. These settings allow your processor to boost as high as it can go (when necessary) if there is enough power, voltage, and thermal headroom. This is essentially a dynamic overclock that is still extremely stable.
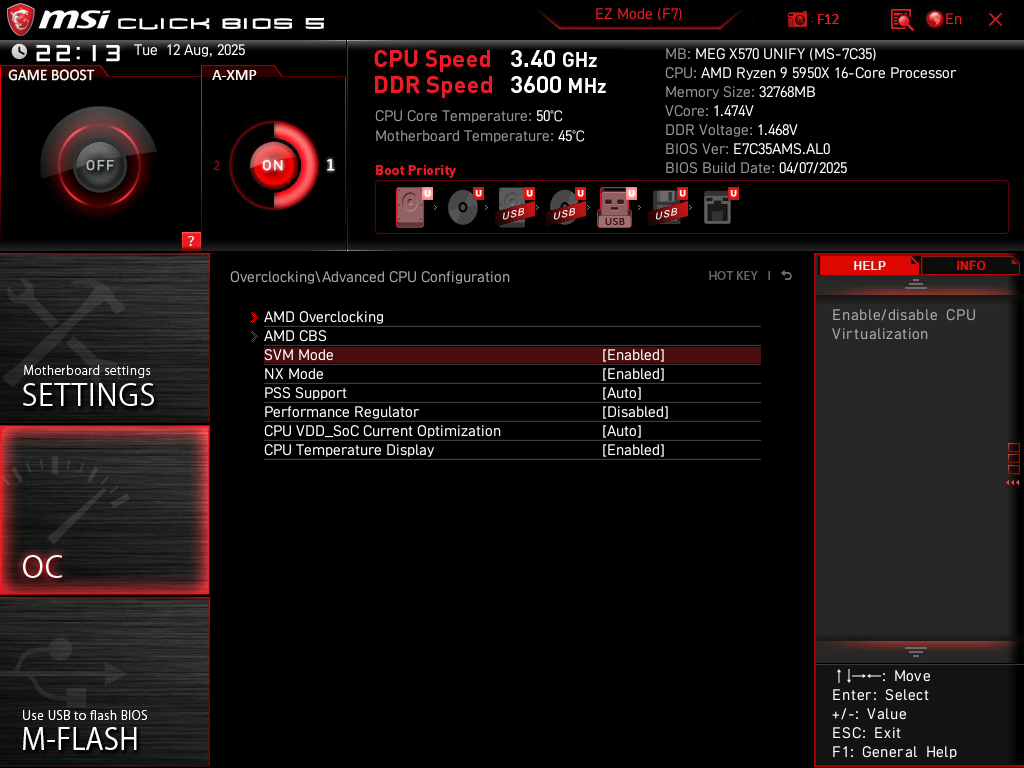
OC > Advanced CPU Configuration.
Enable SVM Mode. This activates virtualization capabilities on your CPU, such as the ability to run virtual machines. This is also important for Windows, since some core isolation security features rely on virtualization.
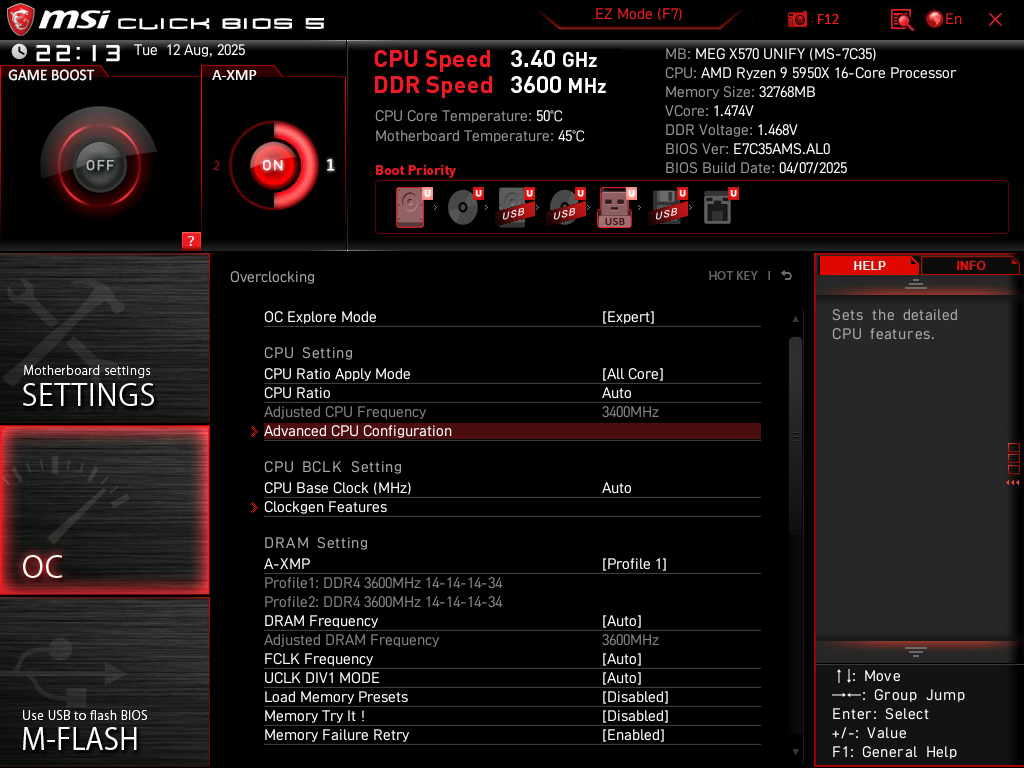
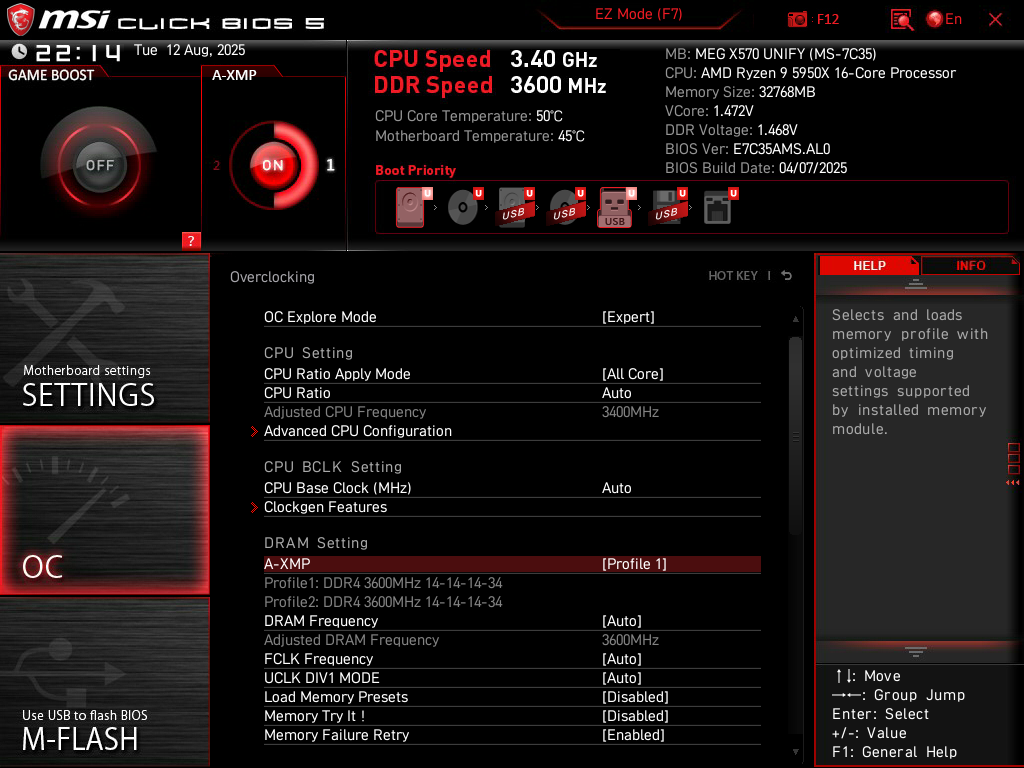
OC.
Enable A-XMP (or EXPO if you’re on a newer AMD platform). Sometimes there is more than one profile available, with both profiles showing the same speeds and timings. In that case, just choose the first profile. If the two profiles are different, the frequency is usually the same between them, but the timings may be different. Choose the one with the lower timings. Activating a RAM profile allows your memory to run at the advertised speeds instead of at lower JEDEC speeds.
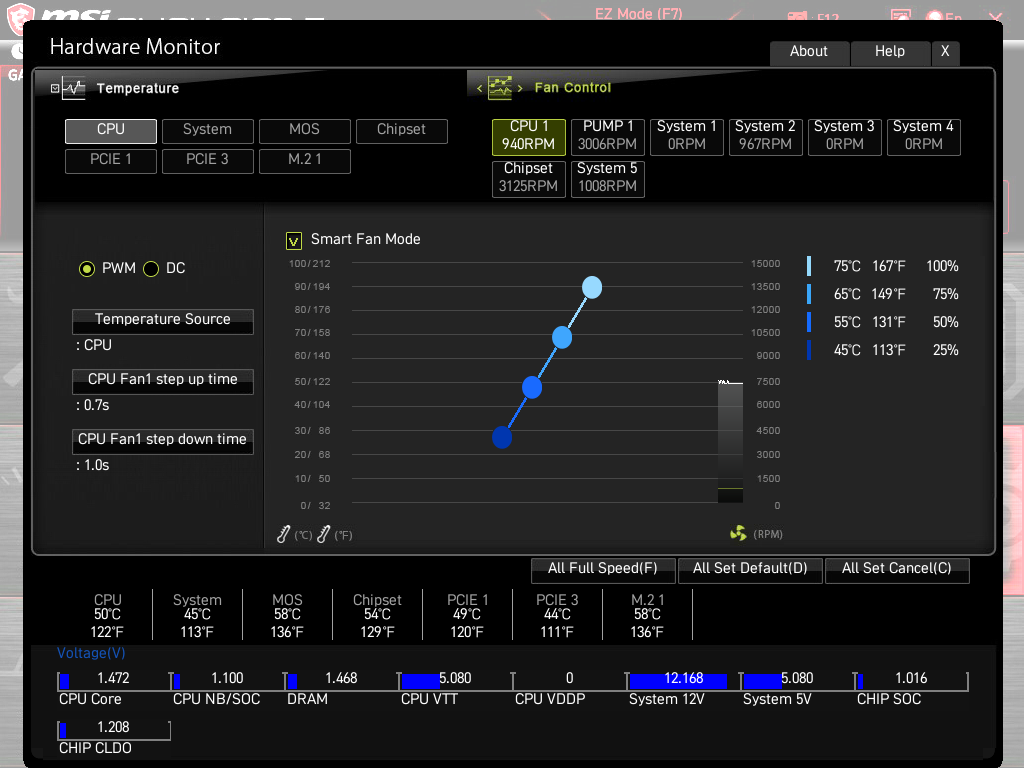
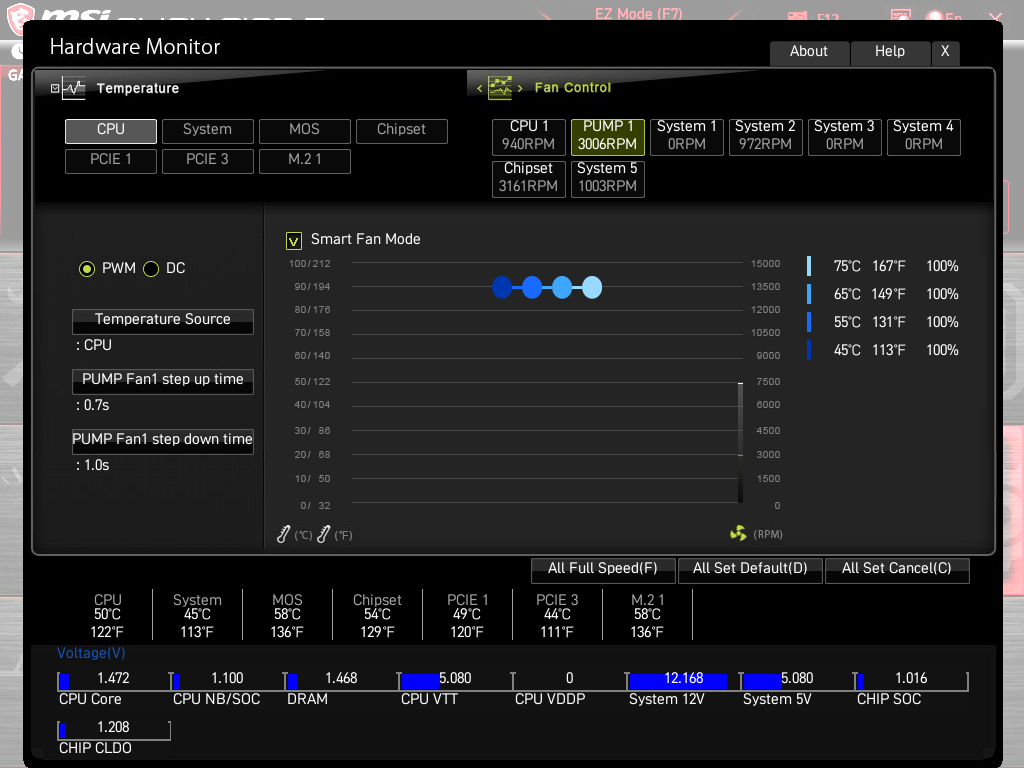
Hardware Monitor.
For each of your fans, ensure that you have the correct fan option selected. If your fan supports PWM (4-pin header), make sure that it’s set to PWM. If your fan is a DC fan (3-pin header), make sure that it’s set to DC.
For each of your fans, set the Step Up Time and Step Down Time to the maximum possible values. On MSI motherboards, the maximum step up time is 0.7s, and the maximum step down time is 1.0s. You may have to scroll down in the dropdown menu to see the 1.0s value. These settings allow your fans to gradually rise or drop in speed instead of instantly jumping to different RPMs, which can be annoying and jarring. This is also completely fine to do, since it takes time for CPU heatsinks or liquid coolers to start soaking up the heat. There is no reason to instantly ramp the fans to maximum speed simply because the processor is momentarily heating up. The fans will always reach the appropriate speeds well before the heatsink or liquid cooler reaches the saturation point.
Turn on Smart Fan Mode for each fan and you’ll be able to customize their fan curves on the right side of your screen. The one in my screenshot is aggressive, but could be a good starting point depending on your preferences. For my quiet builds, I set the temperature targets higher (100% fan speed at 90C, 75% fan speed at 80C, 50% fan speed at 70C, and 25% fan speed at 60C). If you’re using a liquid cooler, I suggest running the pump at full speed at all times (simply set the speed to 100% across all temperature targets).
April 1, 2026: Polished for better readability and fixed grammatical mistakes.
You’re starting your journey into building computers. There are so many options out there. How do you choose the right parts for your rig? I’ll guide you through the process of selecting the correct parts to optimize your build.
Chassis.
Although this is mostly personal preference since everyone has their own tastes in design and color schemes, there are certain things that you want to consider. Are you planning to build a small, medium, or large PC? The computer case needs to be compatible with the other parts you plan to install.
For example, if you’re installing an ATX-sized motherboard, you cannot select a small case that only supports motherboards up to mATX. Likewise, if you’re planning to install a 360mm liquid cooler into your system, you cannot select a case that only supports radiators up to 280mm. You also need to check the length of the graphics card that you’ve been eyeing. Your chassis should be able to fit the graphics card you choose, specifically the length, as modern graphics cards have been getting progressively longer.
Select a chassis that you like, but make sure it’s compatible with everything else that you’re choosing. I personally like cases from Fractal (Fractal Define 7 series) and NZXT (H5 Flow series).
Processor.
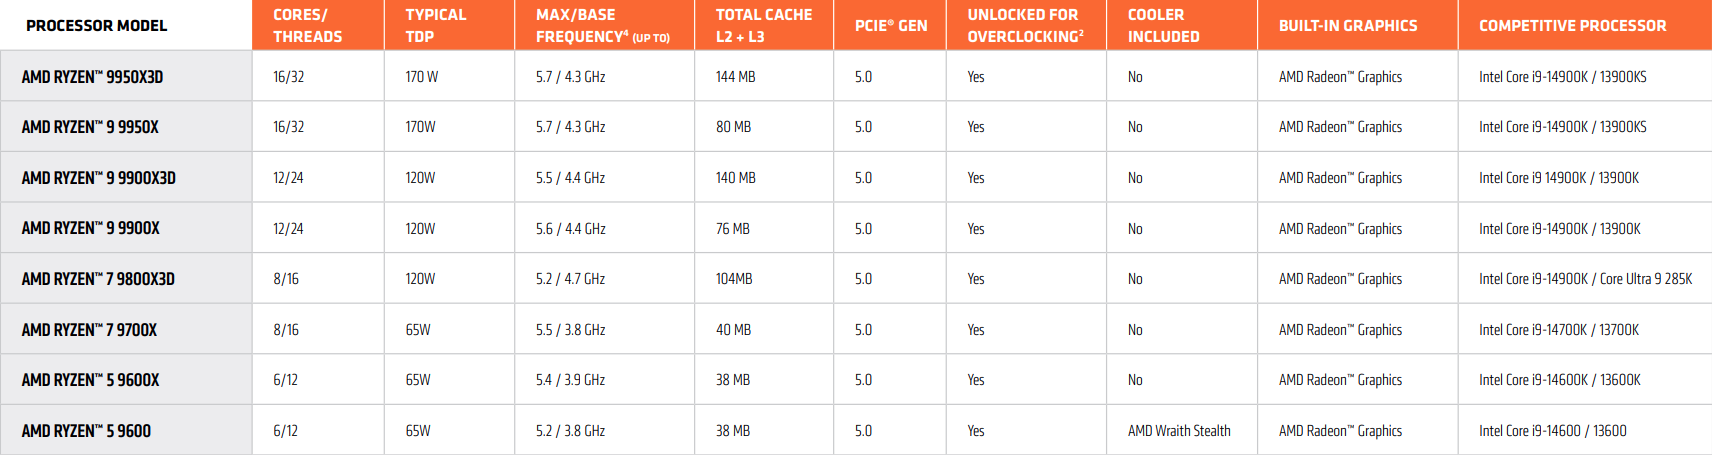
I recommend buying one of the newest-generation processors. The two major players in this space are Intel and AMD. The latest processors will typically offer the best efficiency and performance improvements. At the time of this post, AMD’s current processor family is the Ryzen 9000 series (Zen 5).
The processor models ending in “X3D” have AMD 3D V-Cache technology, which features vertically-stacked cache. This allows for considerably more cache on the processor (the fastest type of memory) for extremely low-latency operations. The system can therefore rely less on RAM (much slower compared to processor cache). At the moment, these “X3D” processors are the highest-performing chips for gaming.
AMD processors have a chiplet architecture, where each group of cores is in a CCD (Core Chiplet Die), with up to eight cores per CCD. If you’re purchasing a processor purely for gaming, then the AMD Ryzen 7 9800X3D is the optimal CPU for you this generation. It has one fully-loaded CCD with V-Cache. All tasks reside on the single CCD instead of distributing work across two. It’s an amazing all-around performer even outside of gaming.
If your work requires even heavier multi-threaded performance (like for rendering jobs), then one of the higher X3D processors is right for you. If you want the best consumer processor this generation, get the AMD Ryzen 9 9950X3D for the optimal performance across any workload.
If you want to quickly compare the performance of multiple processors, then visit the PassMark site and search for the name of your CPU. Pay attention to both the single-threaded and multi-threaded scores. You can also take a look at various benchmarks across the web.
Motherboard.
The processor you choose will determine your motherboard platform. The current generation of AMD desktop processors (Ryzen 9000 series) uses an AM5 CPU socket. The current generation of Intel desktop processors (Ultra 2 series) uses an LGA1851 socket. Since I recommended AMD processors above, we’ll take a look at AM5-socket motherboards.
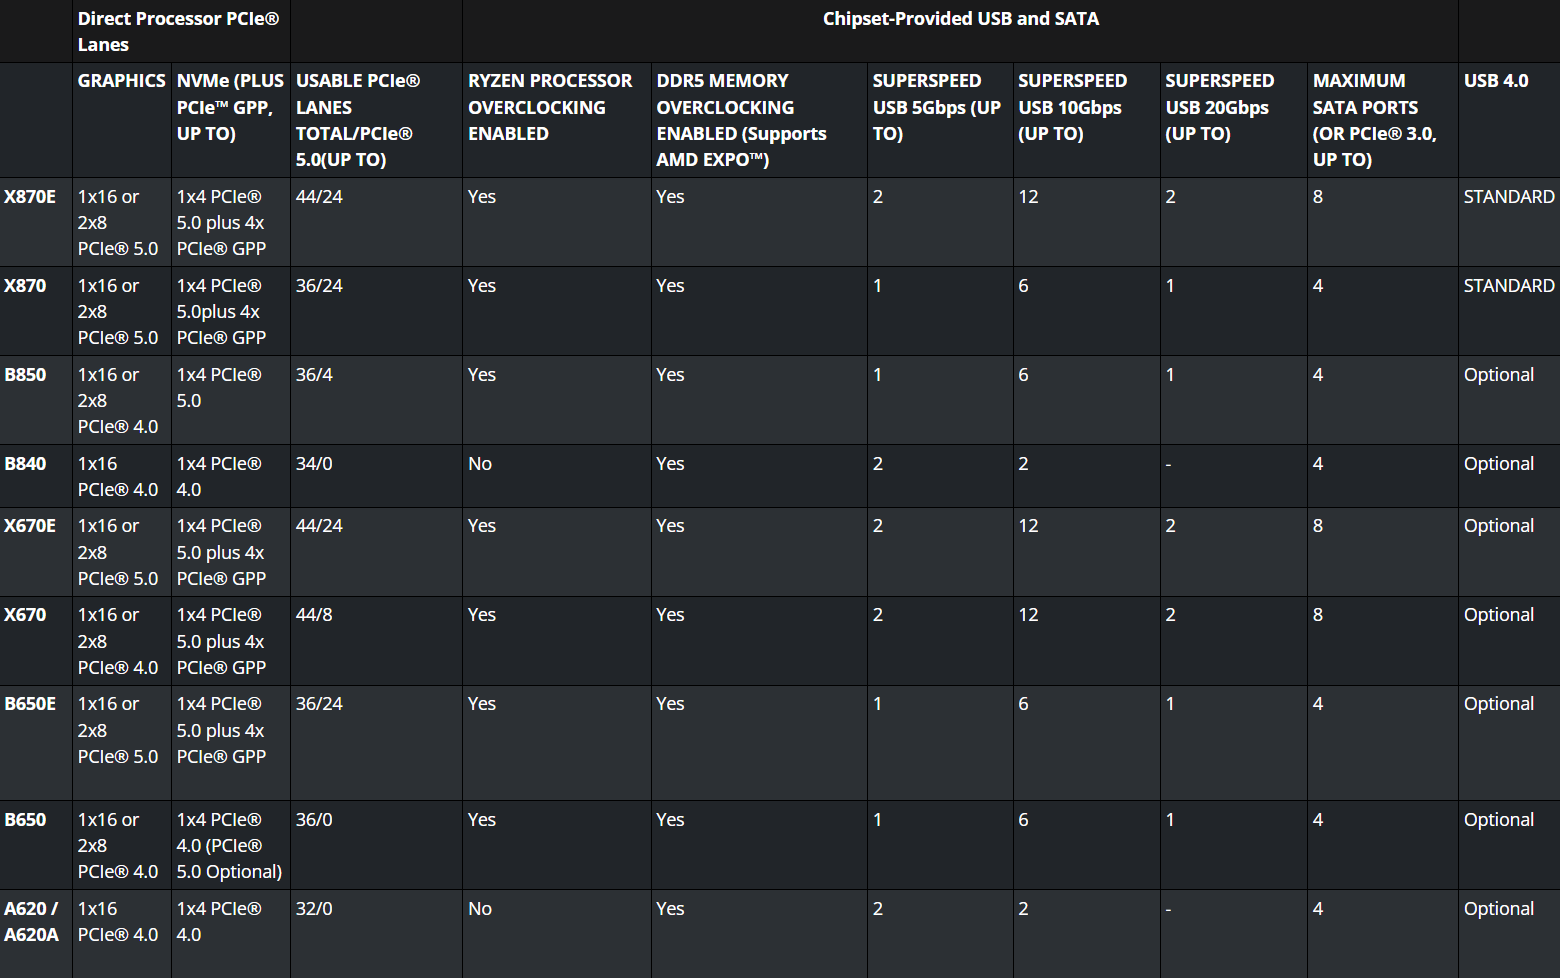
The first step is to look up which motherboard chipsets are compatible with your socket. For AM5, there are currently two chipset series available (600 series and 800 series). Newer generation chipsets are usually recommended since they have the latest features and will be supported for longer. In this case, that narrows it down to the 800 series, which includes the X870E, X870, B850, and B840 chipsets.
For all the systems I build, I typically opt for an “X” variant chipset instead of the more basic “B” variants. You’ll get more USB ports, and PCIe 5.0 compatibility for both your graphics card and NVMe drive. If you’re on a budget, you can choose the cheapest X870 motherboard available.
I typically suggest a mid-range or higher X870 motherboard from MSI, but any major vendor works. Check the specs and make sure you have the features you need (like built-in WiFi connectivity or a 2.5G ethernet port). You don’t need to step up to an X870E motherboard unless you require even more USB ports or more PCIe lanes. Standard X870 motherboards will already have sufficient VRMs and power delivery to support even the highest AMD Ryzen processor.
Graphics card.
As with the processor advice, stick with the current-generation hardware. The three major players in this space are Nvidia, AMD, and Intel. For graphics, I typically recommend going with Nvidia. At the time of this post, the GeForce RTX 50 series is the newest generation of GPUs.
The current generation of graphics cards supports features like Multi Frame Generation, which uses AI to “fill in” multiple frames between two real ones, enhancing visual smoothness. For games without native MFG support, Smooth Motion is an available driver-level solution in the Nvidia App that attempts to do the same thing, although not as precise, since it has much less data to work with.
Aside from prominent features like MFG, there are other improvements under the hood, including the newest Nvidia video encoder (NVENC) and Nvidia video decoder (NVDEC). NVENC is important for those who livestream, record gameplay, or deal with video workflows. The latest chips feature massive gains in performance and efficiency, including AV1.
The graphics card that you choose should pair nicely with your processor. It wouldn’t make much sense to pair the highest-end GeForce RTX 5090 graphics card with a last-gen Ryzen 5 7400F processor. Likewise, you wouldn’t usually pair the highest-end Ryzen 9 9950X3D processor with a low-end GeForce RTX 5050 graphics card. You can easily find benchmarks online to make sure one part isn’t heavily bottlenecking the other.
Some cards may have more than one configuration. For example, the GeForce RTX 5060 Ti card has an option for 8GB VRAM or 16GB VRAM. When there are two configurations available for the same chip, it’s highly recommended to go for the one with higher VRAM. Benchmarks show that the higher VRAM variants perform significantly better than the lower VRAM versions. The added memory is even more important when you play on higher resolutions, like 1440p instead of 1080p.
Your choice of graphics card comes down to your budget. Of course, if budget is not an issue, then go with the GeForce RTX 5090. Most people wouldn’t spend over $2,000 on an enthusiast graphics card, so a GeForce RTX 5080 would be the perfect high-end choice. The GeForce RTX 5070 Ti also uses the same die as its older brother (GB203-300), so it’s a good option if you can’t splurge. As for mainstream graphics cards, the GeForce RTX 5070 and GeForce RTX 5060 Ti graphics cards are good options. I wouldn’t recommend a GeForce RTX 5060 or lower unless you’re on a strict budget.
Founders Edition cards are made by Nvidia and are sold at true MSRP. They hold their value over time better than other card versions. If you don’t have access to a Founders Edition card, I recommend purchasing a card from PNY. They are the last remaining board partner here in the United States after EVGA left the graphics card market. If you’re unable to find both Founders Edition and PNY versions of your card, the last board partner I recommend is MSI. I usually avoid Asus, Gigabyte, and Zotac cards based on anecdotal evidence of terrible customer service and warranty processes. If you’re on a strict budget, buy the cheapest version of your card from any vendor.
RAM.
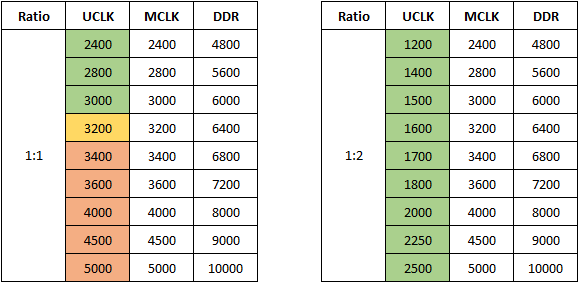
If you’re on the latest processors and motherboards at the time of this post, they’re only compatible with DDR5 RAM. For the AM5 platform, the sweet spot is DDR5-6000. When the DDR speed is 6000 MT/s, your AMD processor runs the UCLK and MCLK at a 1:1 rate. It is the highest speed available in 1:1 mode that offers high stability.
If you attempt to run higher RAM speeds, like DDR5-6400 or DDR5-6800, then the processor will fall back to 1:2 mode since the memory controller won’t be able to stay stable otherwise. While bandwidth does increase, the latency penalty is severe. You will notice lower average framerates and more framerate dips in your games when operating your system with the UCLK and MCLK desynchronized.
You should specifically purchase a RAM kit with an AMD EXPO profile to pair with your AMD processor. If you’re purchasing RAM for your Intel build, ensure that your RAM kit has an Intel XMP profile instead. Make sure to activate the profile in your motherboard BIOS to run at the advertised speeds. If you don’t, your RAM will operate at much lower JEDEC speeds.
When choosing RAM, choose a kit with the lowest possible primary timings for the best latency, starting off with CL (CAS latency) being the most important. At the moment, the lowest latency kit available at our sweet-spot speed is DDR5-6000 CL26. Then look at the other values in the chain. For example, if you see one kit with 26-36-36-68 timings and another kit with 26-36-36-96 timings, then the first one would be better. Lower RAM latency significantly helps with higher framerates, fewer stutters, and better 1% lows.
For most gaming rigs, I would recommend 32GB of RAM. You can go higher if needed. The bare minimum for any new computer nowadays should be 16GB, so avoid going below that even if you’re on a budget. If you’re on a strict budget, you can get slightly slower RAM, like CL28 or even CL30 instead of CL26.
Always install two sticks of RAM instead of four, unless your workflow requires you to absolutely max out the memory capacity. In that case, make sure to purchase a kit of four sticks for the highest probability of the RAM properly working (not two kits of two sticks each). Installing more than two sticks significantly increases strain on the memory controller and often prevents your PC from properly booting unless you manually lower the speeds. Installing only one stick is also never recommended since it essentially causes your computer to run single-channel memory instead of dual-channel.
I usually purchase G.SKILL kits in my own builds, but I like using PCPartPicker to compare RAM kits across different vendors. They have a great filtering system to easily find all DDR5-6000 kits, and then you can sort the results by lowest latency.
Power supply.
Your graphics card is typically the highest-powered component in your system. You can look up the minimum PSU requirements for your graphics card and go upward from there. For example, the GeForce RTX 5090 specs recommend that your power supply be at least 1000W. You should look for a power supply with a wattage greater than the recommended minimum. In that case, a 1200W PSU would be a good starting point. This helps prevent unexpected stability issues when there are large power usage spikes.
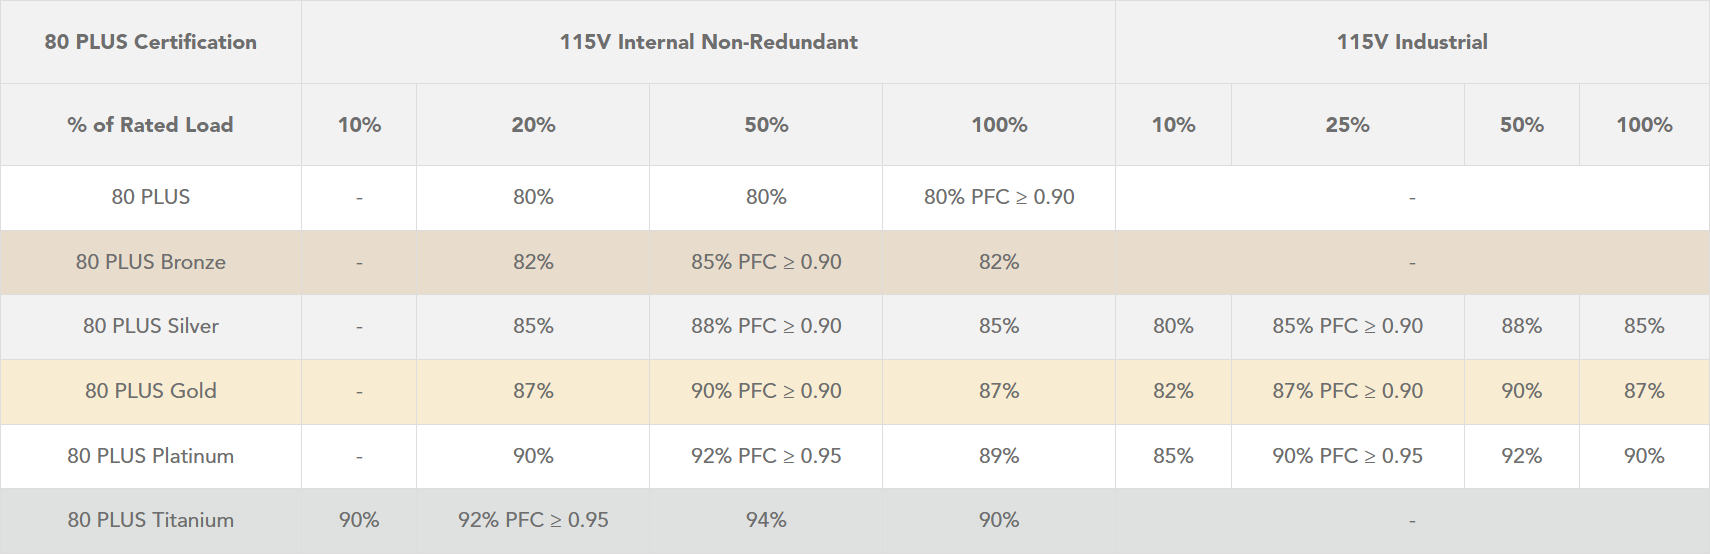
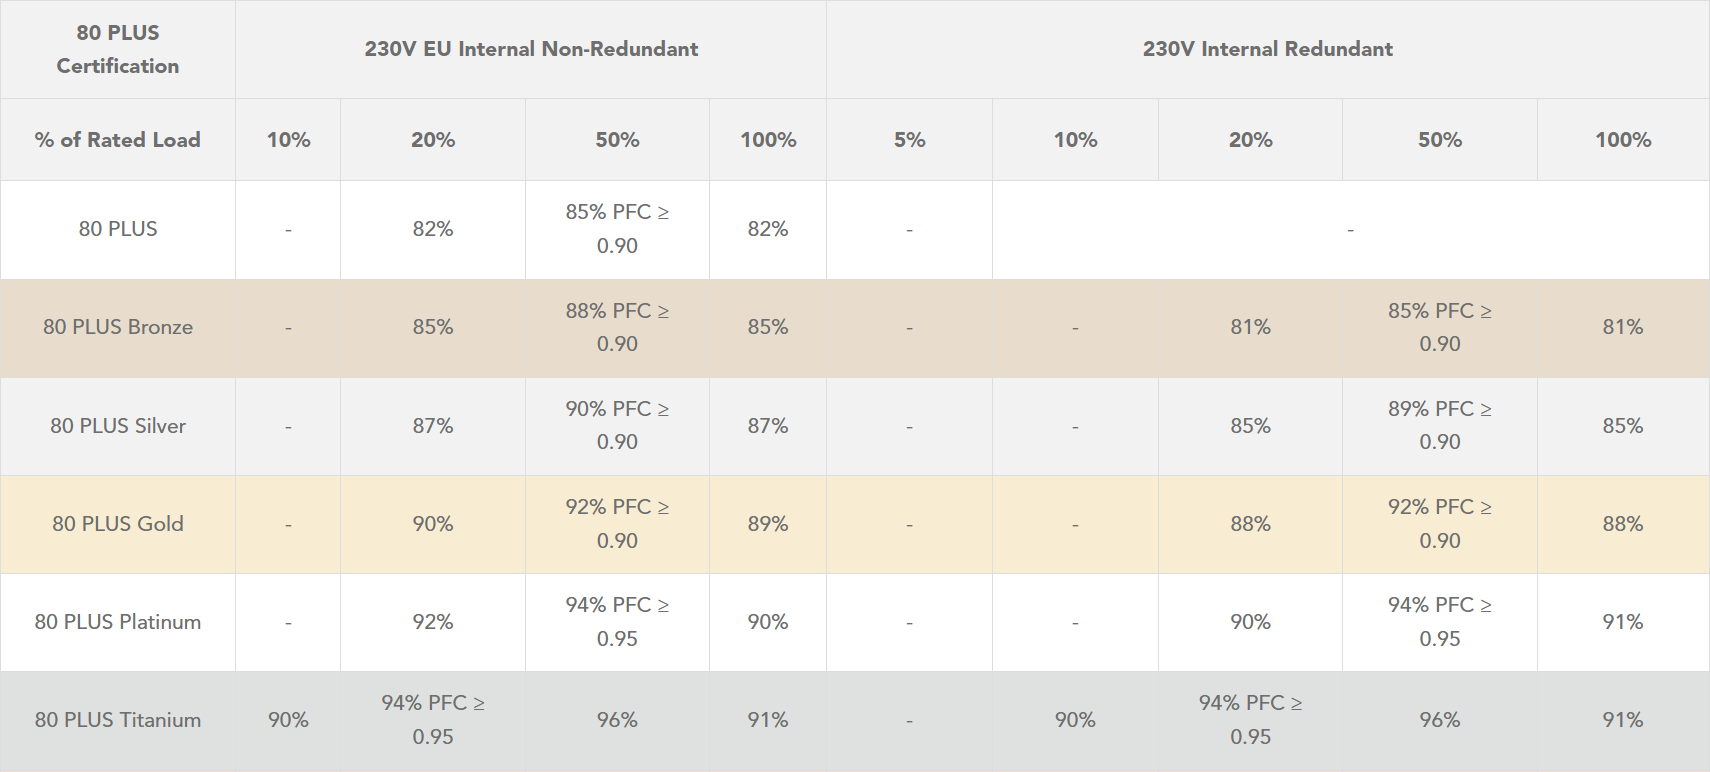
80 PLUS certifications for consumer power supplies include Standard, Bronze, Silver, Gold, Platinum, and Titanium. These ratings are given based on the efficiency of the PSU, tested at different load levels to ensure the requirements are met at every stage. Power supplies can vary in quality. Generally, higher efficiency power supplies are of higher quality, but that’s not always the case. Always perform your own due diligence.
The higher the 80 PLUS rating, the more efficient the PSU. A more efficient PSU draws less power from the wall and generates less heat. For example, a low-efficiency PSU may be pulling 1000W from the wall to output 800W of power for your system, generating a lot of excess heat while doing so. It also requires running the PSU fan more frequently or at higher speeds to dissipate the extra heat. It’s like running a 200W heater in your room. Higher efficiency power supplies will also save you money on electricity costs over time.
I recommend purchasing a PSU with an 80 PLUS Titanium rating, but an 80 PLUS Platinum rating is also good. If you’re on a budget, 80 PLUS Gold is completely fine too. I am a fan of Seasonic power supplies, specifically their PRIME TX ATX 3.1 (Titanium efficiency) PSU. Unfortunately, it is currently only available in 1600W and 1300W versions. The VERTEX PX ATX 3.1 (Platinum efficiency) PSU is currently available in 1200W, 1000W, 850W, and 750W versions.
The newest graphics cards no longer use the old eight-pin PCIe power cables. They now use a single 12VHPWR connector, capable of delivering up to 600W of power. The power supplies I linked above have the newest revision of that, which is the “12V-2×6” cable. It supports the latest ATX 3.1 and 16-pin PCIe Gen 5.1 standards. It’s more reliable than the previous revision, featuring shorter sensing pins and longer conductor terminals. I’m sure you’ve seen the news of graphics cards burning up the power connector. This change was made to mitigate that. I would recommend only considering power supplies with this latest standard.
A power supply is an important part of your computer. Its purpose is to provide clean, stable power to every single component. Too many people skimp on this part since it’s not a component that directly increases the performance of a computer. A good power supply is worth the investment. A high-quality one will last longer, allowing you to continue using it in the future when you decide to upgrade your entire PC. SPL’s PSU Tier List is a good resource if you want to look up a specific power supply.
CPU Cooler.
Out of the current generation of AMD Ryzen CPUs, only the Ryzen 5 9600 includes a basic CPU cooler in the box. It’s a small AMD Wraith Stealth cooler that’s compatible with virtually any build configuration. The higher-end processors require you to purchase your own cooler.
When choosing between a liquid cooling solution and an air cooler, there are pros and cons that you must consider. To start off, a liquid cooler with a 120mm (1x 120mm fan) radiator is never worth it, as it performs on par with mediocre air coolers. As you step up to 240mm (2x 120mm fans), 280mm (2x 140mm fans), 360mm (3x 120mm fans), and 420mm (3x 140mm fans) sizes, this is where it starts making sense.
The larger the radiator, the more cooling it can provide. Larger radiators contain a higher volume of liquid, capable of absorbing more heat. Not only that, but a larger radiator will be more efficient at dissipating heat because of the higher surface area for the fins. In turn, it’s possible to run the fans at a lower speed to achieve similar cooling performance as smaller coolers. It makes sense why AIO (all-in-one) liquid coolers are a popular, zero-maintenance, cool and quiet solution. I’ve personally used multiple NZXT Kraken series liquid coolers without any of them failing on me. Most AIO liquid coolers on the market are actually customized versions of Asetek. If you’re on a budget (or even if you’re not on a budget), Arctic makes liquid coolers that often top all the performance charts.
As with most good things, there are also cons to using liquid coolers. The pump itself can run at high speed and result in unwanted noise, especially if you’re sensitive to sounds. If the pump somehow fails, the fans will keep spinning, so you might not immediately notice unless you’re constantly monitoring the RPMs and CPU temps. The processor may start hitting the hardware-level thermal protections and immediately power down your PC.
On the flip side, air coolers excel in the areas that AIO coolers don’t. Aside from the fans, air coolers are just giant hunks of metal. The heatsink has no moving parts and there is no ongoing maintenance required. An air cooler will last well past the lifespan of an AIO pump and you will avoid the risk of a liquid cooler potentially leaking inside your PC. Air coolers are king when it comes to longevity.
The golden standard for air coolers is Noctua. Aside from making top-tier products in every regard, they provide industry-leading support in terms of customer service and warranty. They are also very well-known for providing free mounting hardware if you plan to use an existing cooler on future builds. For maximum performance, the flagship NH-D15 G2 is a good choice. It has a huge heatsink, so you must ensure that your computer case supports the height of the CPU cooler. To maximize compatibility while maintaining excellent cooling performance, the NH-U12A (also available in a chromax.black color scheme) is the perfect choice. It uses 120mm fans instead of 140mm fans, and doesn’t overhang the RAM or NVMe slots, making it easier to access other components. If you’re on a budget, Arctic also has amazing air coolers. Their Freezer 36 series is an excellent performer despite the value pricing.
Some Noctua coolers come with Noctua’s NT-H1 thermal paste, and some come with Noctua’s upgraded NT-H2 thermal paste. I personally recommend using the newer version even if you’re not installing a Noctua cooler. The paste is rated for at least five years once applied, providing excellent longevity. You can add the NA-TPG1 thermal paste guard if you’re on an AM5 processor. There is an AM5 Edition available that bundles the two together.
Modern processors automatically boost higher if there is enough power, voltage, and thermal headroom. It’s not uncommon to see high temperatures even with a high-end cooler. It is normal and expected behavior, especially if you have technologies such as PBO (Precision Boost Overdrive) enabled.
Storage.
Unlike 3.5-inch and 2.5-inch drives of the past, modern desktops use an SSD that plugs right into the M.2 slot of your motherboard. There are two types of M.2 SSDs. There’s one that uses the older SATA-based technology and one that uses NVMe technology. The latter is what we want. The top NVMe slot on a motherboard is typically the one that is connected directly to the CPU without first going through the chipset, so that should be the slot that you use.
Depending on your motherboard, it may support the newest PCIe 5.0 NVMe drives. Older motherboard models might only support up to PCIe 4.0 NVMe drives. To get the most out of your computer, opting for a Gen 5 SSD is optimal since nearly all drives are backwards compatible with the previous generation anyway. My NVMe SSD recommendation would be Samsung’s 9100 PRO, which is currently available in 1TB, 2TB, and 4TB capacities. Fast speeds, and especially the high IOPS, will make your PC extremely fast and responsive. If you want a cheaper drive, a PCIe Gen 4 NVMe SSD like Samsung’s 990 PRO is a good fit, also available in 1TB, 2TB, and 4TB capacities.
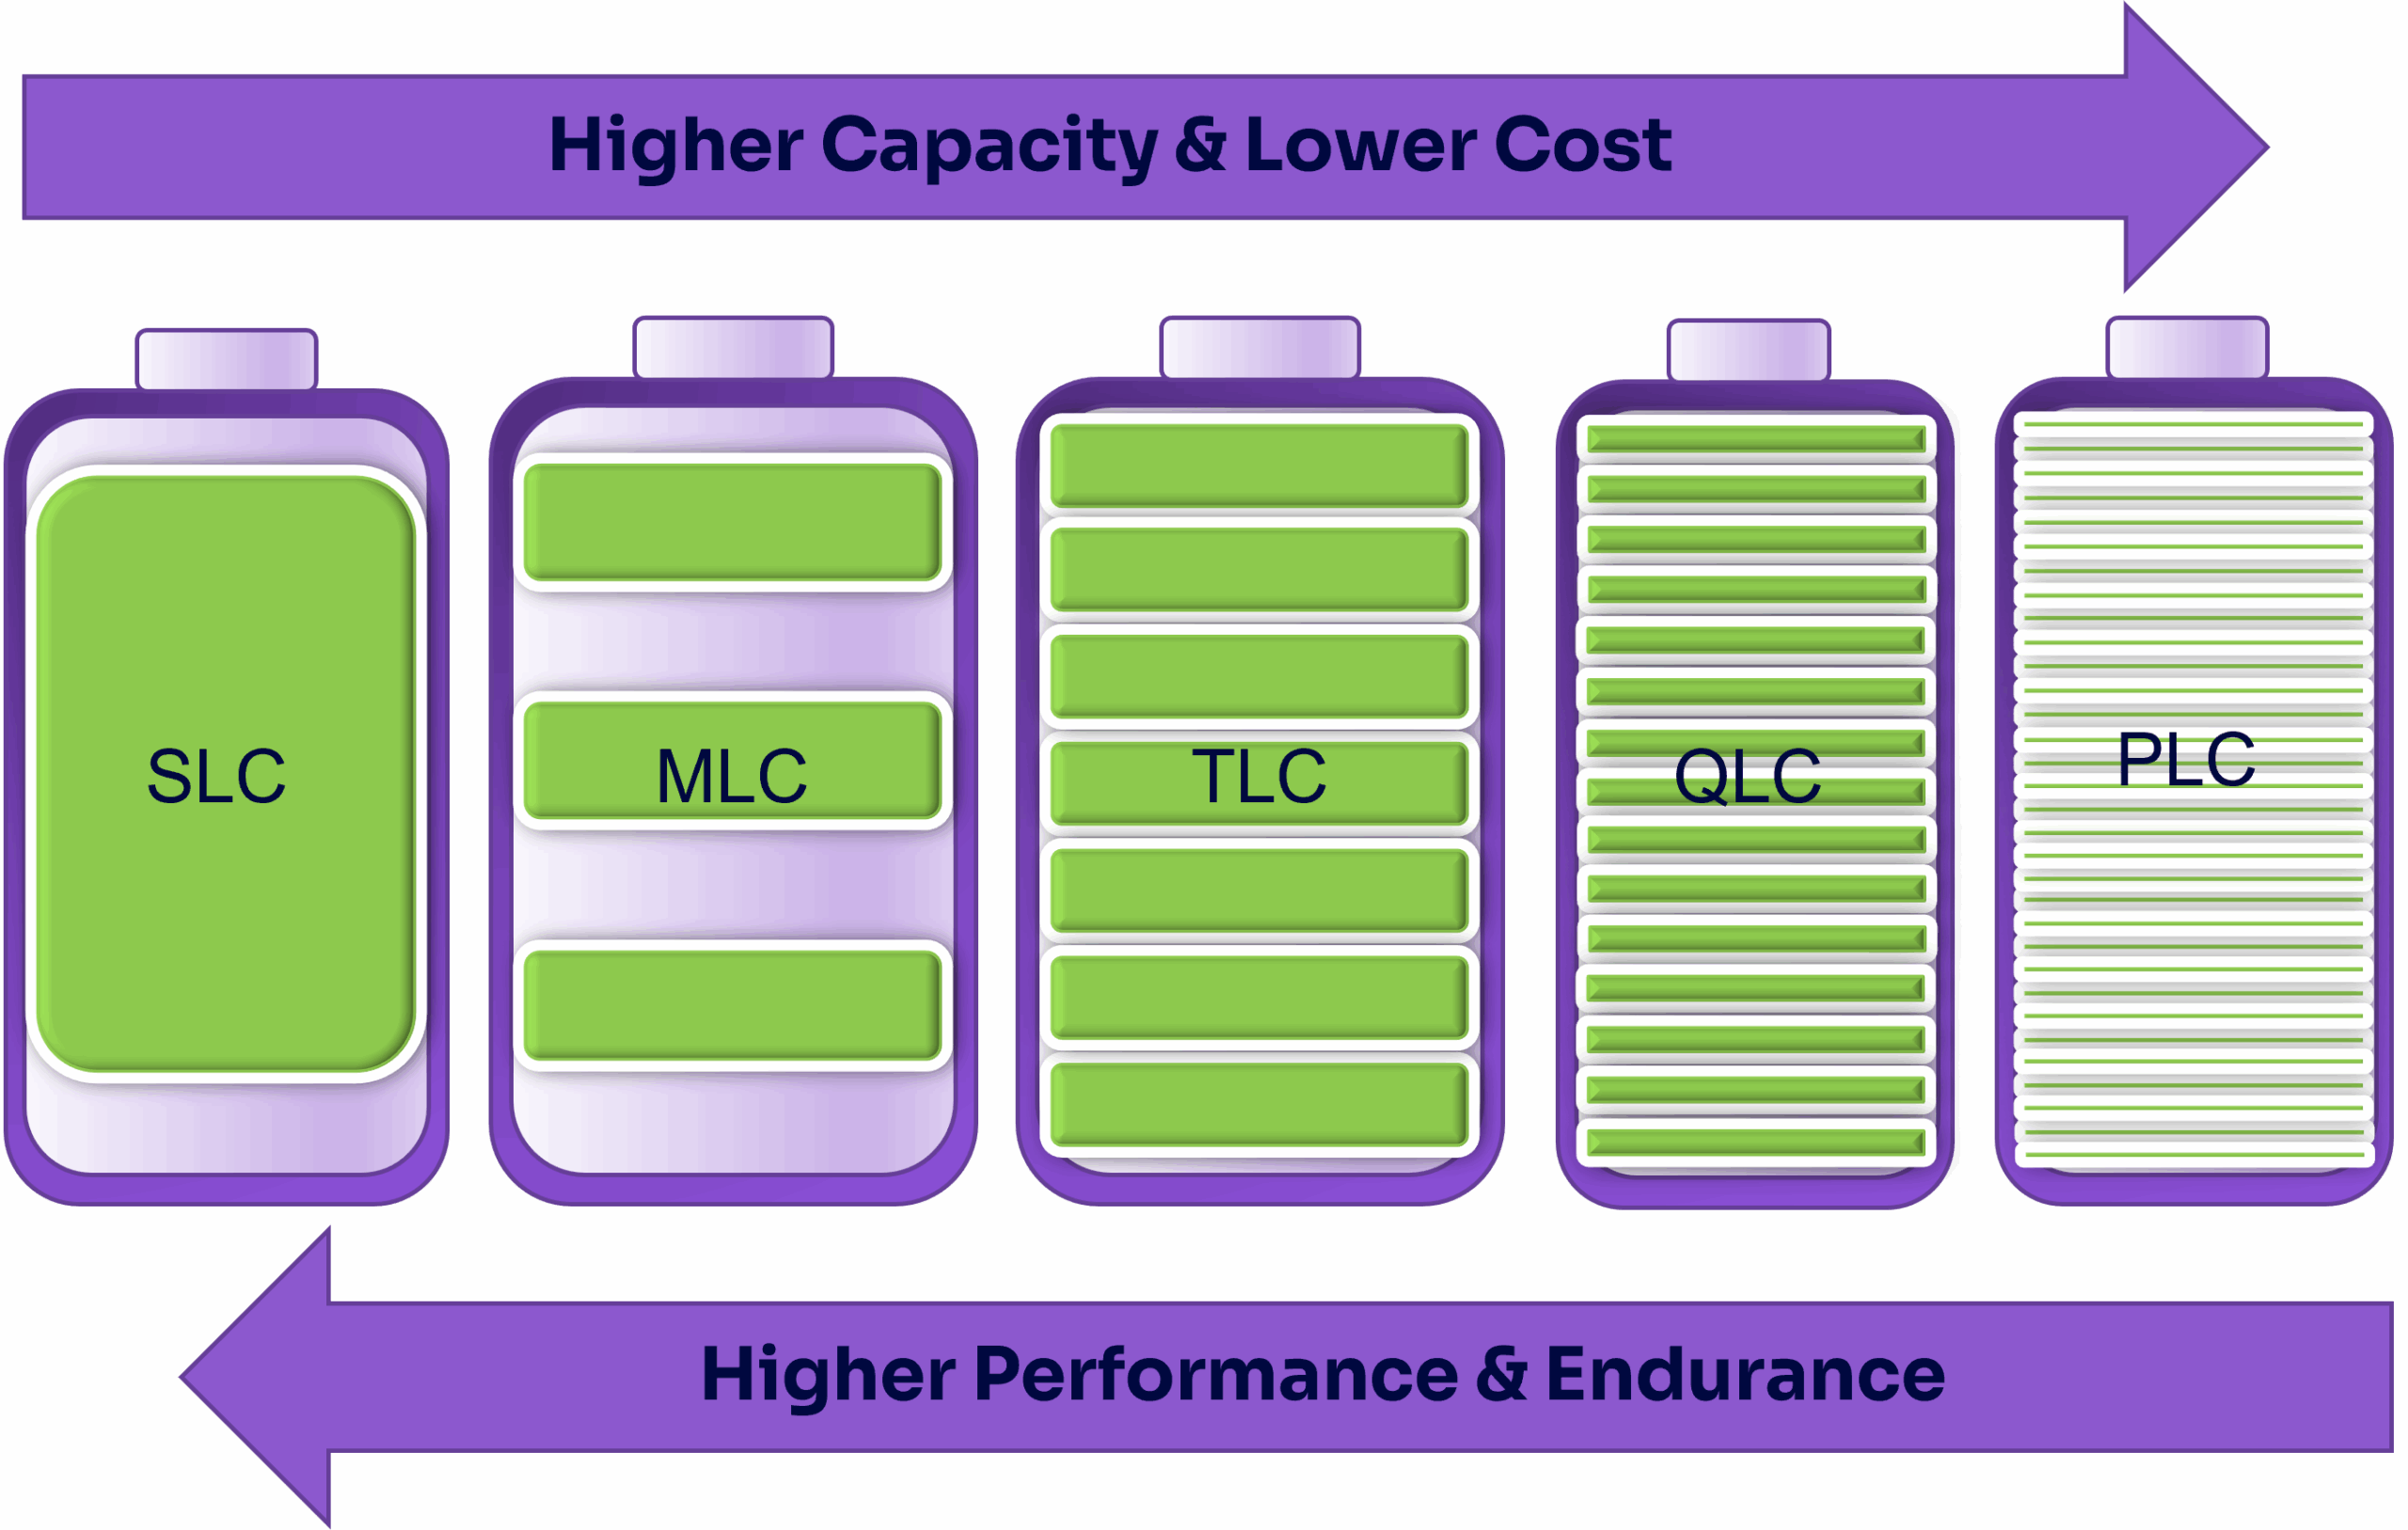
Not all NVMe drives are created equal, regardless of whether the specs show the newest generation or high speeds on paper. Even well-known manufacturers boost the capacity of lower-end SSDs by using QLC technology instead of TLC technology. That means that the performance is much worse as soon as the drive cache fills up during file transfers. QLC technology stores four bits of data per cell, so each cell holds 16 different voltage states, which is double that of TLC tech. Each cell needs to be read entirely before each write operation, so the drive can understand where to apply the appropriate voltage levels. Needing to read more bits per cell during write operations will result in significantly slower operation. In some cases, file transfers are even slower than on hard drives.
Some SSDs don’t even come with a dedicated cache, so it doesn’t mean all TLC drives are created equal. They might use on-hardware techniques to temporarily program some cells as SLC to create a dynamic, makeshift cache. But that also means that the cache will get smaller and smaller, or become nonexistent as the drive fills up. The larger the drive cache, the quicker it can perform small write operations without slowing down your entire PC. Generally speaking, larger capacity drives will come with a larger cache.
Fans.
The industry’s gold standard when it comes to computer fans is Noctua. They create chart-topping, high-performance fans that all other fans are compared against. Noctua fans undergo many years of research and development, going through many iterations and prototypes to improve every single possible metric. I highly recommend their newest second-gen fans, the NF-A12x25 G2 PWM (120mm) and NF-A14x25 G2 PWM (140mm).
There are many different applications for a computer fan, such as pushing air through a thick radiator or pulling air through a fine mesh screen for a filtered intake. In the case of air resistance, a fan must excel at static pressure in order to move air through obstacles. In the case of low air resistance, a fan must excel at airflow volume, moving as much air as possible. It’s a delicate balance between the two ends of the spectrum.
Another consideration is fan noise. Any fan can be a performance monster if you create aggressive blades and spin it at very high RPMs. But most consumers don’t want a highly unoptimized fan that sounds like a jet engine taking off right next to them. Not only that, but creating a fan that achieves a good balance between noise and performance is no easy feat, especially when you have to ensure it’s performant across the entire RPM range.
Acoustics play a larger role than most people think. Even if two computer fans advertise that they operate at a 24dB(A) noise level, one fan could have an unintrusive, low hum instead of an annoying, high-pitched whir. Optimizing fans for consistently low turbulence across applications also helps with this. Noise-normalized performance is the other side of the same coin. When comparing two fans operating at the same noise level (regardless of tone), the RPMs, pressure, and airflow may be different due to blade design.
There are a lot more aspects to a fan than what I’ve discussed, including vibration, power consumption, material degradation, and lifespan. Noctua takes every factor into account when developing their products. Extensive testing lasts many years before they even consider releasing a product to the public. They are excellent fans that are reliable in every single aspect. If you’re on a budget, Arctic makes great fans at a great price. I would recommend their P12 Pro (120mm) and P14 Pro (140mm).
Positive pressure is important when setting up case fans. Ensure that you have more fans pushing air into your case than fans exhausting. A negative pressure environment causes dust to be sucked in through cracks and crevices instead of all clean air going through filtered intakes.
Pricing.
To get the most bang for your buck, shop around different sites for the best prices. Many stores offer a price match policy as well. If you prefer purchasing some of your components locally, like from Micro Center or Best Buy, ask for a price match against online retailers such as Amazon or B&H.
April 25, 2026: Updated Nvidia global settings to use new option.
March 31, 2026: Minor grammatical corrections.
August 26, 2025: Updated the Nvidia App instructions for setting a global DLSS override.
So you just built a new computer and have a fresh install of Windows 11. Follow these steps to get everything set up optimally. These are in no particular order and you don’t have to follow them step-by-step.
Windows activation.
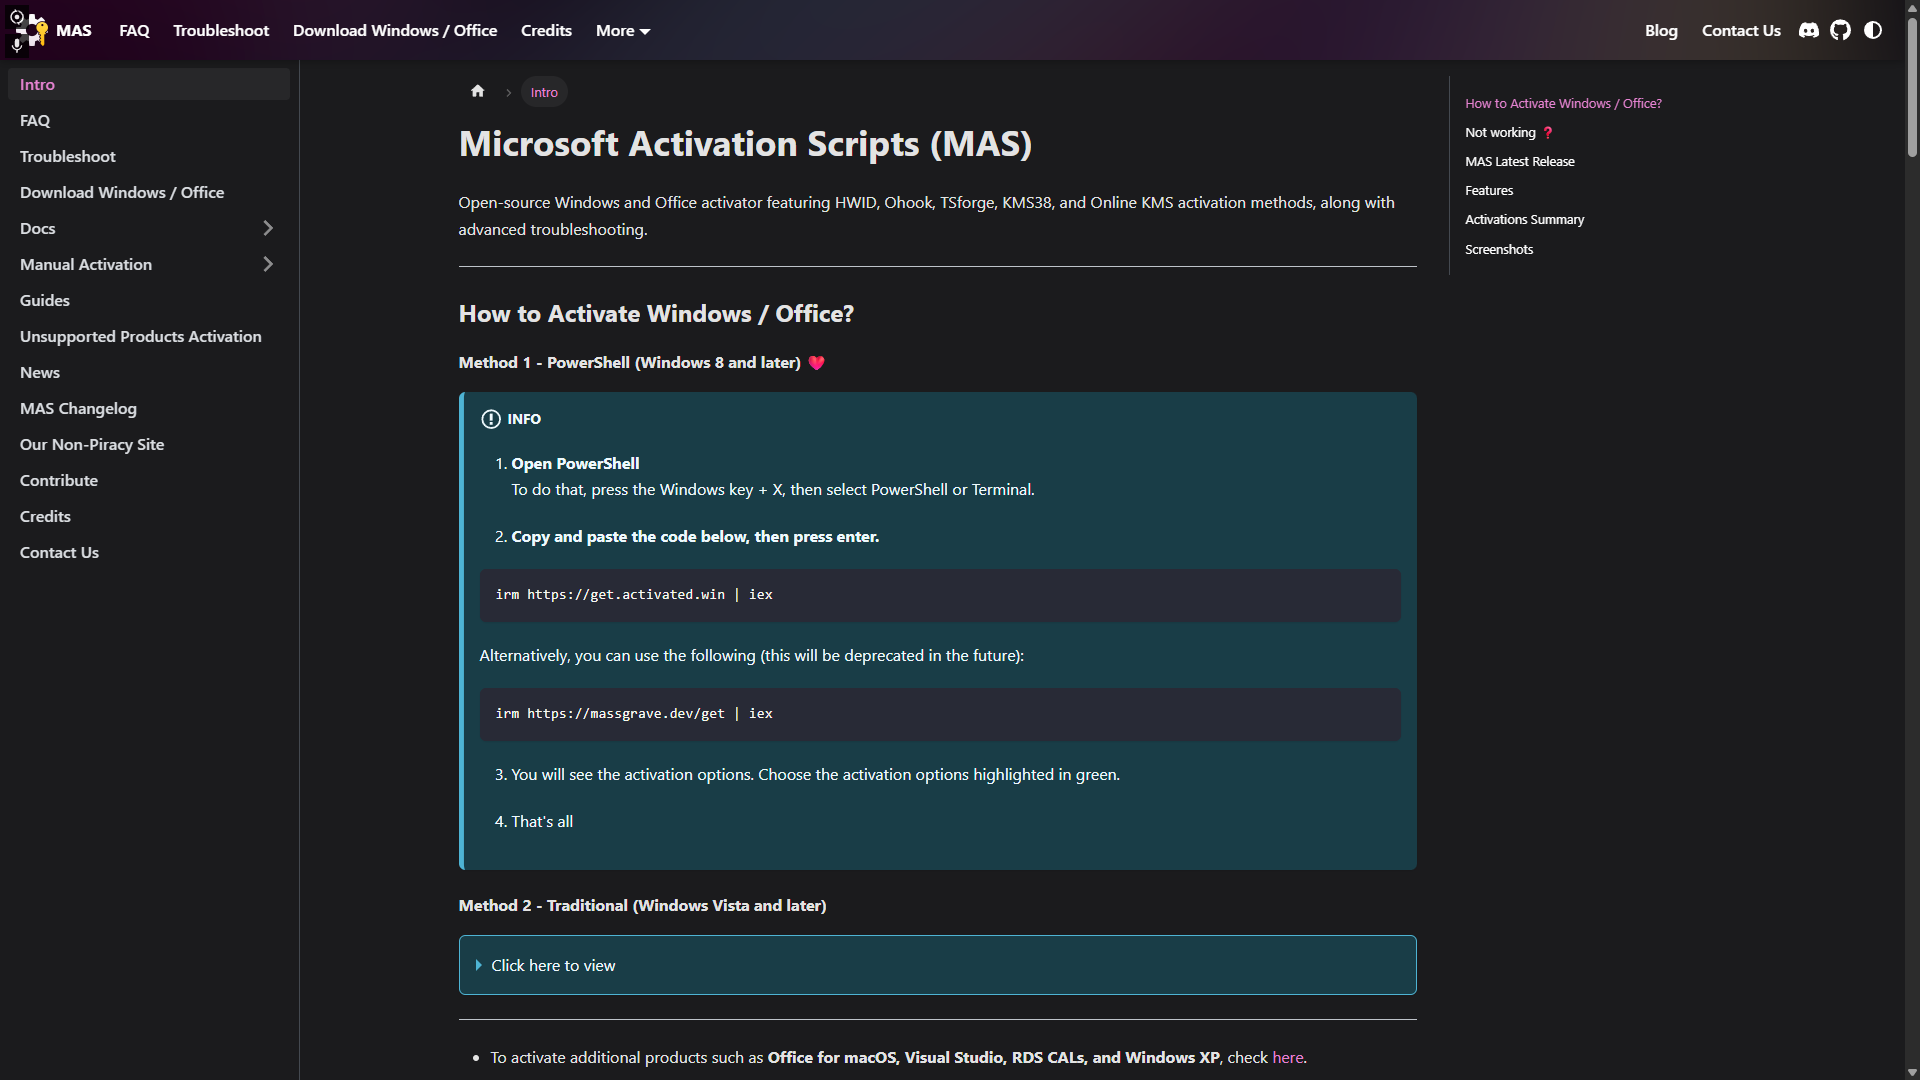
Visit Massgrave and follow the instructions in Method #1 to get your copy of Windows activated. When you run the script in PowerShell, there will be an option to also change your version of Windows to the Pro edition, which is recommended if you’re not already on Pro.
Drive optimization.
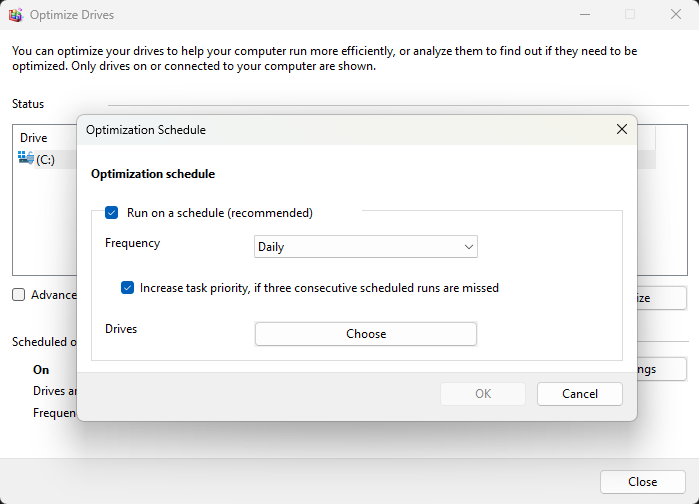
Search for “Defragment and Optimize Drives” in your Start menu and click on the first result. In the scheduled optimization settings, change the frequency to Daily.
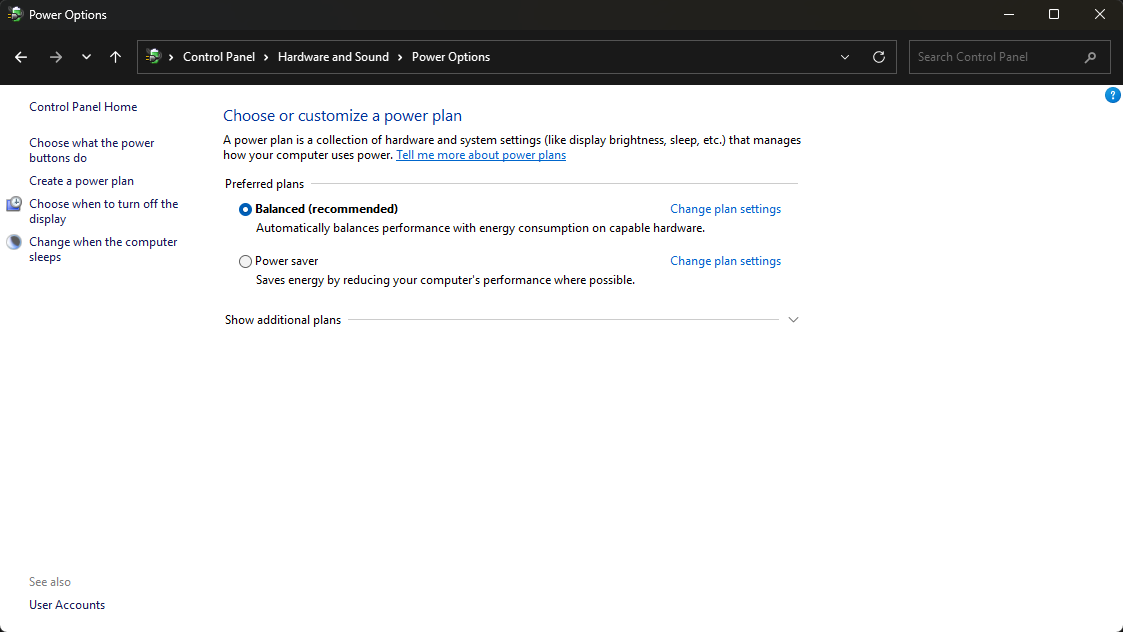
Windows power settings.
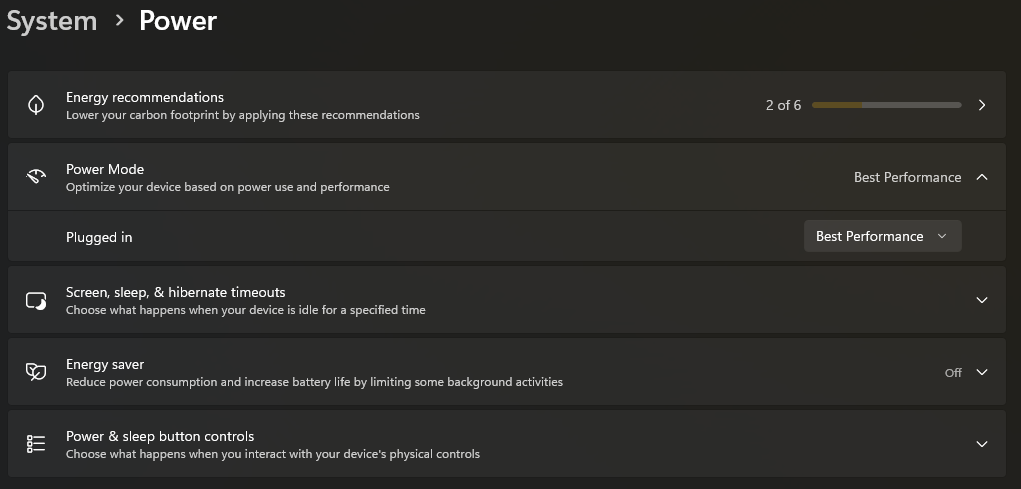
Search for “Power, sleep, and battery settings” in the Start menu and click the first result. Make sure your power mode is set to Best Performance. If you’re on a laptop, it may show different power options for plugged in and battery. I would typically suggest Best Performance when plugged in and Best Battery Efficiency on battery mode.
Keep in mind that this is NOT the same as power plans. It is recommended that you do NOT touch the power plans, especially on newer systems. One of the most important reasons not to touch this setting is because modern CPUs can have different types of cores (like X3D processors from AMD). Changing this setting would prevent slower cores from going to sleep or powering into a lower state during gaming, potentially pegging all cores to a static frequency and not assigning the game to the cores with V-Cache. Leave the setting on Balanced.
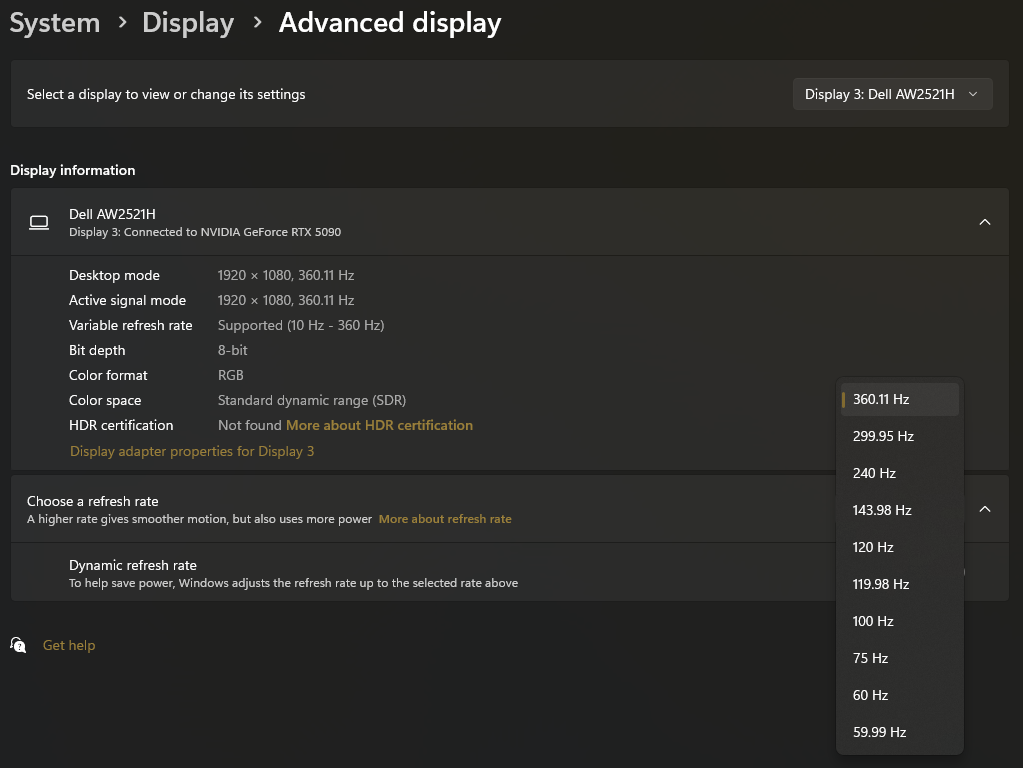
Display refresh rate.
Search for “Display settings” in the Start menu and click on the first result. Scroll to the bottom of the new window and click on “Advanced display.” Make sure all your monitors are set to the highest refresh rate available. If there are any refresh rates listed with an asterisk, they should be avoided. Those refresh rates are technically overclocks and do not usually support the monitor’s native resolution.
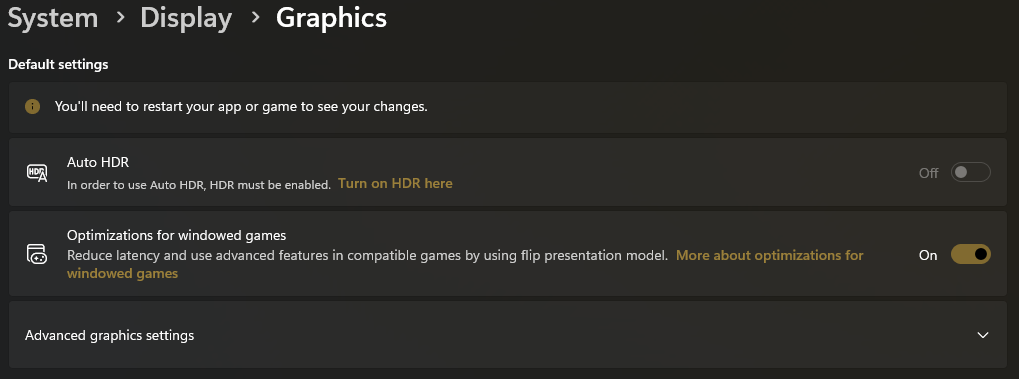
You can go back to the previous page, scroll all the way down, and click on the “Graphics” setting. Make sure “Optimizations for windowed games” is enabled.
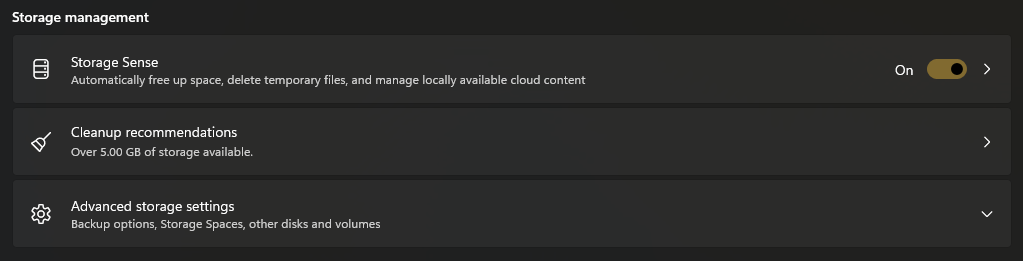
Windows storage space optimization.
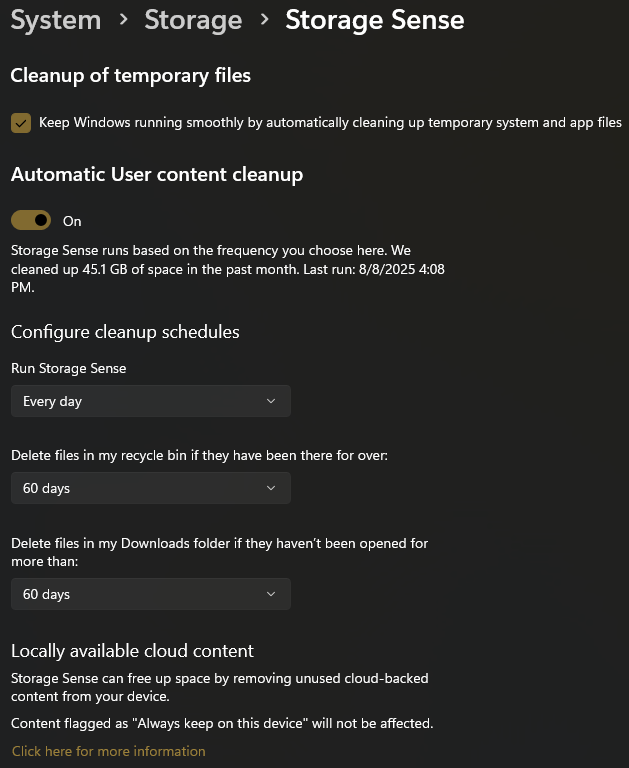
Search for “Storage settings” in the Start menu and click on the first result. Toggle on the Storage Sense option.
Click into Storage Sense. Enable the cleanup of temporary files and automatic user content cleanup. Set Storage Sense to run every day. Set the Recycle Bin and Downloads folder cleanup to sixty days. If you have cloud services enabled, you will see an additional setting at the bottom where you can choose how many days of inactivity need to pass before files are offloaded to be stored online only.
Windows updates.
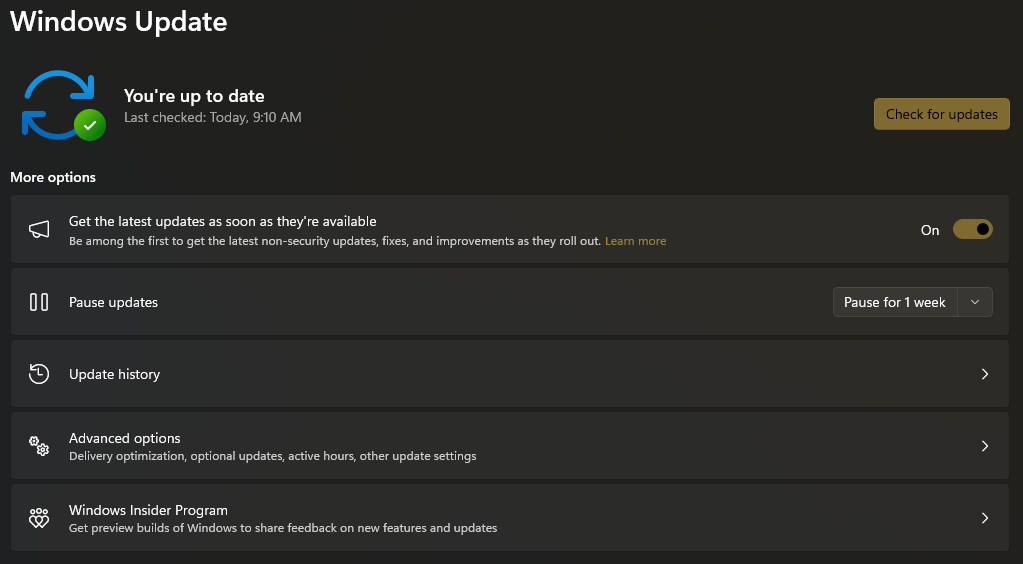
Search for “Windows update settings” in the Start menu and click on the first result. Toggle on the option to get the latest updates as soon as they are available.
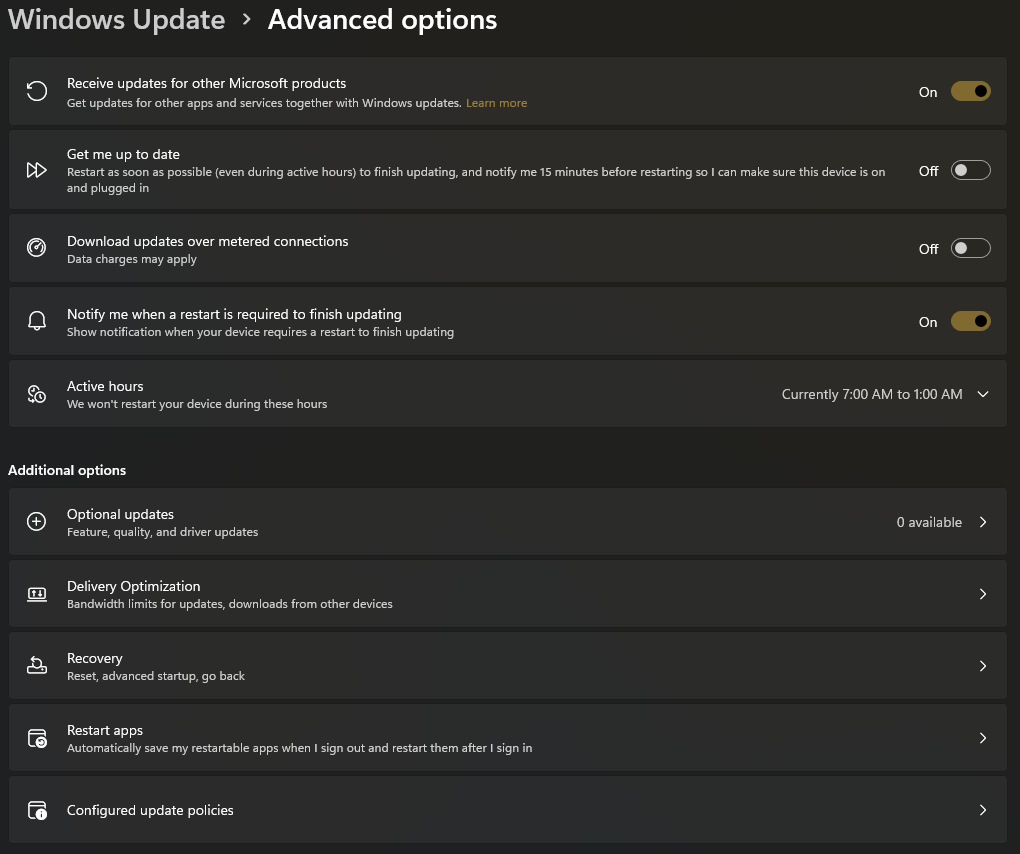
Click into the “Advanced options” menu. Toggle on the options to receive updates for other Microsoft products and to notify you when a restart is required to finish updating. It’s also a good idea to check what’s available in the “Optional updates” section near the bottom and install them.
Windows security.
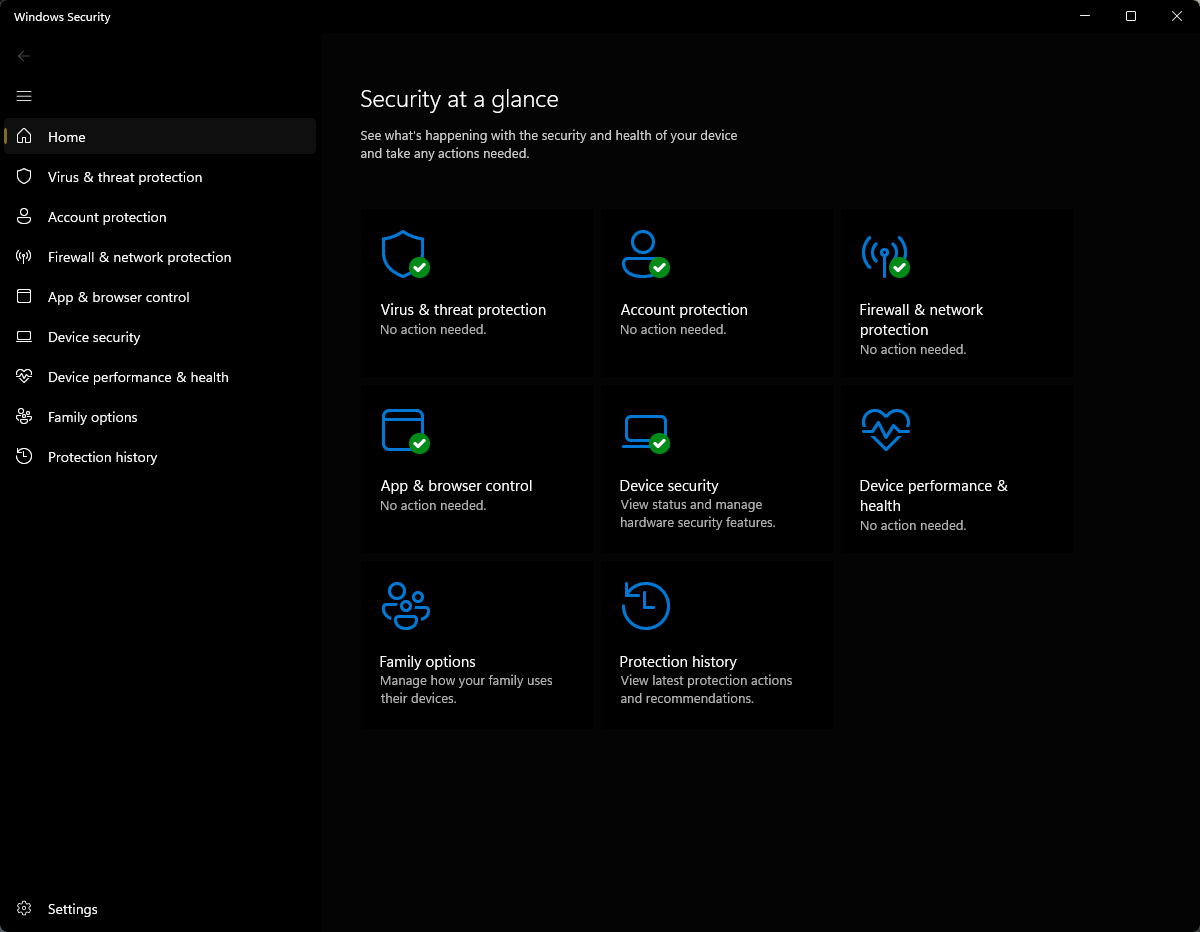
Search for “Windows Security” in the Start menu and click on the first result. Go through each option and make sure all the categories are enabled, except for Smart App Control in the “App & browser control” section.
Device encryption.
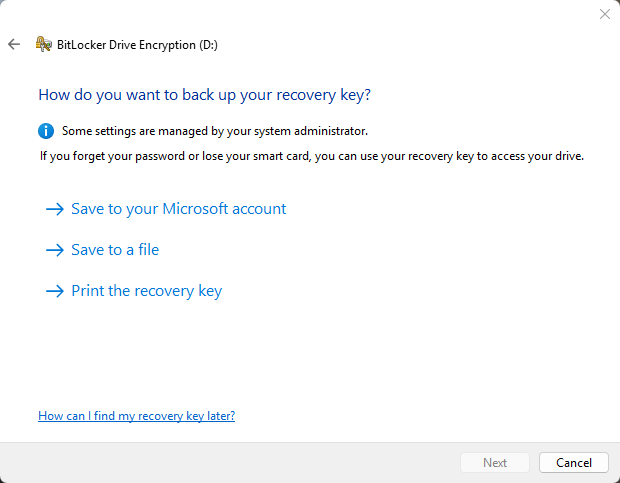
Search for “Manage BitLocker” in the Start menu and click on the first result. You can start the drive encryption process if your device is not already encrypted by default. One very important step during the setup process is to make sure you select “Save to your Microsoft account.” Too many people save their key to a file or print the recovery key and end up losing it. Only select those options at your own risk if you are an advanced user.
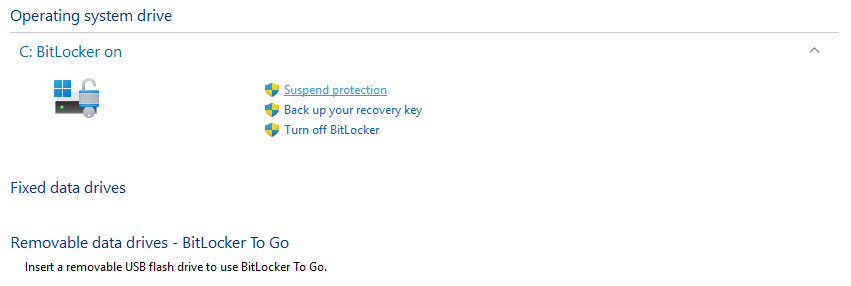
Keep in mind that you will most likely need to enter the key whenever you make major changes to your hardware, like flashing your motherboard BIOS or upgrading to a different graphics card. It is recommended that you return to the Manage BitLocker options and click “Suspend protection” right before making such changes so it doesn’t ask for your recovery key on the next boot.
Chipset drivers.
If desired, you can grab the latest chipset drivers for your motherboard directly from Intel or AMD, depending on what processor you’re on. I would not recommend downloading them from the motherboard support page, as those aren’t always up to date. Most of the time, this step can be skipped since Windows Updates will handle it.
Graphics drivers.
If you have a discrete graphics card, you can download the corresponding software for your system (Nvidia, AMD, or Intel), which will also give you options to update drivers once installed.
Graphics performance tuning.
In the NVIDIA App, click on Graphics in the sidebar and go to the Global Settings tab. Set the DLSS Override – Model Presets to Recommended, and set Low Latency Mode to Ultra.
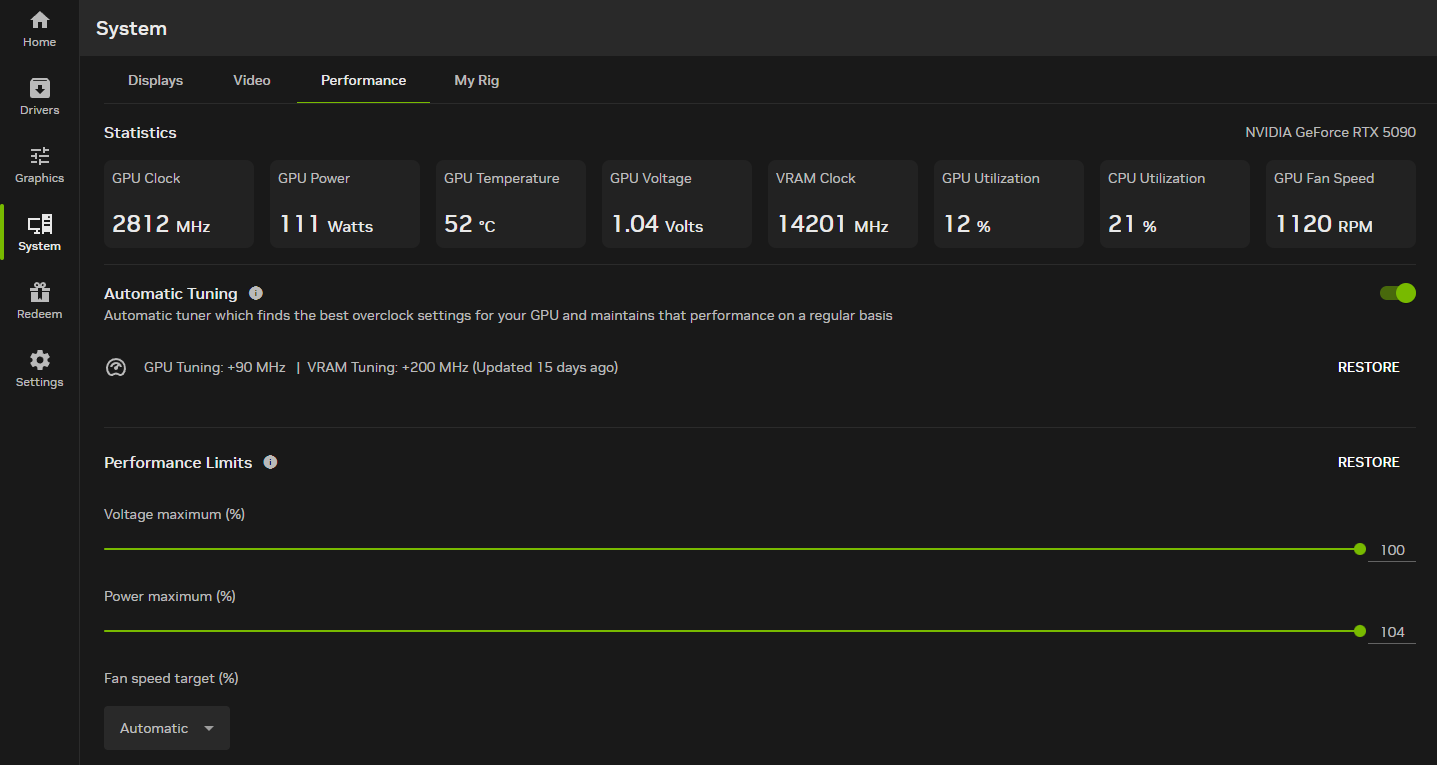
Click on System in the sidebar and go to the Performance tab. Toggle on Automatic Tuning. Max out all the available sliders (voltage maximum, power maximum, temperature target).
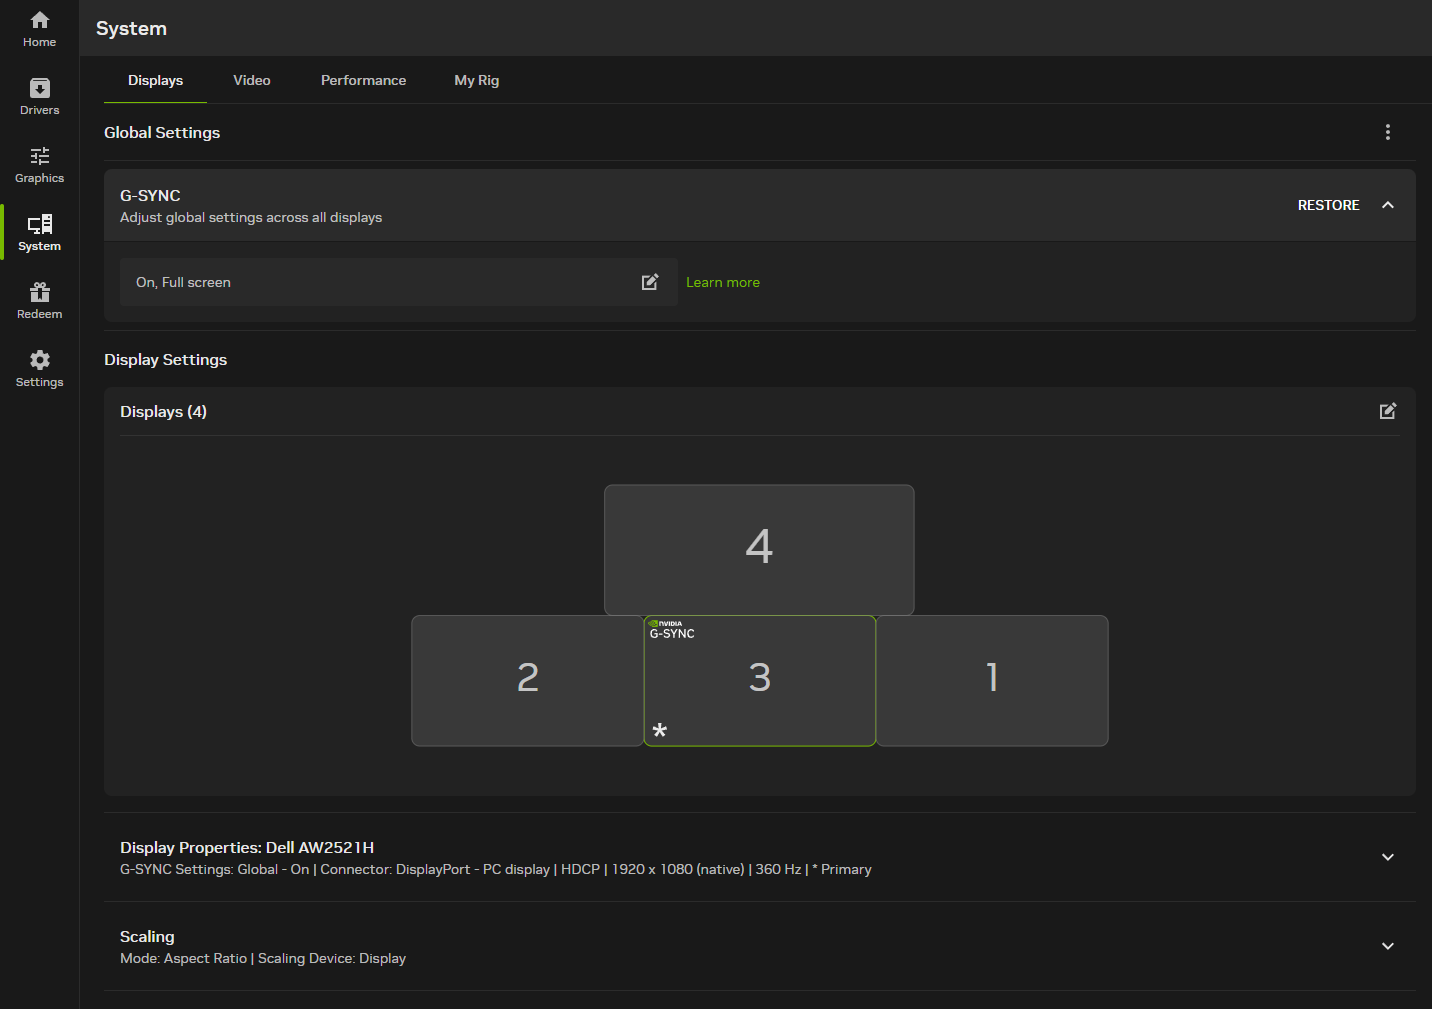
If you have a G-Sync compatible or G-Sync capable display, you can click on the System button in the sidebar and navigate to the Displays tab. Ensure that G-Sync is set to “On, Full screen” at the top.
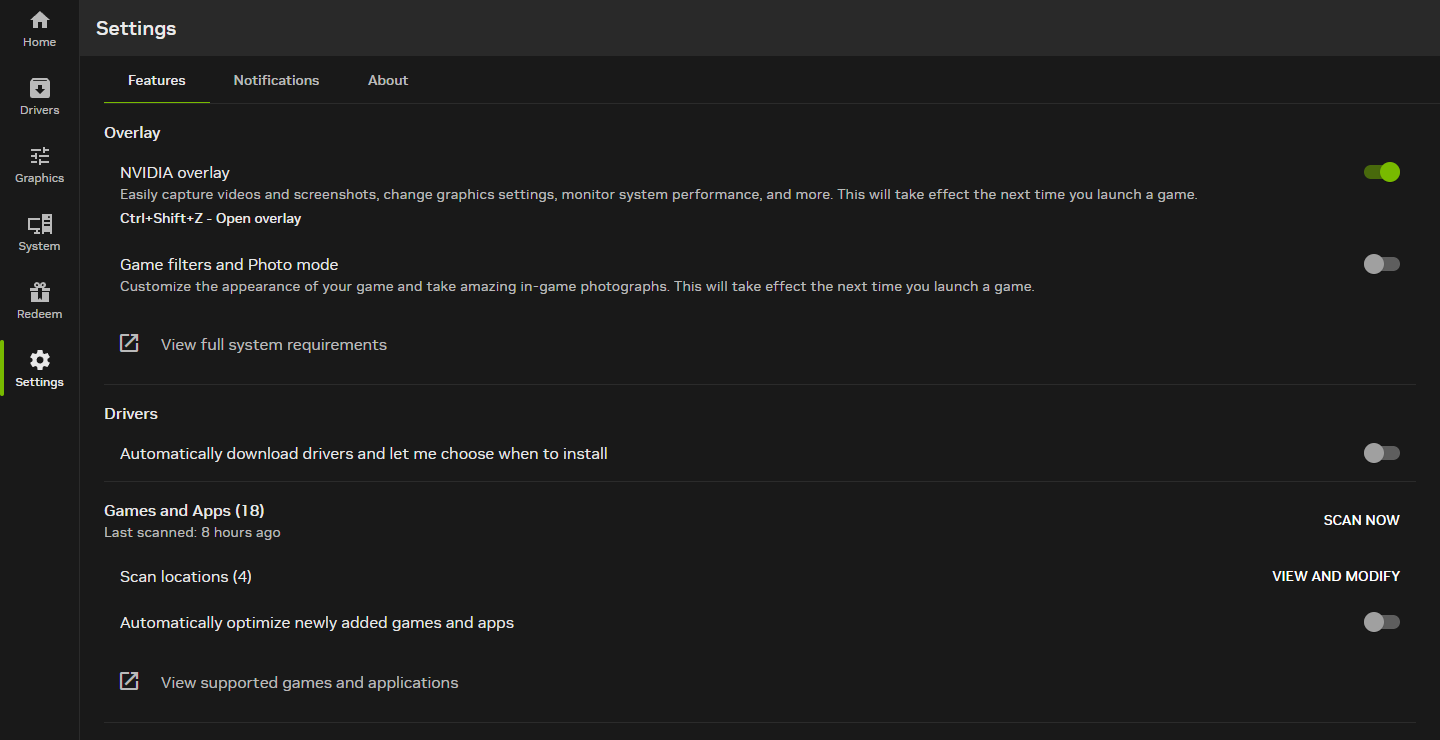
Nvidia overlay settings.
In the NVIDIA App, click Settings in the sidebar. Toggle on NVIDIA overlay. You can hit the assigned hotkey (defaulted to Alt+Z) to open up the overlay and customize your options.
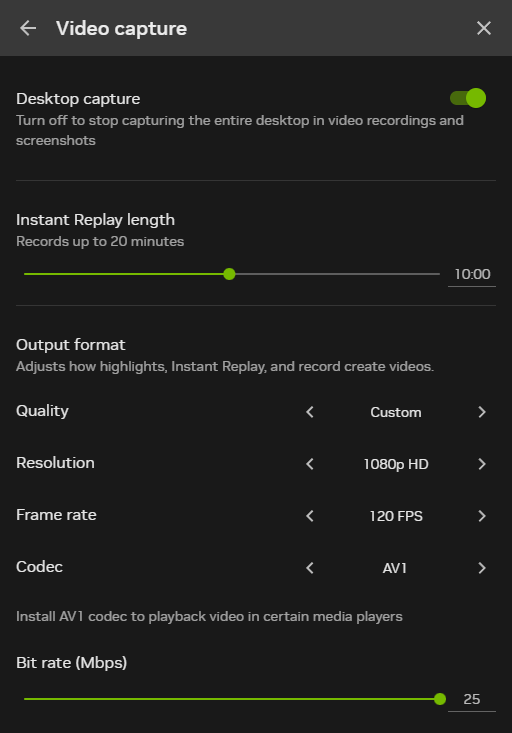
If you plan to enable Instant Replay (automatically clipping the last few minutes of your gameplay), the screenshot below shows my recommended settings for anyone on a 1080p screen. If you are on a higher resolution, simply set the resolution to match your screen and set the quality preset to High. You can leave the frame rate and codec to the ones in the screenshot below.
Audio setup.
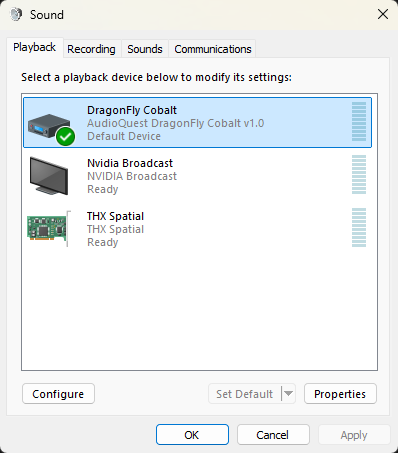
Search for “Sound settings” in the Start menu and click on the first result. Scroll down and click on “More sound settings.” Right-click and disable any playback devices that are not going to be used, like audio outputs from your graphics card. This prevents software from accidentally selecting them as an output device. To properly set a default playback device, highlight the device and click on the “Set Default” button. If you right-click and click on “Set as default device,” you will have a separate device selected as the communication device, which isn’t what we typically want.
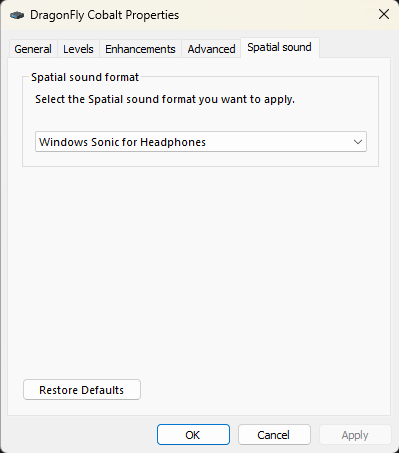
Right-click your playback device and click Properties. Go to the Spatial sound tab and enable “Windows Sonic for Headphones” if the output will be used with headphones.
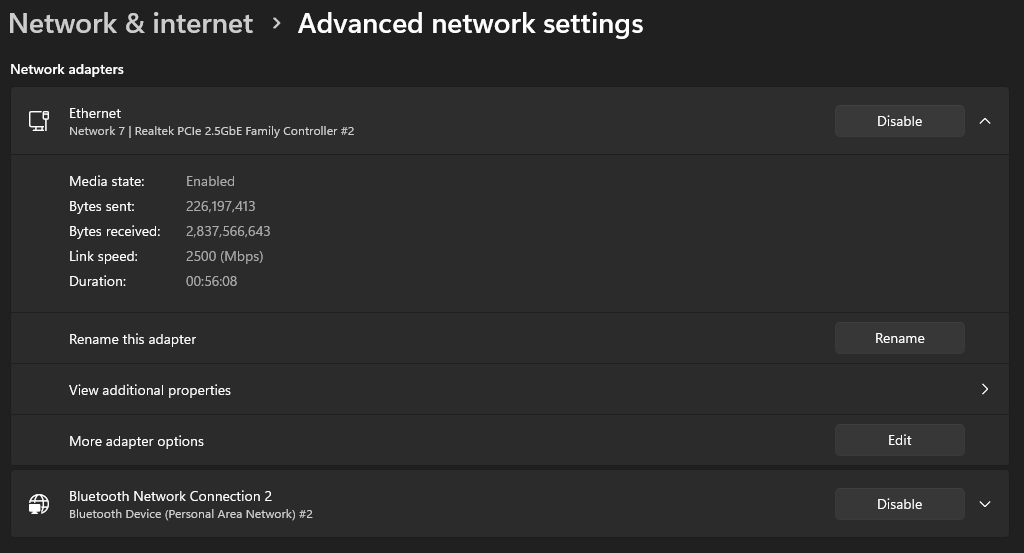
Network tuning.
Search for “Manage Network Adapter settings” in the Start menu and click on the first result. Click on your Ethernet or Wi-Fi adapter (depending on what you use) to expand the options. Click on the “Edit” button next to “More adapter options.”
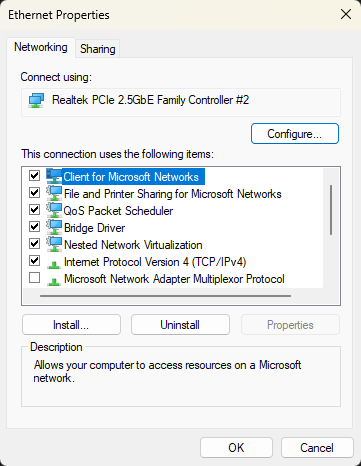
Click on the Configure button in the new window.
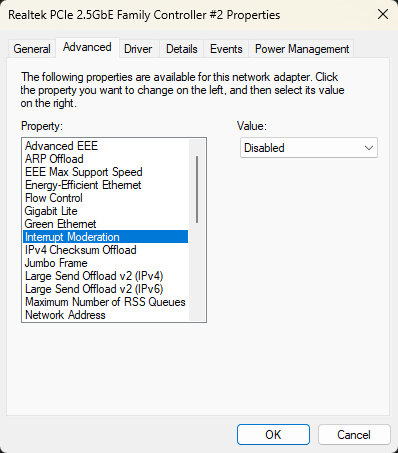
Go to the Advanced tab. Disable all energy efficiency options like Gigabit Lite and Green Ethernet. Disable any option that has the word “Offload” in its name. Turn off Interrupt Moderation and Flow Control. Disabling Interrupt Moderation may be the most important setting out of all of these, since it has the highest impact on latency from queuing up packets before sending them out in batches.
Drive firmware.
It’s a good idea to temporarily download software for your drive to make sure there are no firmware updates available for it. For example, there is Crucial Storage Executive for Crucial drives and Samsung Magician for Samsung drives. You can either uninstall it after checking for updates or remove it from startup.
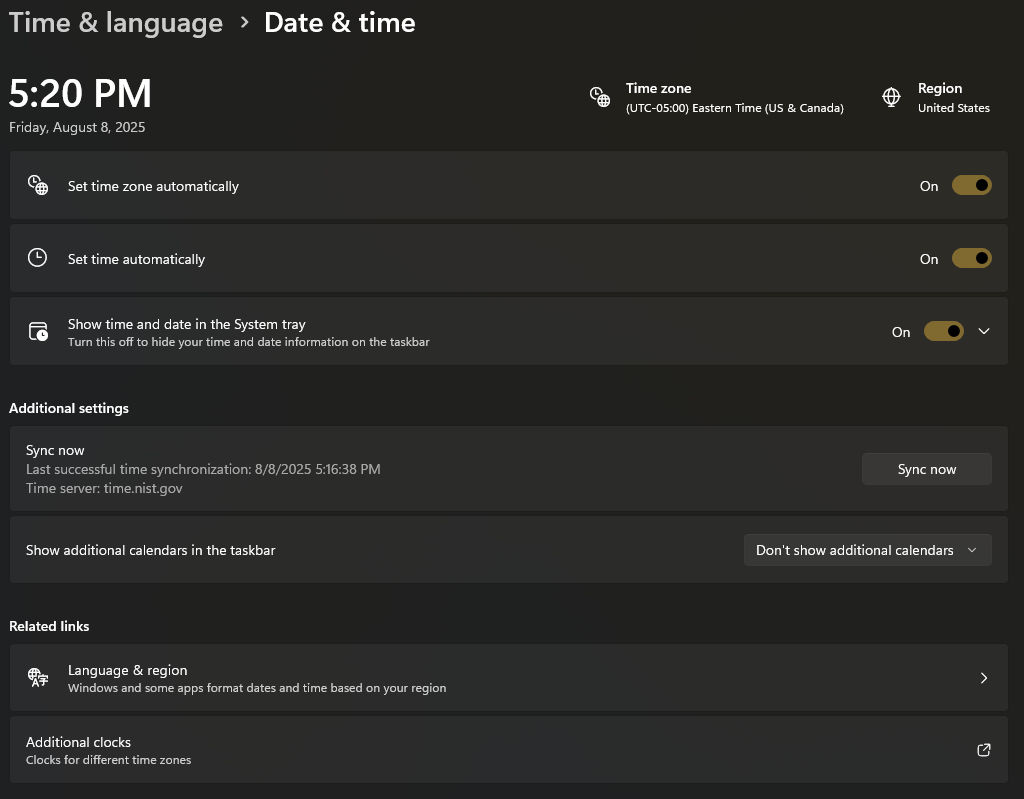
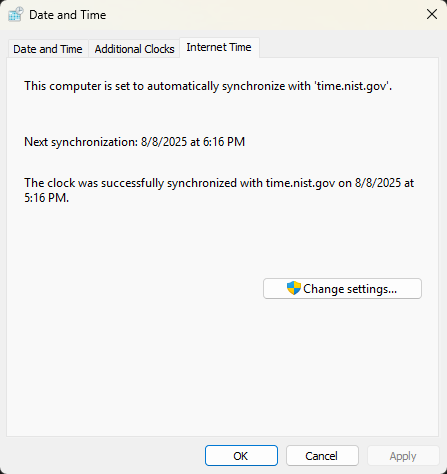
Time sync.
Search for “Date & time settings” in the Start menu and click on the first result. Click on “Additional clocks” near the bottom.
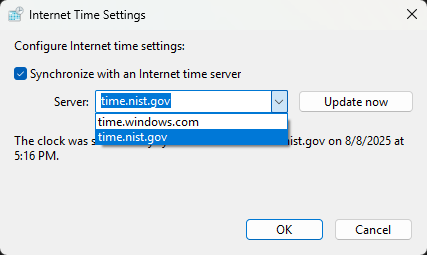
Click on the Internet Time tab in the new window. Then click on the “Change settings” button.
Set your time server to the NIST version and click OK. This is the official source of time from the United States government.
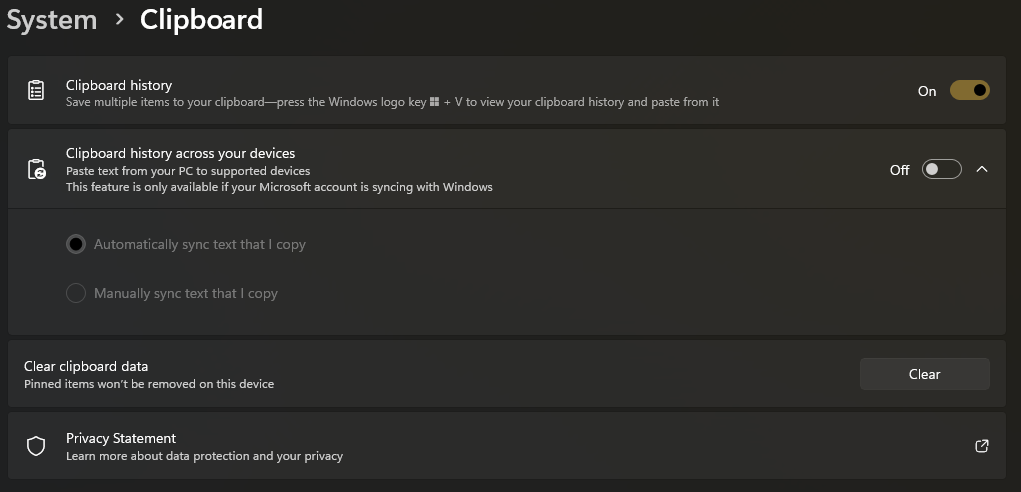
Clipboard history.
Search for “Clipboard settings” in the Start menu and click on the first result. Toggle on the “Clipboard history” setting. This will allow you to press Windows+V and paste from your clipboard history. You will still be able to use Ctrl+V to paste the most recently copied item.
Miscellaneous.
Of course, make sure you uninstall any unnecessary programs that were automatically installed with Windows. Make sure you also look at your startup apps and disable anything that you don’t want running when you boot up your device.